Homemade Baby Food Recipes

A happy baby enjoying homemade baby food with a fresh puree and finger food, promoting healthy eating habits.

Introduction

Nothing beats the goodness of homemade baby food when it comes to feeding your baby. It’s fresh, free from preservatives, and customizable to your baby’s needs. Plus, making your own baby food is way easier than you think! With a few simple ingredients and a little prep time, you can whip up nutritious meals that your baby will gobble up in no time.

We’ll explore the benefits of homemade baby food, essential tools, easy recipes, and tips to make the process seamless. Whether you are a first-time parent or looking for new ideas, these homemade baby food recipes will set you up for success!

Essential Tools for Making Baby Food

Before diving into recipes, let’s talk about the tools you’ll need:

  • Blender or food processor: To puree foods into smooth textures.
  • Steamer or saucepan: To cook fruits and veggies until soft.
  • Ice cube trays or baby food storage containers: For freezing portions.
  • Silicone spatula: Scrape every bit of goodness from the blender.
  • Fine mesh strainer: To remove any unwanted lumps for younger babies.

Age-Appropriate Homemade Baby Food Recipes

4–6 Months: Single-Ingredient Purees

At this stage, your baby is just starting solids, so smooth purees are the way to go.

1. Creamy Sweet Potato Puree

Ingredients:

  • 1 sweet potato
  • Water or breast milk

Instructions:

  1. Peel and chop the sweet potato into small chunks.
  2. Steam or boil until soft (about 10–15 minutes).
  3. Blend with a bit of water or breast milk until smooth.
  4. Serve fresh or store in the fridge for up to 3 days.

2. Apple Delight Puree

Ingredients:

  • 1 apple (peeled and cored)
  • Water

Instructions:

  1. Steam or simmer the apple until soft.
  2. Blend until smooth, adding water if needed.
  3. Serve immediately or store in portions.
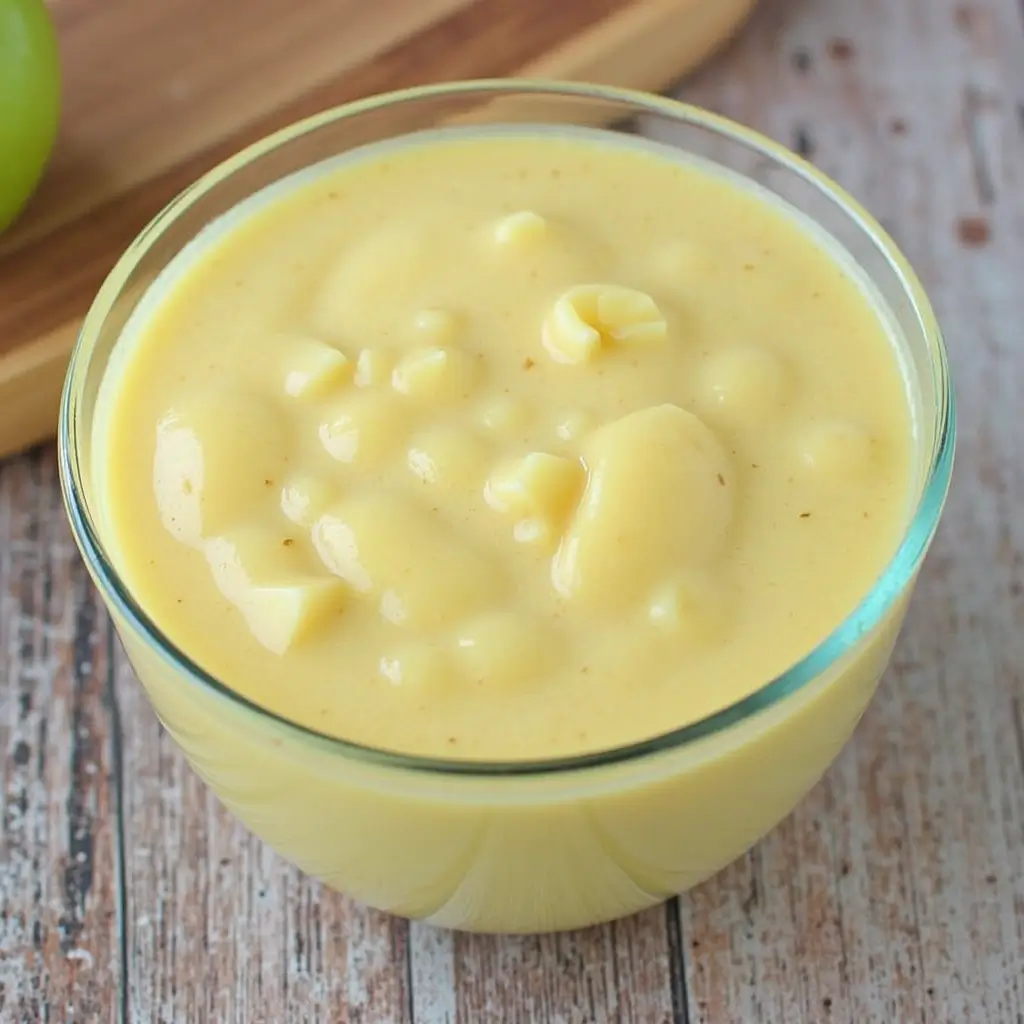
A creamy apple delight puree in a glass bowl, perfect for babies starting on solid foods.
🍏✨ Wholesome & Delicious! This Apple Delight Puree is a smooth, naturally sweet treat packed with essential nutrients for your baby’s healthy growth.

6–9 Months: Combination Purees

Now, it’s time to introduce some new flavors and textures!

3. Banana Avocado Mash

Ingredients:

  • 1 ripe banana
  • ½ avocado

Instructions:

  1. Mash the banana and avocado together until smooth.
  2. Serve fresh – no need to cook!

4. Carrot and Pea Puree

Ingredients:

  • 1 carrot (peeled and chopped)
  • ½ cup peas
  • Water or breast milk

Instructions:

  1. Steam the carrot and peas until soft.
  2. Blend with a bit of liquid for desired consistency.
  3. Store in the fridge for up to 3 days.
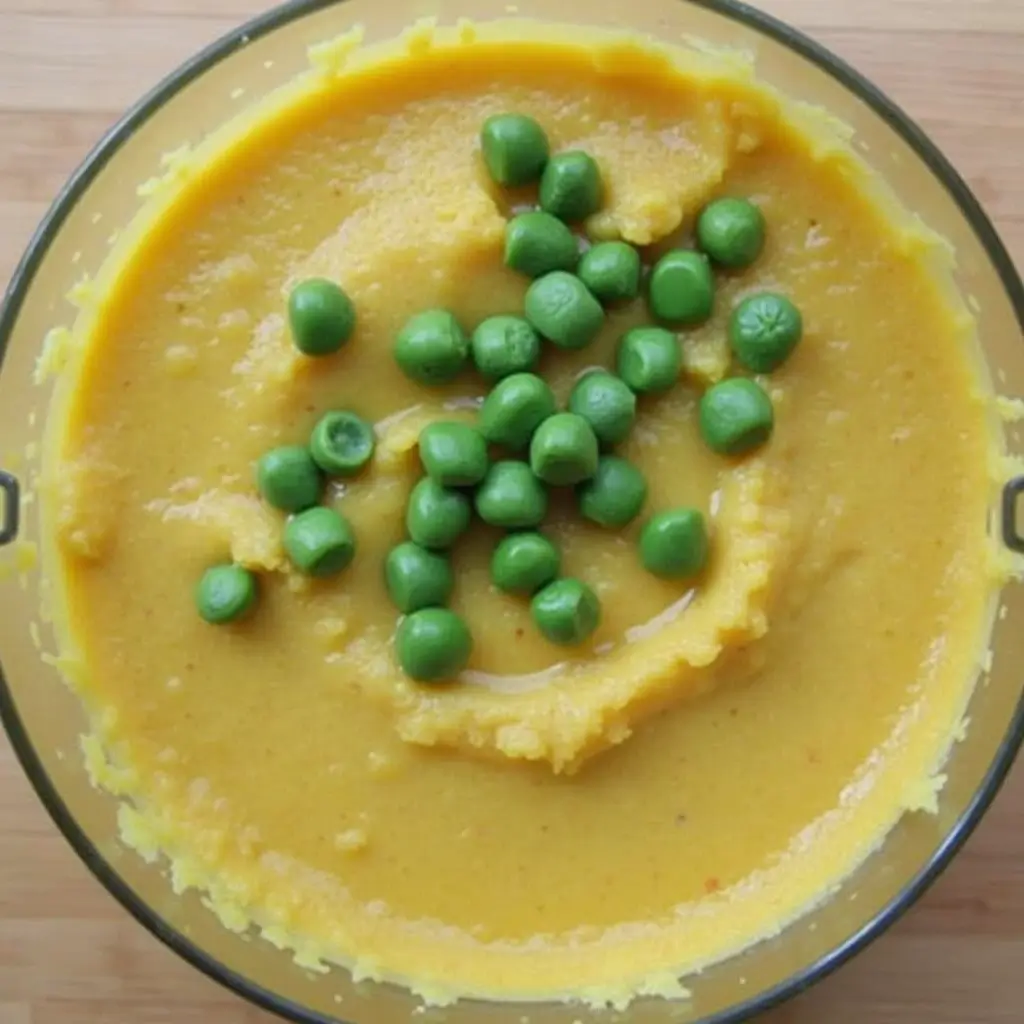
A smooth carrot and pea puree topped with whole green peas, perfect for a nutritious baby meal.
🥕🌱 Wholesome & Colorful! This Carrot and Pea Puree is packed with vitamins and nutrients to support your baby’s growth and development.

9–12 Months: Soft Finger Foods

Babies at this age can handle chunkier textures and small finger foods.

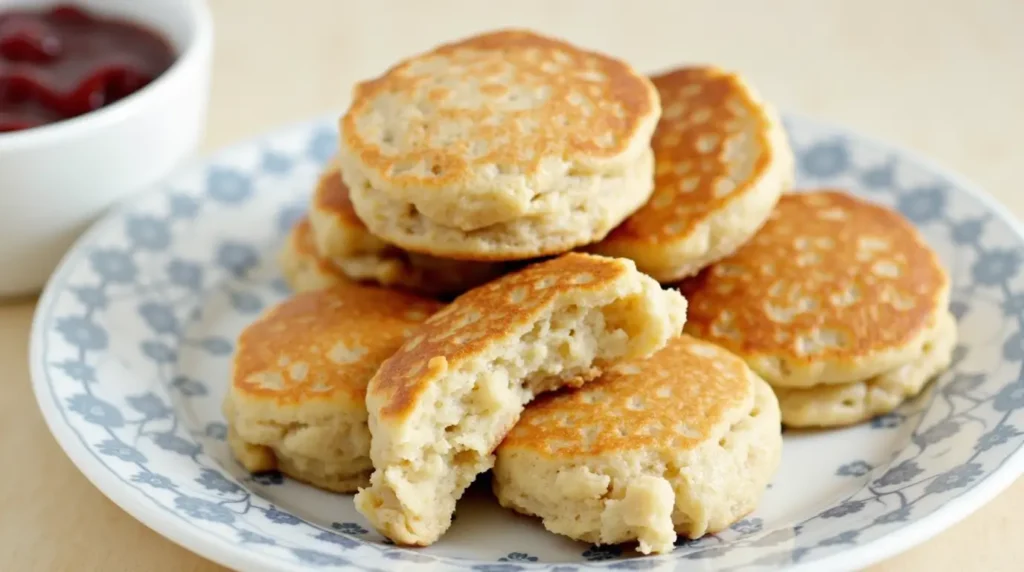
5. Mini Oat Pancakes

Ingredients:

  • ½ cup rolled oats
  • 1 ripe banana
  • 1 egg

Instructions:

  1. Blend the ingredients into a batter.
  2. Cook small pancakes on a non-stick pan until golden brown.
  3. Let them cool before serving.

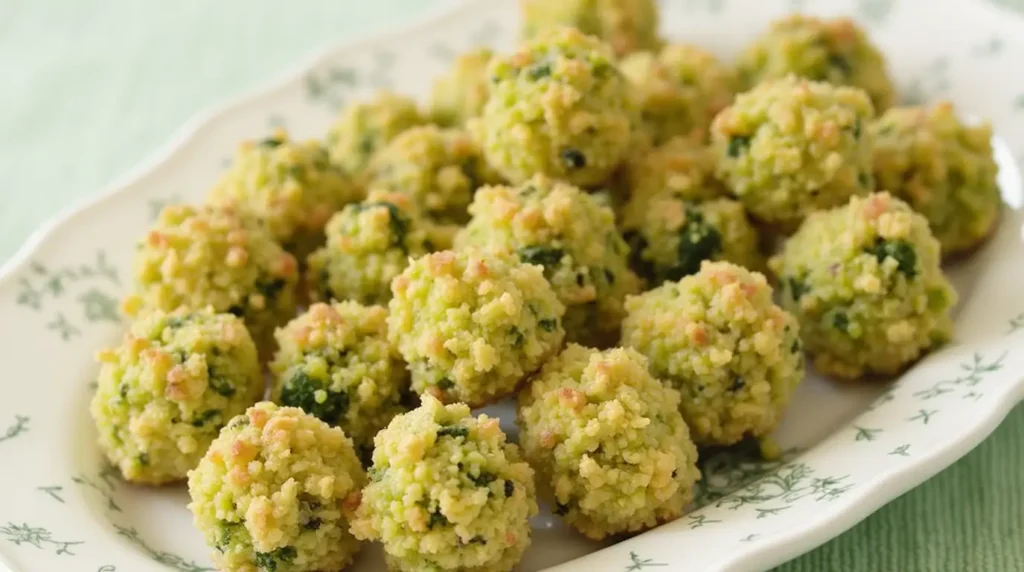
6. Cheesy Broccoli Bites

Ingredients:

  • ½ cup steamed broccoli (chopped)
  • ÂĽ cup shredded cheese
  • 1 egg
  • ÂĽ cup breadcrumbs

Instructions:

  1. Mix all ingredients and form small patties.
  2. Bake at 375°F (190°C) for 10-12 minutes.
  3. Serve warm.
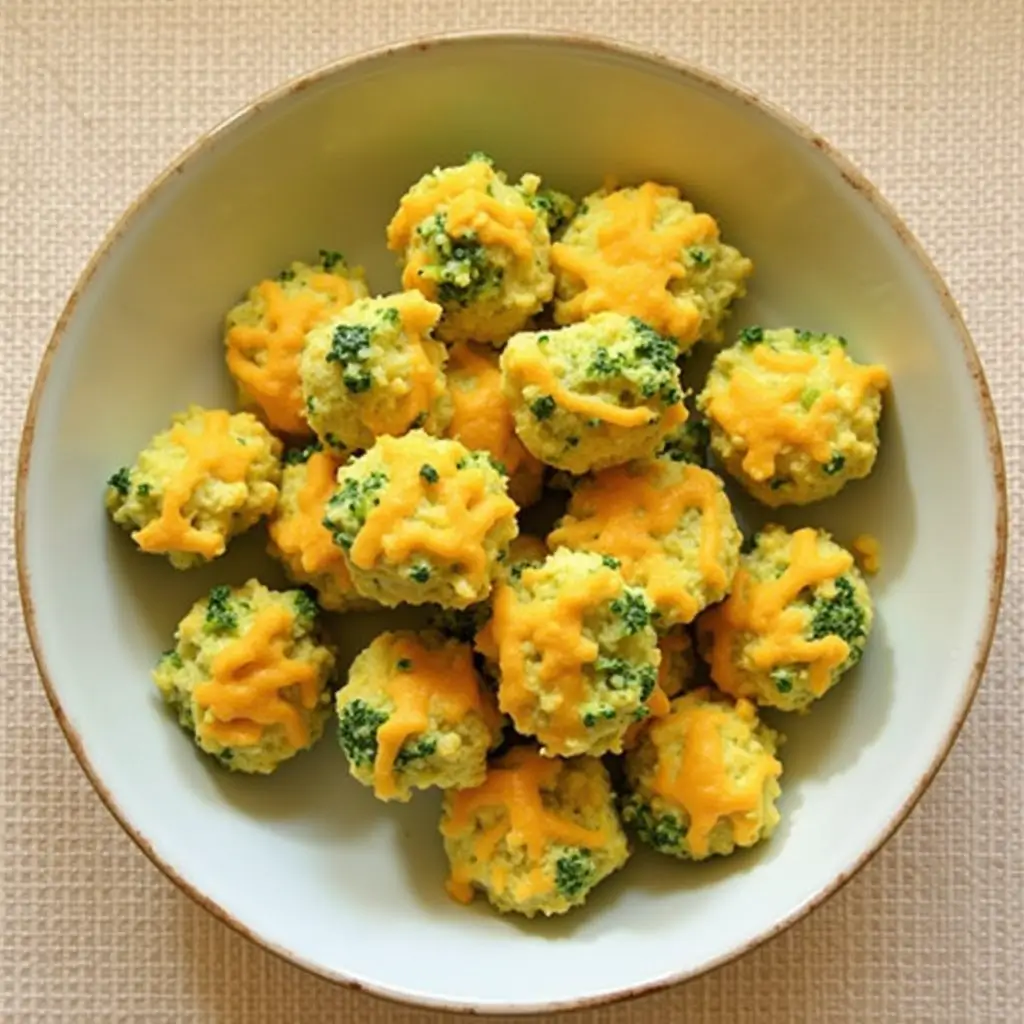
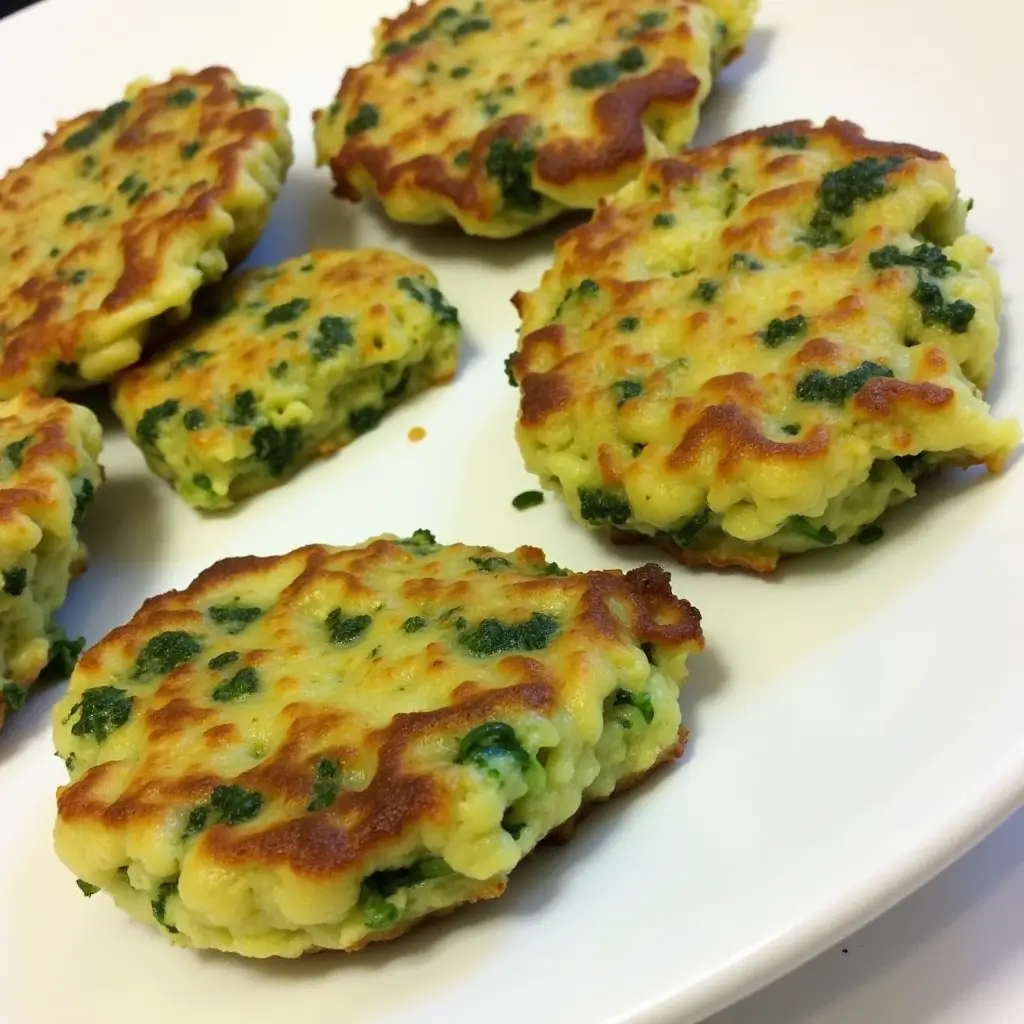
A plate of homemade cheesy broccoli bites, a healthy and tasty finger food for babies and toddlers.
🧀🥦 Cheesy Broccoli Bites – A Fun & Nutritious Finger Food! These soft, cheesy broccoli bites are packed with protein and essential vitamins, making them perfect for little hands to grab and enjoy.
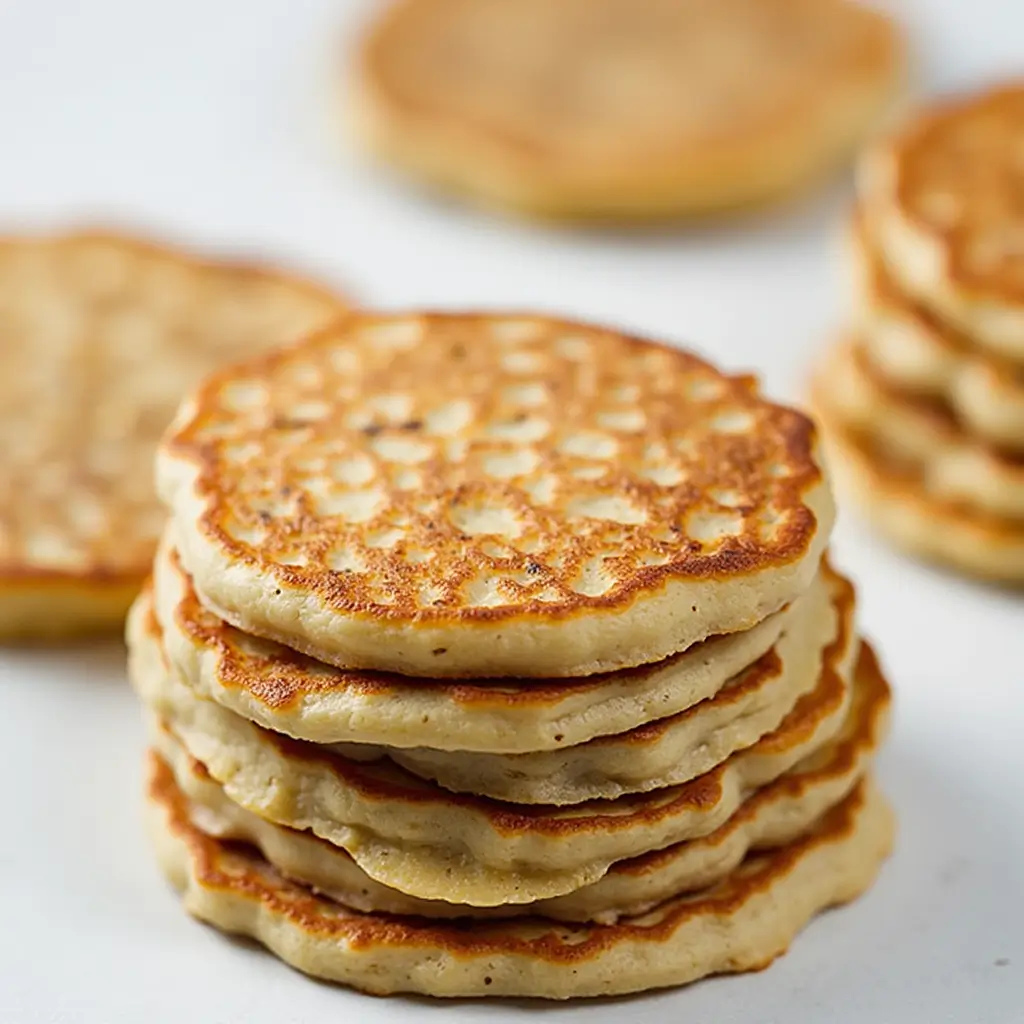
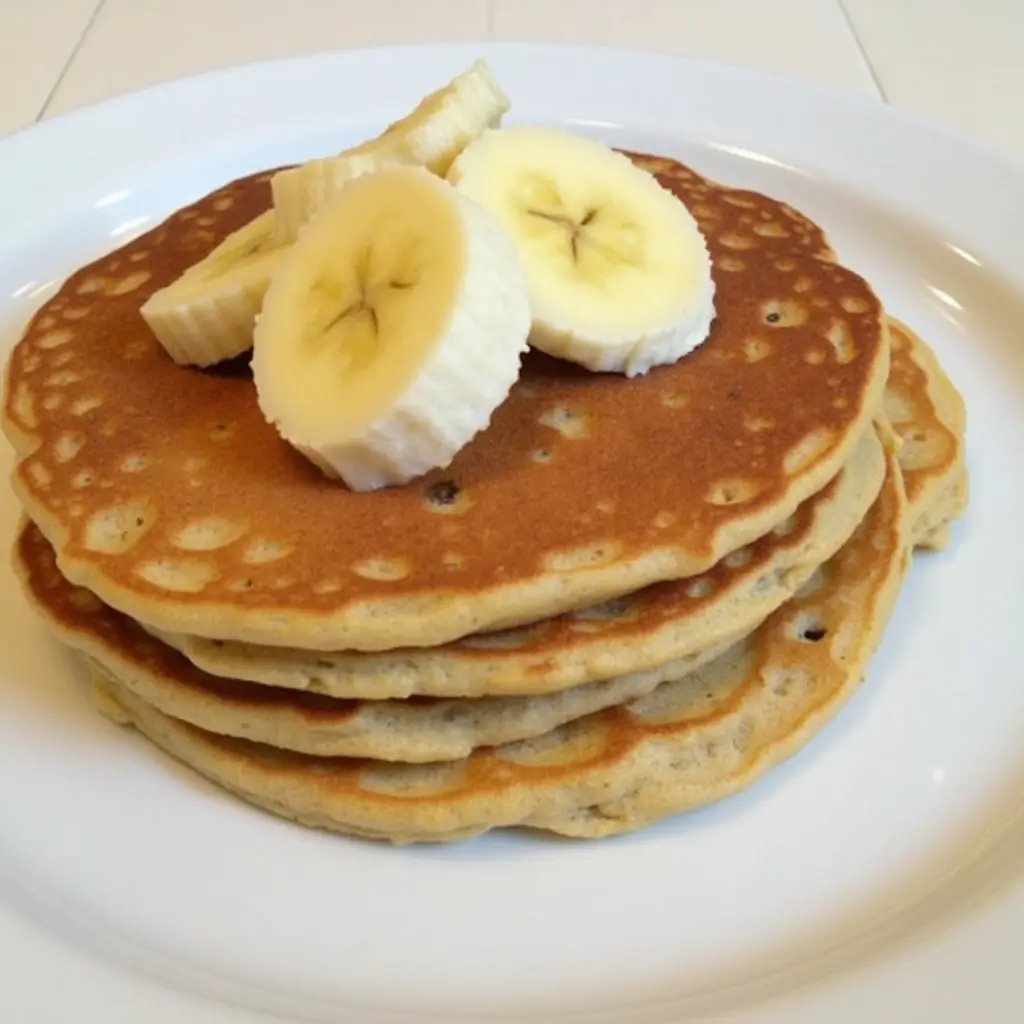
A stack of golden-brown mini oat pancakes, a healthy and easy baby-friendly breakfast option.
🥞 Mini Oat Pancakes – The Perfect Baby-Friendly Breakfast! These soft, nutritious pancakes are made with just three simple ingredients and are ideal for little hands to grasp and enjoy.

Storage and Meal Prep Tips

  • Freeze in small portions: Use ice cube trays to portion meals.
  • Label everything: Write the date and ingredients to keep track.
  • Use within 3 months: Frozen baby food stays fresh for up to 3 months.
  • Thaw properly: Place in the fridge overnight or warm gently before serving.

FAQs

1. How do I know when my baby is ready for solids?

Look for signs like sitting up with support, showing interest in food, and loss of the tongue-thrust reflex.

2. Can I use frozen fruits and vegetables?

Absolutely! Just make sure to steam or cook them before pureeing.

3. How do I introduce allergens?

Introduce common allergens (like peanut butter, eggs, or dairy) one at a time and watch for reactions.

4. Can I add spices or herbs?

Yes! Mild spices like cinnamon or basil can enhance flavors without adding salt or sugar.

Conclusion

Making homemade baby food doesn’t have to be complicated or time-consuming. With the right ingredients, a little prep, and a sprinkle of creativity, you can provide your little one with nutritious and delicious meals every day. Plus, the joy of watching your baby enjoy fresh, wholesome food is priceless!

So, roll up your sleeves, grab those fresh fruits and veggies, and start whipping up some homemade baby food recipes today!

Simple Homemade Baby Food Recipes

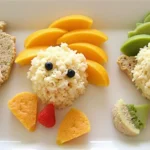
Fun and nutritious homemade baby food arranged as cute animal shapes using rice, whole wheat bread, fruit slices, and berries.

Introduction

Embarking on introducing solid foods to your baby is an exciting and pivotal milestone. As a parent, you naturally want to provide the best nutrition possible, and what better way than crafting wholesome, homemade baby food Recipes? Not only does this ensure your little one receives fresh and nutrient-rich meals, but it also allows you to introduce a variety of flavors and textures tailored to their developing palate. This guide explores simple and delicious recipes like Creamy Carrot and Apple Puree, Banana and Avocado Mash, and Lentil and Vegetable Stew, designed to nourish your baby and make mealtime a delightful experience.

Creamy Carrot and Apple Puree

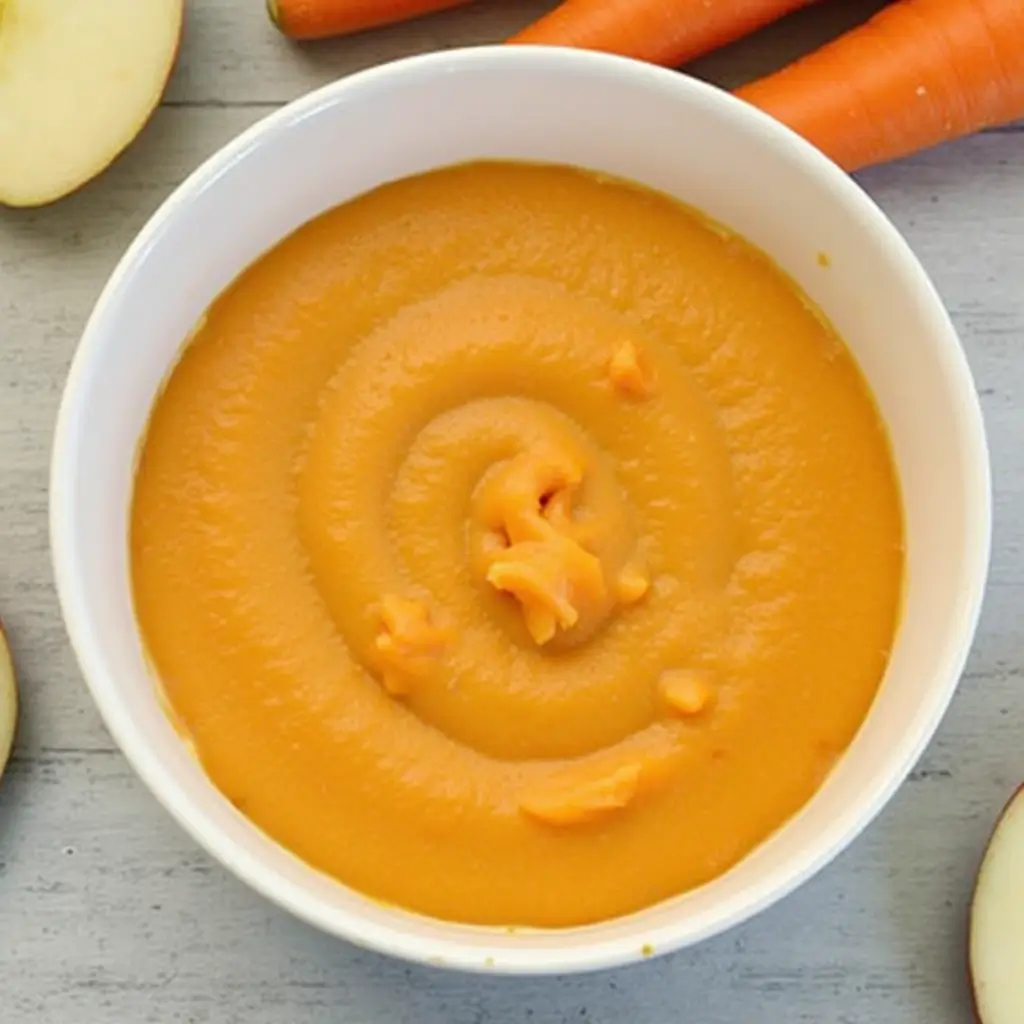
A smooth and nutritious carrot and apple puree in a white bowl, surrounded by fresh carrots and apple slices.

Ingredients:

  • 2 large carrots, peeled and chopped
  • 1 apple, peeled, cored, and chopped
  • Water or breast milk/formula for thinning

Instructions:

  1. Steam carrots and apple pieces until tender.
  2. Transfer to a blender, adding a bit of water or milk.
  3. Puree until smooth, adjusting consistency as needed.

Banana and Avocado Mash

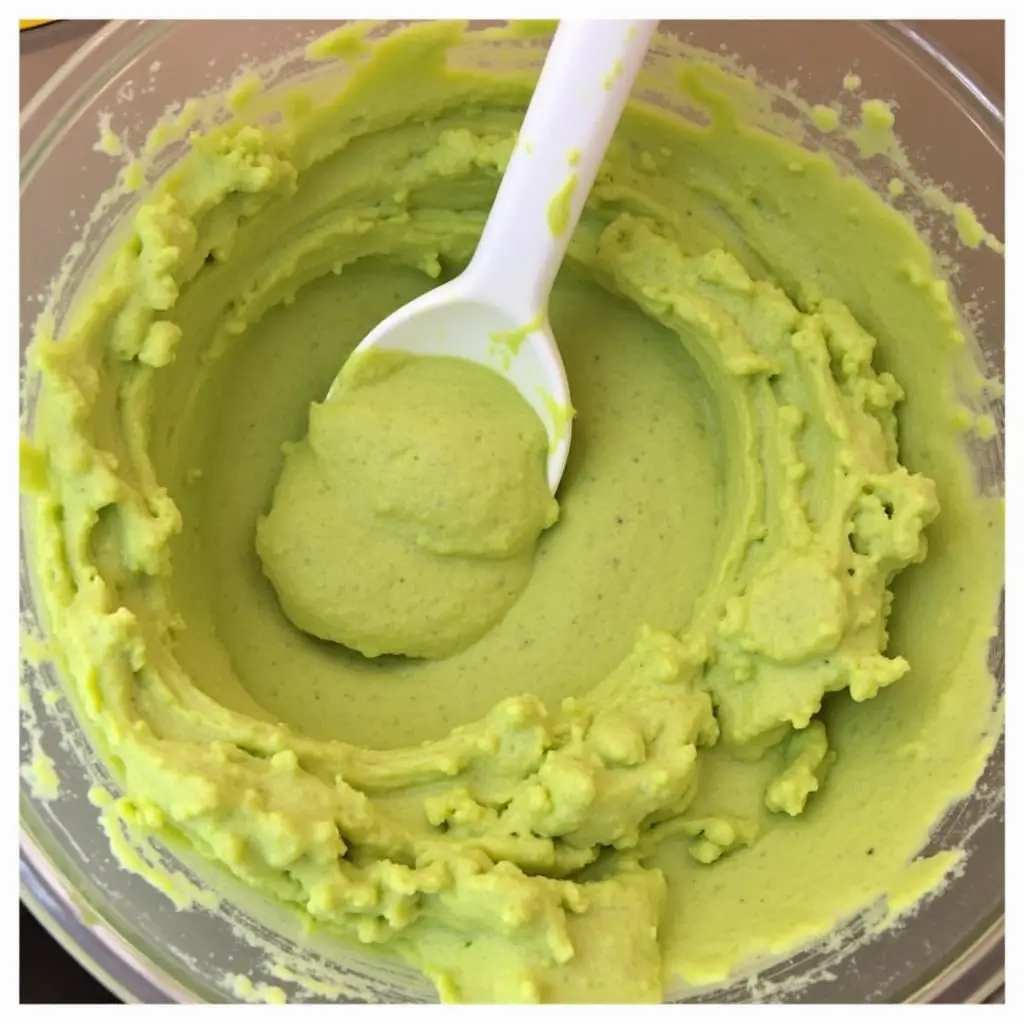
A creamy banana and avocado mash in a bowl with a spoon, featuring a smooth and nutrient-rich baby food texture.

Ingredients:

  • 1 ripe banana
  • 1 ripe avocado

Instructions:

  1. Peel and pit the avocado; scoop the flesh into a bowl.
  2. Add the peeled banana.
  3. Mash together until smooth. Serve immediately to prevent browning.

Lentil and Vegetable Stew

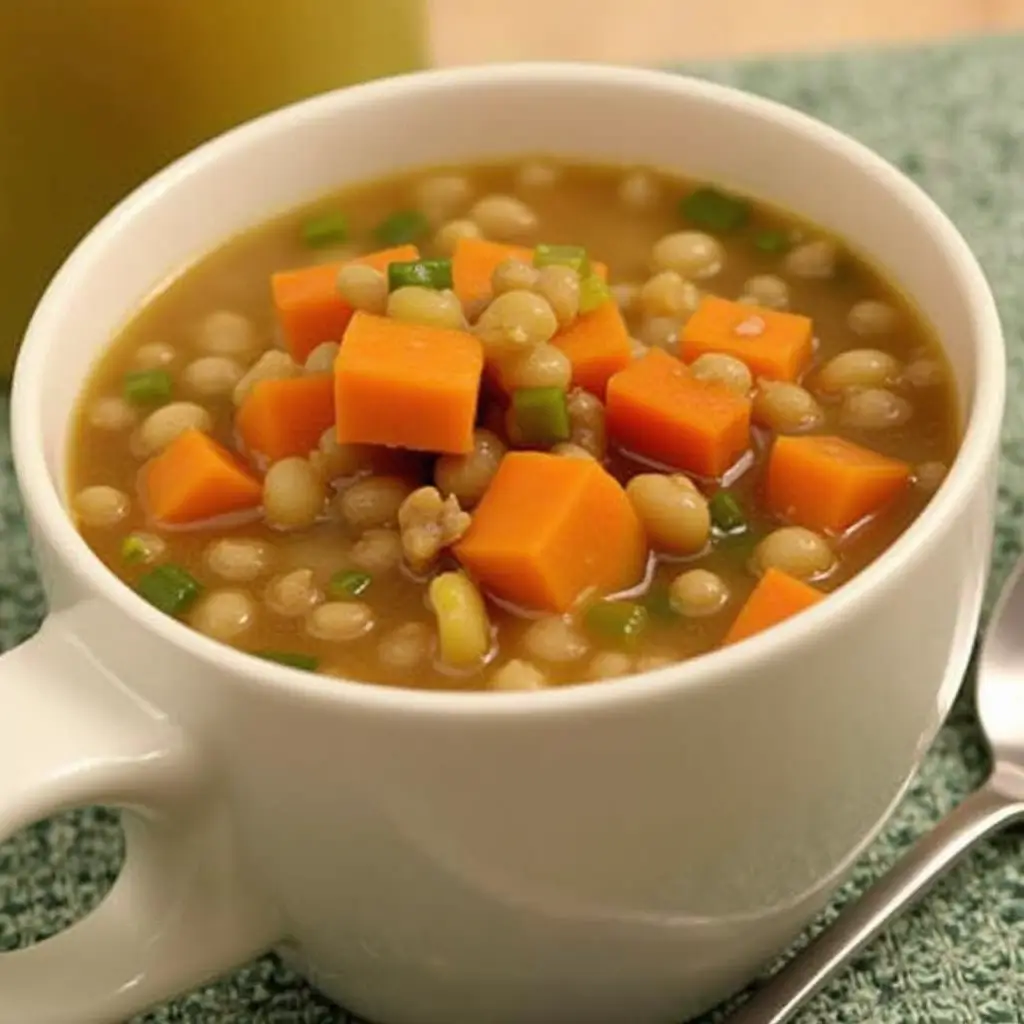
A hearty lentil and vegetable stew in a white cup, featuring diced carrots, lentils, and a flavorful broth.

Ingredients:

  • 1/2 cup red lentils, rinsed
  • 1 small carrot, peeled and diced
  • 1 small potato, peeled and diced
  • 2 cups low-sodium vegetable broth

Instructions:

  1. In a pot, combine all ingredients.
  2. Bring to a boil, then reduce heat and simmer until lentils and veggies are tender.
  3. Mash or blend to desired consistency.

Conclusion

Preparing homemade baby food is a rewarding endeavor that fosters healthy eating habits from the very start. Selecting fresh ingredients and crafting meals with love sets the foundation for your child’s lifelong relationship with food. The recipes shared, Creamy Carrot and Apple Puree, Banana and Avocado Mash, and Lentil and Vegetable Stew, are just the beginning. As you gain confidence, feel free to experiment with different combinations, always keeping your baby’s nutritional needs and taste preferences in mind. Here’s to joyful cooking and even more joyful eating!

FAQs

When should I start introducing solid foods to my baby?

It's generally recommended to begin introducing solids around 6 months of age. Signs that your baby is ready include the ability to sit up with minimal support, showing interest in food, and the loss of the tongue-thrust reflex that pushes food out of the mouth. Always consult with your pediatrician before starting solids to ensure your baby is developmentally ready.

How do I store homemade baby food, and how long does it last?

After preparing your baby's food, allow it to cool before transferring it to airtight containers. Refrigerate portions that will be used within 2-3 days. For longer storage, freeze the puree in ice cube trays; once frozen, transfer the cubes to freezer-safe bags, where they can be stored for up to 2-3 months. Always label containers with the date of preparation. When reheating, ensure the food is warmed evenly and test the temperature before serving to your baby.

Can I use frozen fruits and vegetables for making baby food?

Yes, frozen fruits and vegetables can be a convenient and nutritious option for homemade baby food. They are typically frozen at peak ripeness, preserving their nutritional value. Ensure they are cooked thoroughly before pureeing, and avoid any frozen produce that contains added sugars, salts, or sauces.

How do I know if my baby is allergic to a new food?

When introducing a new food, offer it alone and wait for 3-5 days before adding another new item. This allows you to monitor for any adverse reactions, which may include symptoms like rash, swelling, vomiting, diarrhea, or respiratory issues. If you notice any of these signs, discontinue the food immediately and consult your pediatrician.

Is it necessary to add salt or sugar to my baby's food for flavor?

It's best to avoid adding salt or sugar to your baby's food. Babies have sensitive palates, and introducing them to the natural flavors of foods helps develop healthy eating habits. Additionally, excessive salt and sugar can be harmful to your baby's health. Instead, focus on using fresh, high-quality ingredients to enhance flavor naturally.

Homemade Baby Food

A happy baby enjoying a nutritious homemade meal with fresh fruit and juice in a kitchen setting.

Introduction

Embarking on the journey of introducing solid foods to your baby is both exciting and a tad overwhelming. With countless options lining supermarket shelves, it’s easy to grab a jar and call it a day. But have you ever considered whipping up your own homemade baby food? Not only does it offer peace of mind knowing exactly what’s going into your baby’s tummy, but it also allows for a burst of creativity in the kitchen. Let’s dive into the world of homemade baby food and explore how you can serve up nutritious, delectable meals for your little munchkin.

Why Choose Homemade Baby Food?

Nutritional Benefits

You’re in the driver’s seat when you prepare baby food at home. You select fresh, wholesome ingredients, ensuring your baby gets the best nutrients without unnecessary additives or preservatives. Plus, you can tailor meals to suit your baby’s specific needs and preferences.

Cost-Effective

Store-bought baby food can take a toll on your wallet. You can save a pretty penny by purchasing fresh produce in bulk and preparing it yourself. Moreover, homemade baby food allows you to utilize seasonal fruits and veggies, which are often more affordable and flavorful.

Environmental Impact

Think about all those tiny jars and plastic containers. By making baby food at home, you reduce waste and your carbon footprint. It’s a small step towards a greener planet and every bit counts!

Getting Started: The Basics

Essential Tools

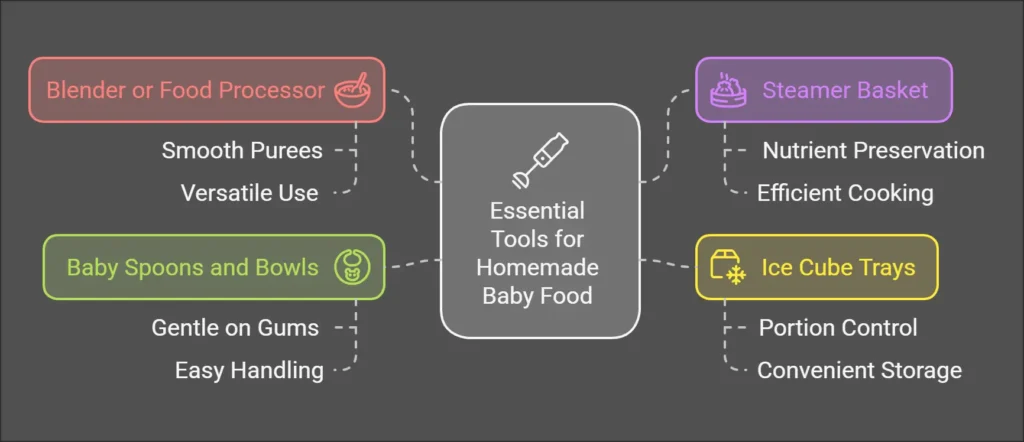
You don’t need a state-of-the-art kitchen to whip up baby food. Here’s a simple list to get you started:

  • Blender or Food Processor: For pureeing foods to the desired consistency.
  • Steamer Basket: Retains nutrients while cooking fruits and vegetables.
  • Ice Cube Trays: Perfect for portioning and freezing small servings.
  • Storage Containers: BPA-free containers to store and transport meals.

Choosing Ingredients

Opt for organic produce when possible to minimize exposure to pesticides. Fresh, in-season fruits and vegetables taste better and offer superior nutrition. Remember, variety is the spice of life! Introducing a range of foods ensures your baby receives a balanced diet and helps develop their palate.

A smiling woman in a modern kitchen using a food processor to prepare fresh baby food with healthy ingredients.

Age-Appropriate Foods

At this stage, it’s all about introducing simple, single-ingredient purees. Here are some baby-friendly options for Homemade Baby Food:

  • Rice Cereal: A classic first food, easy to digest and iron-fortified.
  • Mashed Avocado: Creamy texture and packed with healthy fats.
  • Pureed Sweet Potatoes: Naturally sweet and rich in beta-carotene.
  • Banana Mash: Soft, sweet, and gentle on the tummy.
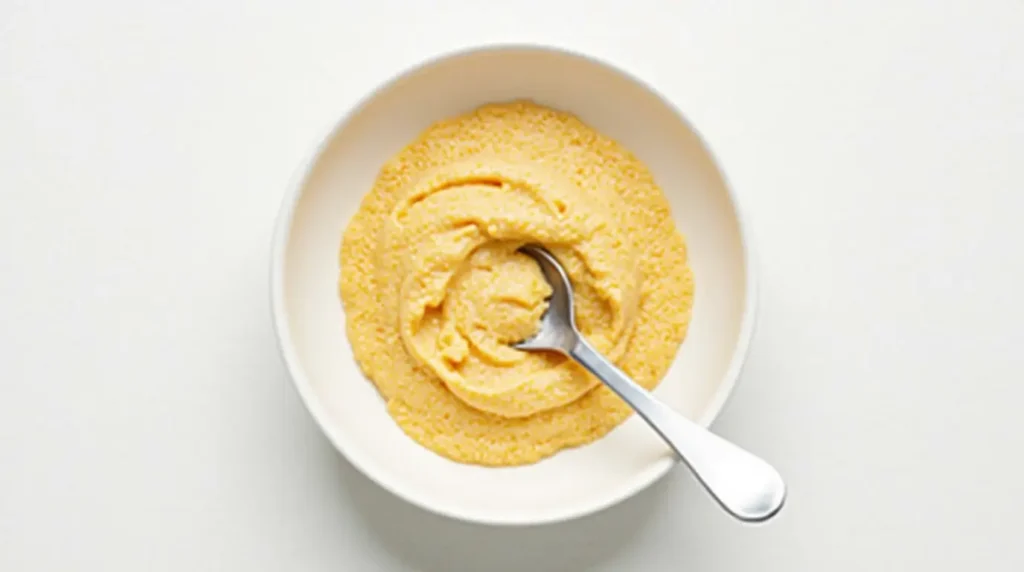
A bowl of smooth rice cereal puree with a spoon, ideal as a first food for babies aged 4-6 months.
🍼 Gentle & Nutritious! Rice cereal is a classic first food that’s easy to digest and packed with iron for growing babies.

As your baby grows, so does their culinary curiosity. Introduce more variety with these options:

  • Pureed Peas: A mild flavor and a good source of vitamins.
  • Mashed Carrots: Slightly sweet and loaded with vitamin A.
  • Apple Sauce: Stewed and pureed apples without added sugar.
  • Butternut Squash Puree: Smooth texture and a hint of sweetness.
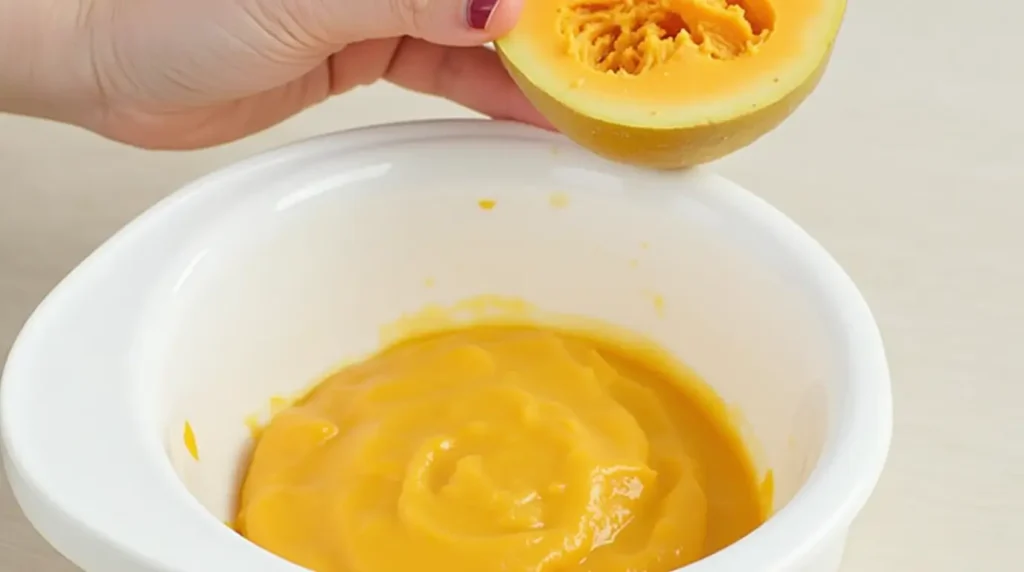
A bowl of smooth butternut squash puree with a halved squash in hand, ideal for babies aged 6-8 months.
🥄 Creamy & Naturally Sweet! Butternut squash puree is the perfect nutrient-packed introduction to solid foods for growing babies.

It’s time to add a bit of texture to those purees. Think mashed foods and small, soft chunks:

  • Mashed Lentils: Protein-packed and easy to digest.
  • Soft Scrambled Eggs: Ensure they’re fully cooked; a great source of protein.
  • Mashed Berries: Blueberries or strawberries are mashed for a burst of flavor.
  • Cooked Pasta: Small pieces of soft pasta, perfect for tiny hands.

10-12 Months: Mini Meals

Your little one is gearing up to eat what the family’s eating. Here are some ideas:

  • Shredded Chicken: Soft pieces mixed with veggies.
  • Steamed Broccoli Florets: Easy to hold and packed with nutrients.
  • Cheese Cubes: Mild cheeses cut into small pieces.
  • Whole Grain Toast: Small, soft pieces, perhaps topped with a thin layer of nut butter.
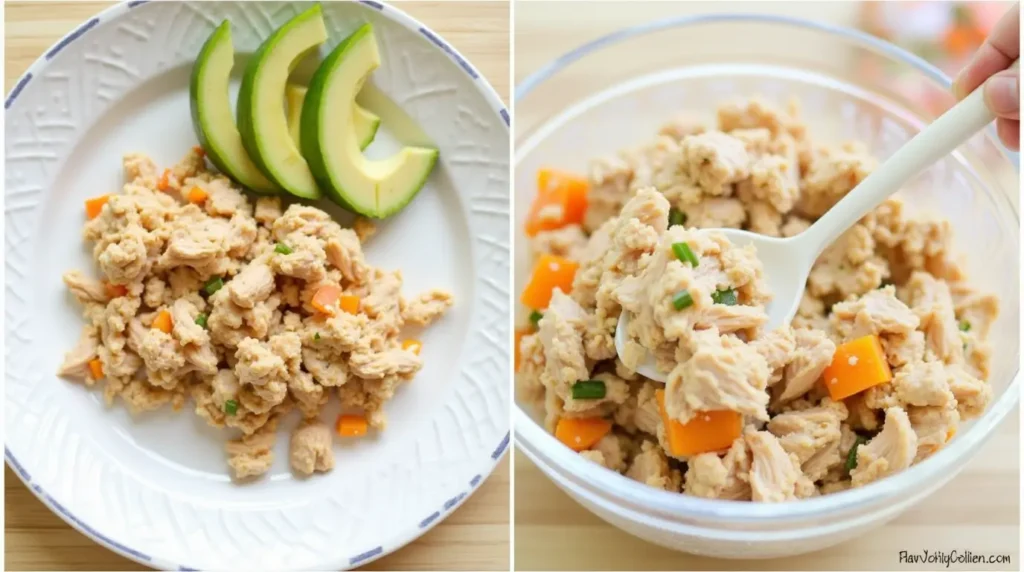
A plate of shredded chicken mixed with soft-cooked vegetables, served with avocado slices, perfect for babies aged 10-12 months.

Tips for Success

  • Introduce One Food at a Time: Wait 3–5 days before introducing another to monitor for allergies.
  • Mind the Texture: Start with smooth purees and gradually introduce more texture as your baby grows.
  • Stay Hygienic: Always wash your hands, utensils, and produce thoroughly.
  • Avoid Added Salt and Sugar: Let the natural flavors shine through.

FAQs

How long can I store homemade baby food?

Refrigerate for up to 3 days or freeze for up to 3 months. Always use airtight containers and label them with dates.

Can I use frozen fruits and vegetables?

Absolutely! Frozen produce can be just as nutritious as fresh. Ensure they're cooked thoroughly before pureeing.

When can I introduce allergens like peanuts or eggs?

Recent guidelines suggest introducing common allergens between 4-6 months. However, consult with your pediatrician for personalized advice.

How do I reheat frozen baby food?

Thaw in the refrigerator overnight and warm using a bowl of hot water or a baby food warmer. Always test the temperature before serving.

Conclusion

Diving into the world of homemade baby food is a rewarding endeavor that benefits you and your little one. It fosters healthy eating habits, ensures optimal nutrition, and can be a fun culinary adventure. So, tie on that apron, fire up the blender, and create delicious, wholesome meals tailored just for your baby. Happy cooking!

Best First Foods for Babies Recipes

A happy baby exploring new flavors while starting solid foods, making mealtime fun and nutritious.

Introduction

Embarking on the journey of introducing solid foods to your little one is exciting and a tad overwhelming. With countless options and opinions, it’s easy to feel lost in the baby food aisle. But fear not! We’re here to guide you through this article about Best First Foods for Babies Recipes, with scrumptious and simple recipes that will tickle your baby’s taste buds and set the stage for a lifetime of healthy eating habits.

Before diving into the kitchen, knowing when your baby is ready to start solids is crucial. Most pediatricians recommend beginning around six months of age. Look for these telltale signs:

  • Sitting up with minimal support: Your baby should have good head and neck control.
  • Showing interest in your meals: If they’re eyeing your plate or reaching for your food, it’s a good indicator.
  • Loss of the tongue-thrust reflex: This reflex pushes food out of their mouth, so its absence means they’re ready to swallow solids.

Remember, every baby is unique. Consult your pediatrician to ensure your little one is primed for this new adventure.

Introducing a variety of flavors and textures early on can help your baby develop a diverse palate. Here are some top-notch recipes to get you started:

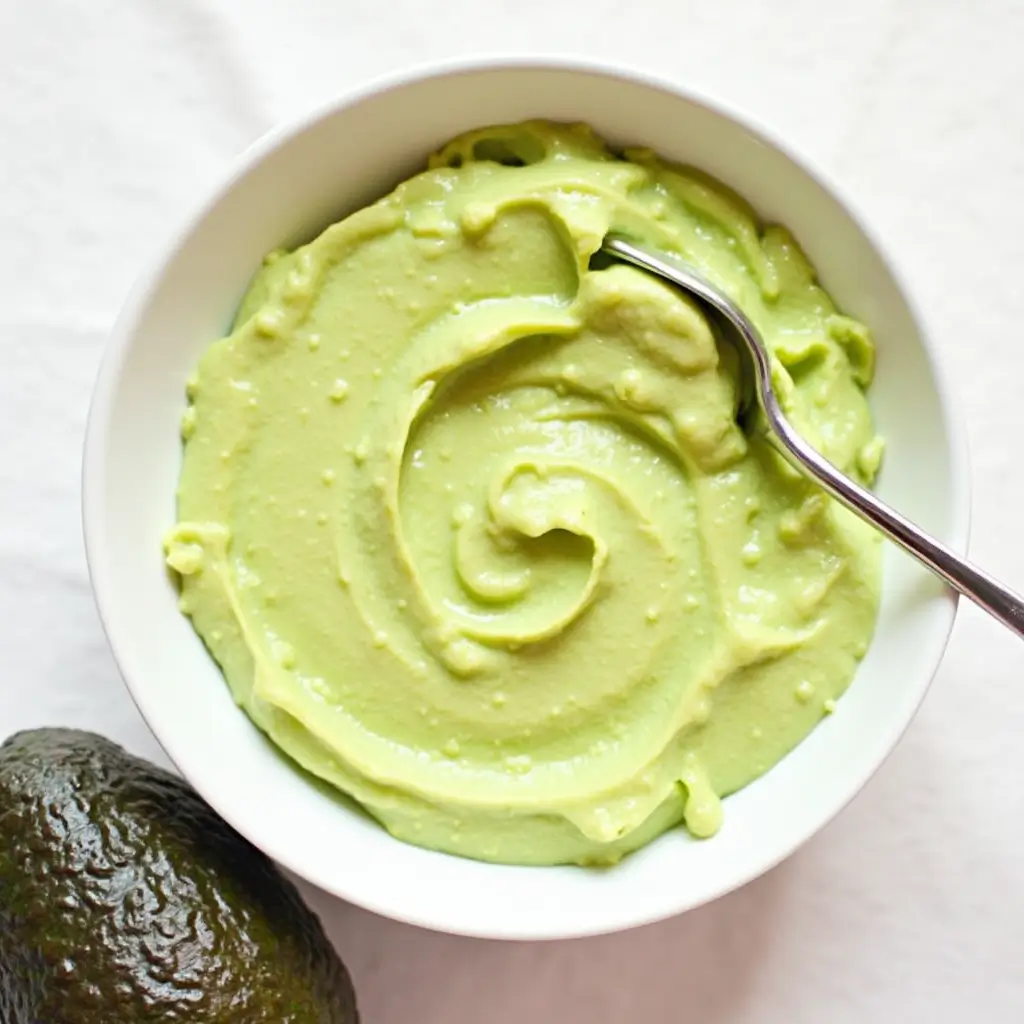
A bowl of creamy avocado mash with a spoon, perfect for a baby's first food.

Avocado is a nutrient-dense fruit, packed with healthy fats essential for brain development.

Ingredients:

  • 1 ripe avocado

Instructions:

  1. Slice the avocado in half, remove the pit, and scoop the flesh into a bowl.
  2. Mash thoroughly with a fork until smooth.
  3. For a thinner consistency, add a teaspoon of breast milk or formula.

Tip: Avocado browns quickly. Prepare just before serving to keep it fresh and appetizing.

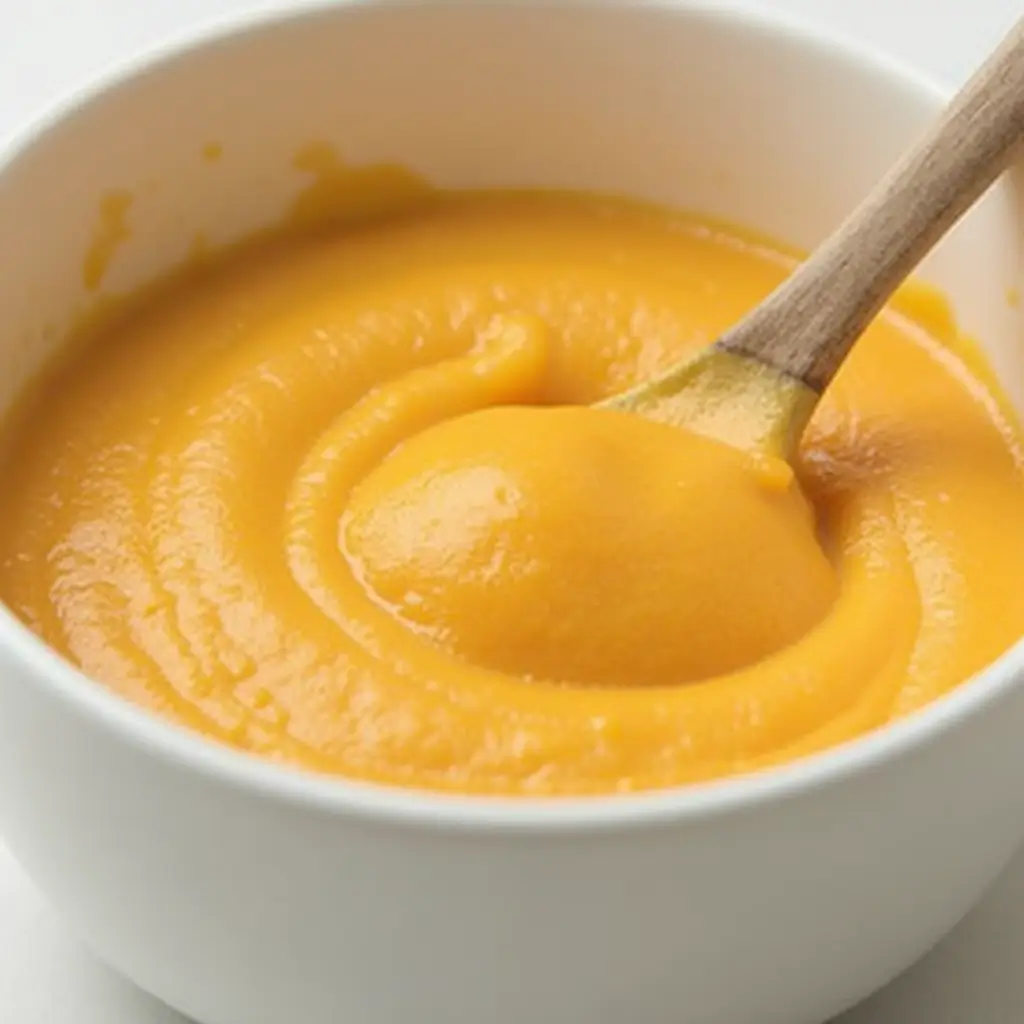
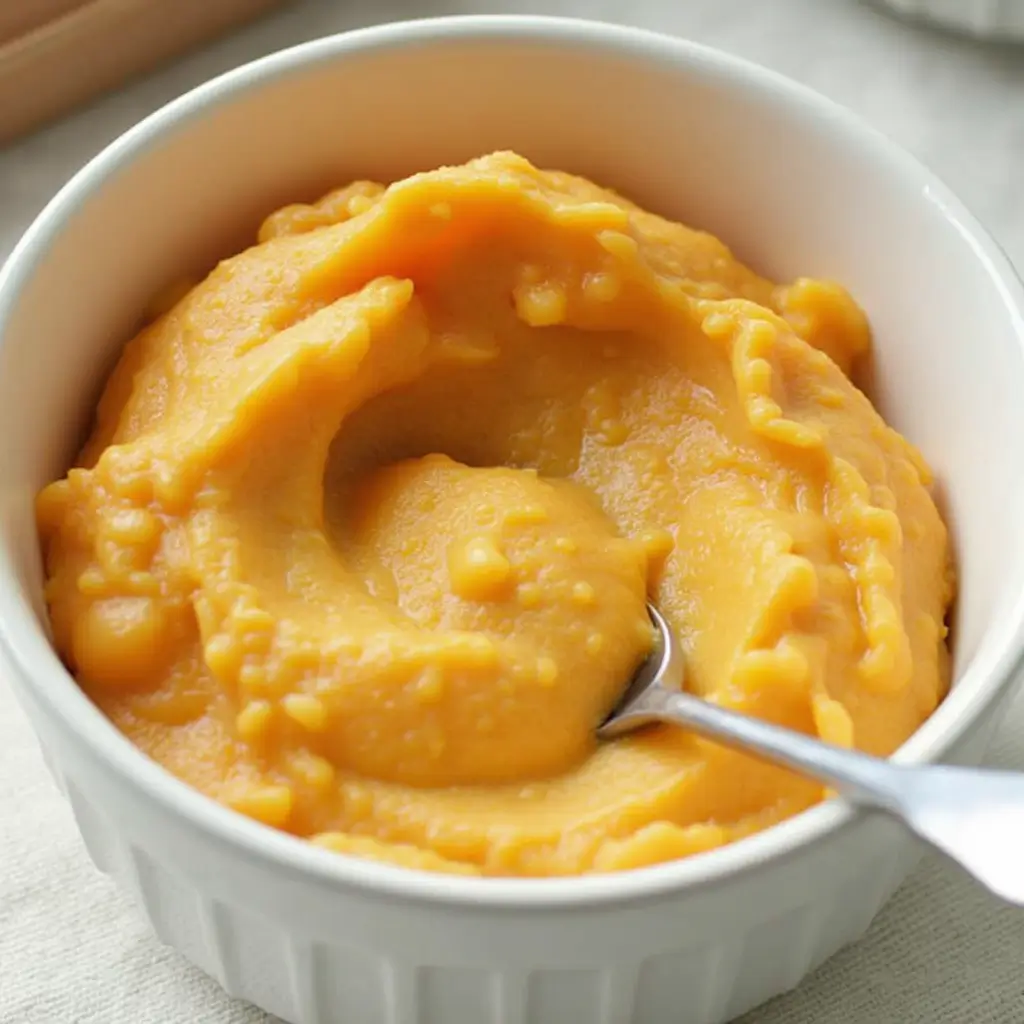
A bowl of silky smooth sweet potato purée with a wooden spoon, ideal for baby’s first solid food.

Sweet potatoes are a hit with babies due to their sweetness and smooth texture.

Ingredients:

  • 1 medium sweet potato

Instructions:

  1. Peel and dice the sweet potato into small cubes.
  2. Steam or boil until tender (about 15 minutes).
  3. Drain and transfer to a blender, puréeing until smooth.
  4. Adjust consistency with breast milk, formula, or water as needed.

Tip: Batch-cook and freeze portions in ice cube trays for convenient future meals.

3. Banana and Oatmeal Breakfast Delight

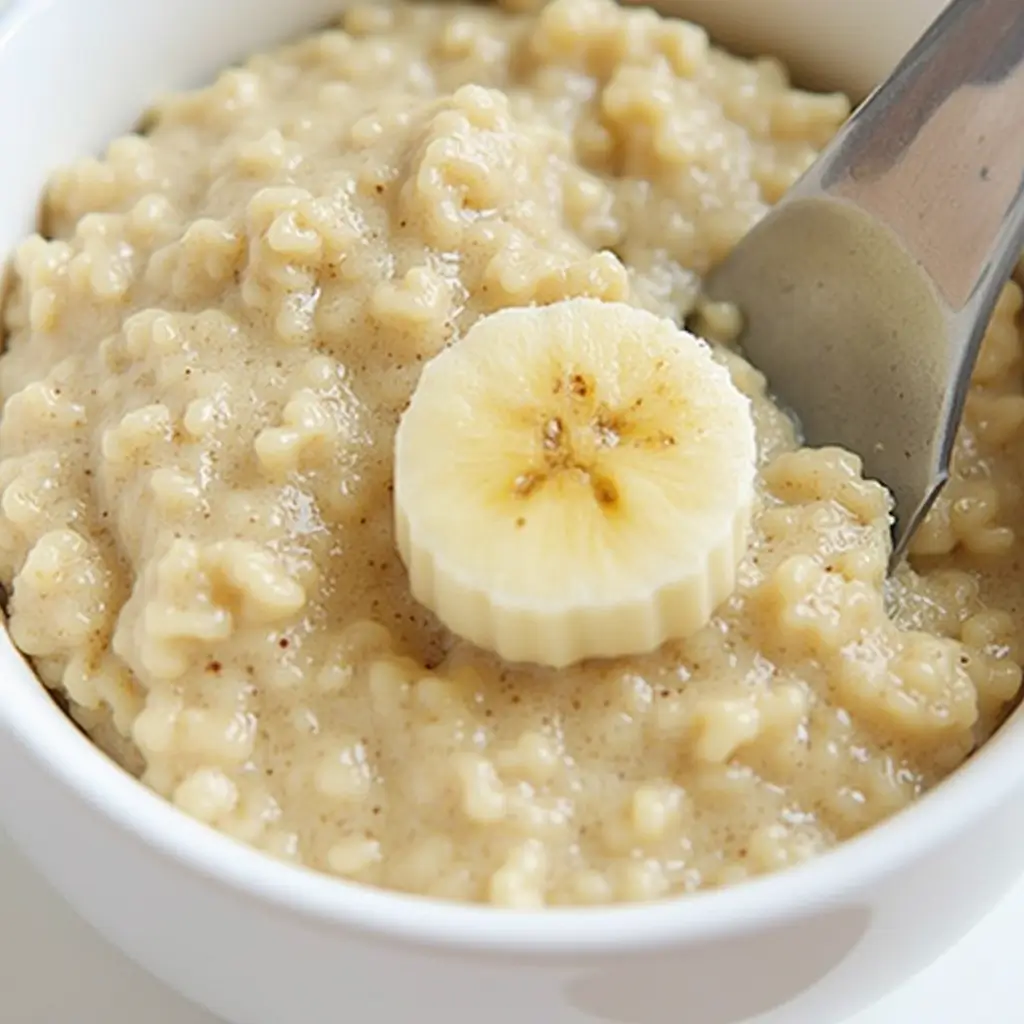
A bowl of creamy banana and oatmeal breakfast topped with a banana slice, a nutritious meal for babies.

This hearty combo provides essential nutrients and keeps your baby satisfied.

Ingredients:

  • 2 tablespoons of baby oatmeal cereal
  • 1/2 ripe banana
  • Breast milk or formula

Instructions:

  1. Prepare the oatmeal according to package instructions, using breast milk or formula.
  2. Mash the banana until smooth.
  3. Mix the banana into the prepared oatmeal, ensuring a uniform consistency.

Tip: For added flavor, sprinkle a pinch of cinnamon.

A creamy apple and carrot medley purée in a white bowl with a spoon, a nutritious baby food option.

This duo offers a delightful mix of sweetness and nutrition.

Ingredients:

  • 1 small apple
  • 1 medium carrot

Instructions:

  1. Peel, core, and dice the apple.
  2. Peel and slice the carrot into small pieces.
  3. Steam both together until soft (about 10–15 minutes).
  4. Blend until smooth, adding water to achieve desired consistency.

Tip: Introduce spices like nutmeg or ginger in tiny amounts to expand your baby’s palate.

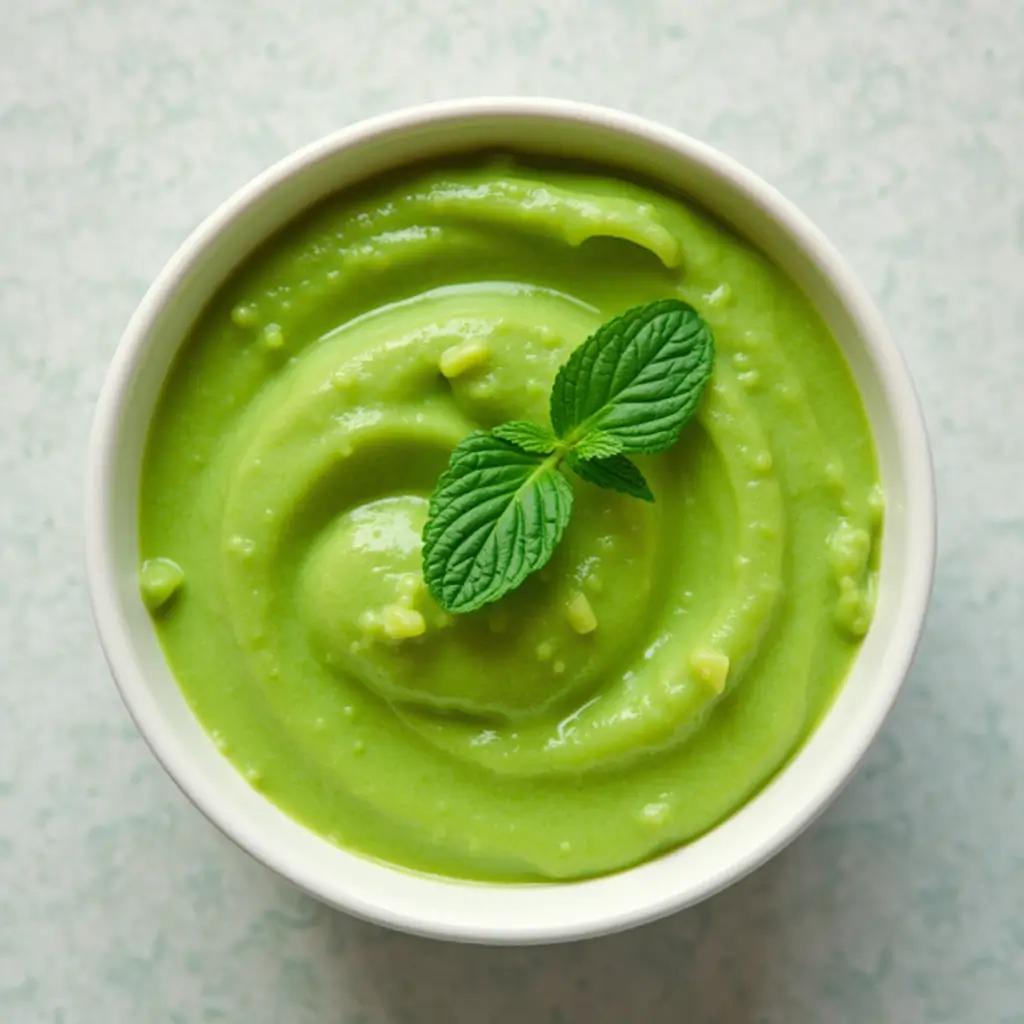
A vibrant green pea and mint purée in a white bowl, garnished with fresh mint leaves—nutritious and refreshing baby food.

A refreshing and vibrant dish that’s as tasty as it is nutritious.

Ingredients:

  • 1 cup fresh or frozen peas
  • A few fresh mint leaves

Instructions:

  1. Cook peas until tender (about 5 minutes).
  2. Add mint leaves during the last minute of cooking.
  3. Drain and blend until smooth, adding water if necessary.

Tip: This purée pairs well with mashed potatoes or rice as your baby grows.

Introducing Allergens Early

Recent studies suggest that introducing common allergens early may help prevent allergies. Consider these guidelines:

  • Peanuts: Mix a small amount of smooth peanut butter with breast milk or formula.
  • Eggs: Offer well-cooked scrambled eggs or a tiny piece of hard-boiled egg yolk.
  • Fish: Introduce mild-flavored, thoroughly cooked fish like cod or haddock.

Always introduce new allergens one at a time, waiting a few days before adding another, and monitor for any adverse reactions.

FAQs

How do I know if my baby is full?

Look for signs like turning their head away, closing their mouth, or becoming distracted. Trust your baby's cues.

Can I add salt or sugar to my baby's food?

It's best to avoid adding salt or sugar. Babies' kidneys are delicate, and they don't need added sugars.

How should I store homemade baby food?

Refrigerate in airtight containers for up to 3 days or freeze in ice cube trays for up to a month.

Conclusion

Embarking on the journey of introducing solid foods to your baby is a significant milestone filled with excitement and a touch of apprehension. You’re laying the foundation for a lifetime of healthy eating habits by offering various wholesome and delicious options. Remember to enjoy mealtime, be patient with new flavors, and cherish these tiny taste adventures together.

Key Takeaways:

  • Start at the Right Time: Introduce solids around six months, ensuring your baby shows readiness signs.
  • Prioritize Safety: Always supervise meals, offer appropriate food sizes, and avoid common choking hazards.
  • Embrace Variety: Expose your baby to diverse flavors and textures to cultivate a well-rounded palate.
  • Monitor for Allergies: Introduce potential allergens one at a time and observe for any reactions.
  • Maintain Nutrition: Continue breastfeeding or formula feeding alongside solids to meet nutritional needs.

By following these guidelines and tuning into your baby’s cues, you’re well on your way to nurturing a happy, healthy eater. Enjoy this special time and the delightful messes that come with it!

Best First Foods for Babies: A Guide for 6 to 9 Months

A happy baby in a white sweater, smiling with excitement, ready to explore new first foods.

Introduction

Welcoming your little one to the world of solid foods is a thrilling milestone! Between 6 and 9 months, babies are ready to explore new tastes and textures. But where to start? Let’s dive into Best First Foods for Babies: A Guide for 6 to 9 Months, and make this journey enjoyable for both of you.

Before introducing solids, ensure your baby:

  • Can sit up with minimal support.
  • Shows interest in your meals.
  • Has lost the tongue-thrust reflex (doesn’t push food out with their tongue).
  • Can grasp objects and bring them to their mouth.

If your baby ticks these boxes, it’s chow time!

Best First Foods for Babies: A Guide for 6 to 9 Months

Introducing various foods ensures your baby gets essential nutrients and develops a broad palate. Here’s a breakdown of suitable options:

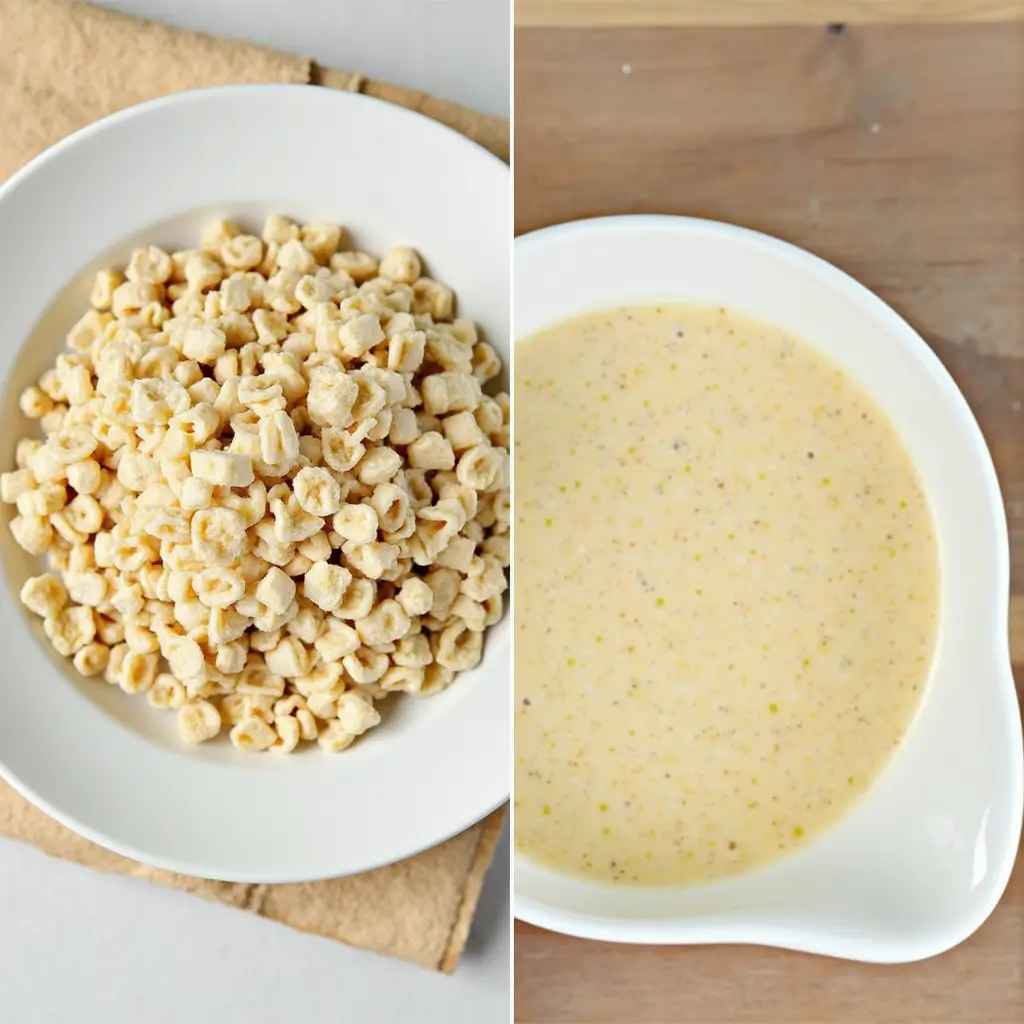
A side-by-side comparison of dry iron-fortified baby cereal and a smooth, creamy cereal mixed with breast milk or formula.

Iron is crucial for your baby’s development. Consider:

  • Pureed Meats: Chicken, turkey, or beef, well-cooked and blended until smooth.
  • Iron-Fortified Cereals: Single-grain cereals mixed with breast milk or formula.
  • Lentils and Beans: Cooked thoroughly and mashed.

Starting with iron-rich foods is recommended to replenish iron stores that begin to deplete around six months.

Introduce a rainbow of produce:

  • Vegetables: Carrots, sweet potatoes, peas, and green beans, steamed and pureed.
  • Fruits: Bananas, avocados, pears, and apples, mashed or pureed.

Offering a variety of vegetables, including those with bitter flavors like broccoli and spinach, can help prevent picky eating habits later on.

A collage of baby-friendly fruits and vegetables, including chopped carrots, green peas, mashed banana with potatoes, and fresh pears—ideal for early food introduction.

Dairy and Alternatives:

While cow’s milk isn’t suitable as a main drink until after 12 months, other dairy products can be introduced:

  • Yogurt: Plain, full-fat varieties without added sugars.
  • Cheese: Small amounts of pasteurized cheese, cut into tiny pieces.

These provide calcium and protein essential for growth.

Grains and Starches:

Incorporate these energy-rich foods:

  • Soft Cooked Pasta: Small shapes like macaroni, cooked until very soft.
  • Bread: Small pieces of soft bread or toast strips.
  • Rice: Well-cooked and mashed.

Ensure these are easy to swallow to prevent choking.

A happy baby enjoying a spoonful of creamy yogurt, an excellent dairy alternative rich in calcium and protein.

Best First Foods for Babies: Foods to Avoid

Not all foods are baby-friendly. Steer clear of:

  • Honey: Risk of botulism; avoid until after 12 months.
  • Whole Nuts and Grapes: Choking hazards; offer in ground or sliced forms.
  • High-Salt or Sugary Foods: Not suitable for babies’ developing kidneys and teeth.
  • Cow’s Milk as a Drink: Wait until after 12 months; however, it can be used in cooking or mixed with food from 6 months.

Tips for a Smooth Transition

  • One at a Time: Introduce new foods individually, waiting a few days before adding another to monitor for allergies.
  • Texture Progression: Start with smooth purees, then gradually introduce lumpier textures as your baby becomes more comfortable.
  • Self-Feeding: Encourage your baby to pick up soft finger foods to promote motor skills.

Allowing babies to self-feed can enhance their hand-eye coordination and foster independence.

A happy baby enjoying self-feeding with yogurt, an essential step in transitioning to solid foods while avoiding potential hazards.

FAQs

How much solid food should my baby eat?

Begin with small amounts once a day, gradually increasing as your baby shows interest and hunger cues.

What if my baby refuses a new food?

It's normal! Reintroduce it after a few days. Sometimes, it takes multiple attempts for a baby to accept a new taste.

Can I offer my baby water?

Yes, small sips during meals are fine, especially once solids are introduced.

When can I introduce allergenic foods?

Current guidelines suggest introducing allergenic foods like peanuts and eggs early, around 6 months, to potentially reduce allergy risks.

Conclusion

Embarking on the adventure of introducing solids is a delightful phase for you and your baby. By offering a variety of nutritious foods and paying attention to your baby’s cues, you’ll set the stage for healthy eating habits that last a lifetime. Enjoy these precious moments and happy feeding!

5 Baby-Led Weaning Dinner Recipes

A baby exploring a nutritious baby-led weaning meal with mashed sweet potato on a slice of baked potato.

Introduction

Baby-led weaning (BLW) is an approach that allows infants to self-feed, promoting independence and healthy eating habits. Instead of purees, babies explore a variety of nutrient-dense, finger-friendly foods that promote motor skill development and a positive relationship with food. Dinner is a crucial meal for families, and we understand the importance of finding simple, nutritious, and baby-approved recipes. That’s why we’ve curated 5 baby-led weaning dinner recipes that are balanced, tasty, and easy to prepare, ensuring that your baby enjoys safe and delicious meals.

Tips for Safe and Nutritious Baby-Led Weaning Dinner Recipes

When preparing baby-led weaning (BLW) dinners, consider the following:

  • Texture & Consistency: Offer soft foods that are easy to mash but firm enough for your baby to grasp.
  • Nutrient Balance: Include iron-rich foods, healthy fats, proteins, and fiber to support growth.
  • Size & Shape: Cut foods into finger-length strips or small pieces for easy handling.
  • Allergen Introduction: Gradually introduce common allergens like eggs, nuts, and dairy, one at a time.
  • Limit Salt & Sugar: Avoid processed foods and add seasonings to protect your baby’s developing kidneys.

Always supervise your baby during meals to ensure safety.

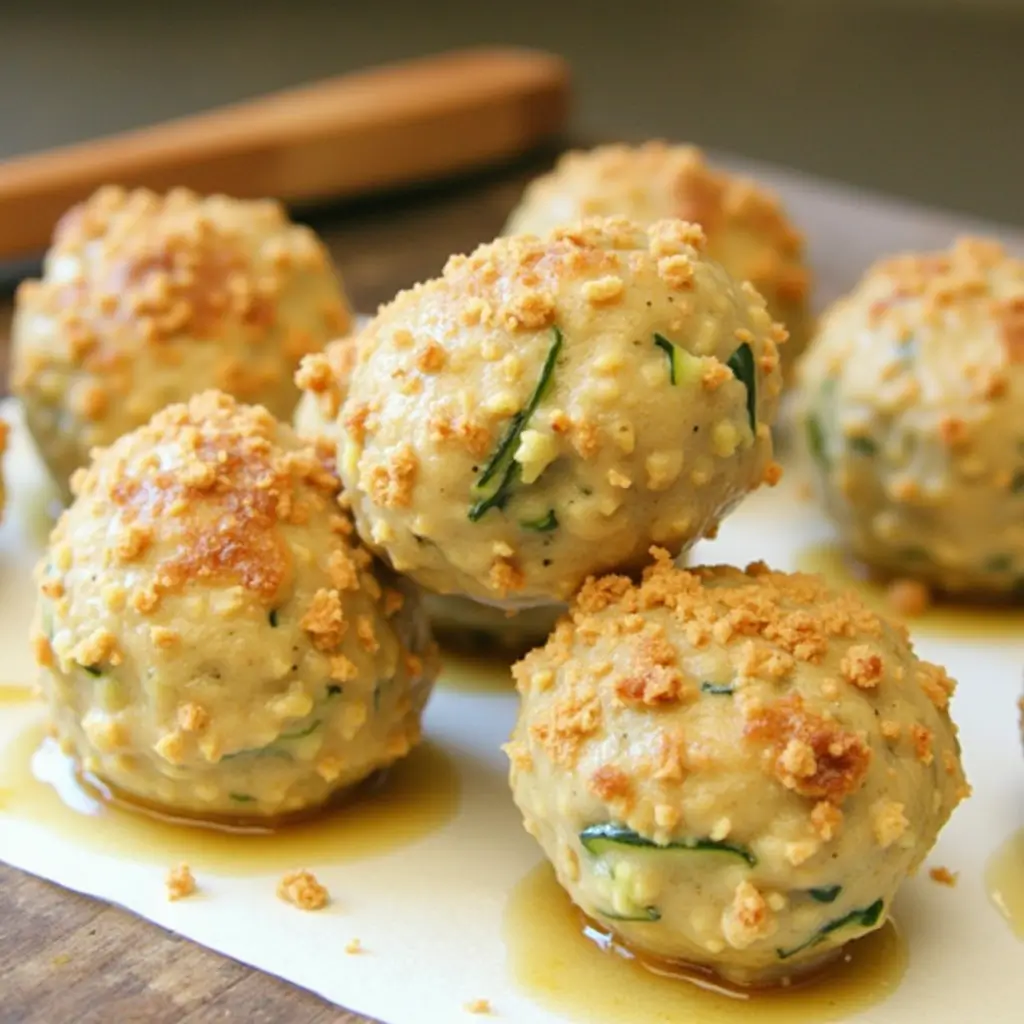
Soft baked chicken and zucchini meatballs with a crispy breadcrumb topping, served on parchment paper.

Chicken & Zucchini Meatballs

Soft, flavorful, and packed with protein and iron, these meatballs are a hit with babies.

Ingredients:

  • ½ pound ground chicken
  • ½ cup grated zucchini
  • 1 egg yolk
  • ÂĽ cup whole wheat breadcrumbs

Instructions:

  1. Mix all ingredients and shape into small meatballs.
  2. Bake at 375°F (190°C) for 15 minutes.
Crispy baked sweet potato fries seasoned with cinnamon on a white plate.

Baked Sweet Potato Fries

These soft fries are rich in fiber, beta-carotene, and natural sweetness.

Ingredients:

  • 1 large sweet potato, peeled and cut into strips
  • 1 tablespoon olive oil
  • ÂĽ teaspoon cinnamon (optional)

Instructions:

  1. Toss sweet potato strips with olive oil.
  2. Bake at 375°F (190°C) for 20 minutes, flipping halfway.
Stack of fluffy quinoa and banana pancakes topped with fresh banana slices on a white plate.

Quinoa & Banana Pancakes

A naturally sweet, protein-rich pancake perfect for little hands.

Ingredients:

  • ½ cup cooked quinoa
  • 1 ripe banana, mashed
  • 1 egg

Instructions:

  1. Mix all ingredients into a batter.
  2. Cook on a skillet over medium heat for 2 minutes per side.
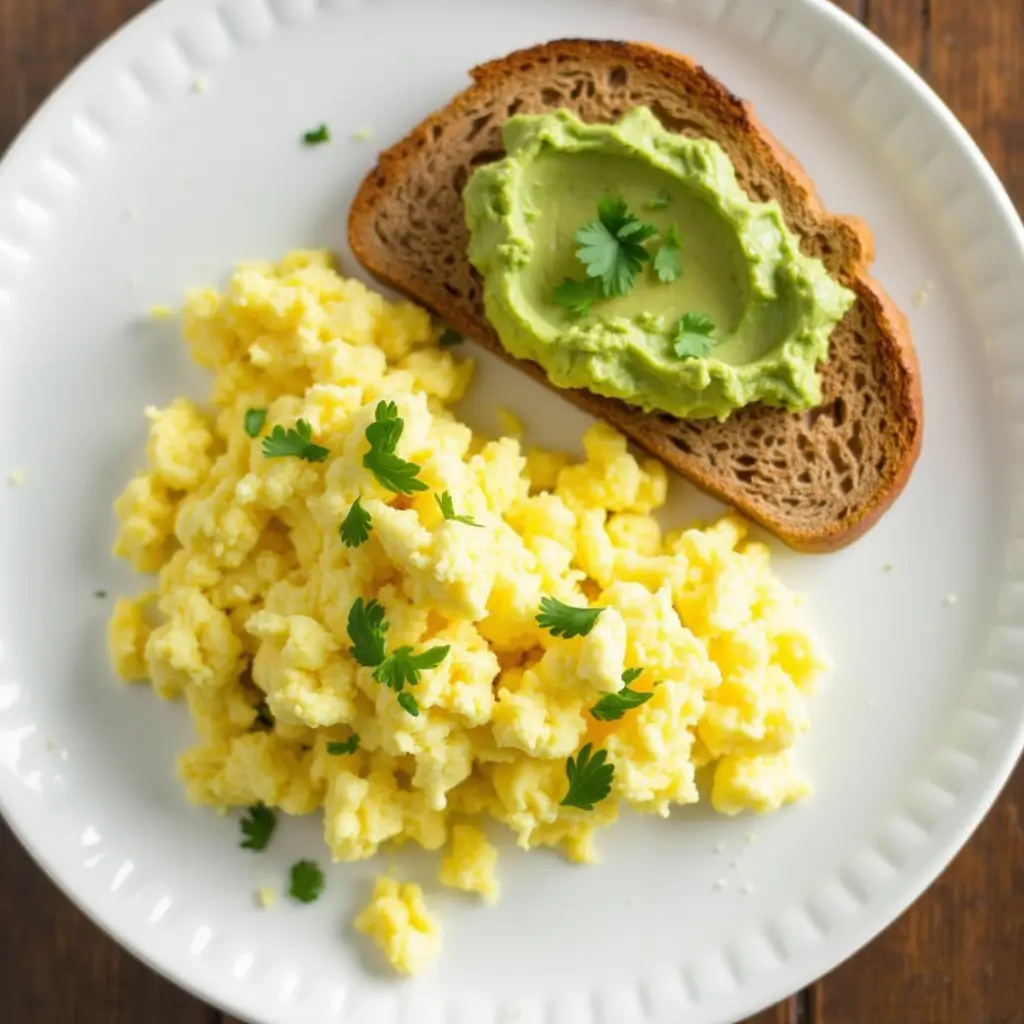
Plate of soft scrambled eggs garnished with fresh herbs, served with whole wheat toast topped with creamy mashed avocado.

Soft Scrambled Eggs with Avocado Toast

Eggs provide essential choline, while avocado adds healthy fats.

Ingredients:

  • 1 egg, lightly scrambled
  • ½ avocado, mashed
  • 1 slice whole wheat toast, cut into strips

Instructions:

  1. Scramble the egg over low heat.
  2. Spread avocado on toast and serve alongside eggs.
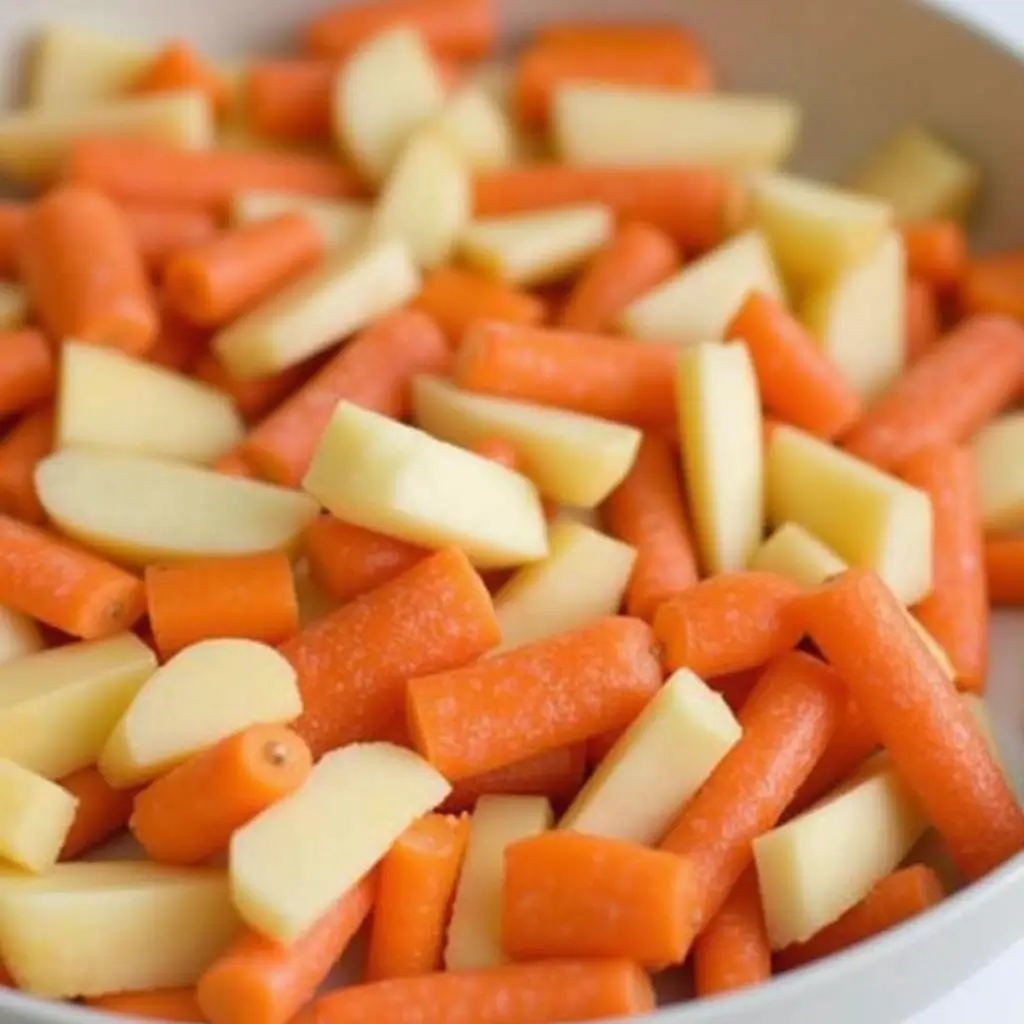
Steamed carrot and apple sticks, cut into baby-friendly finger shapes, ready for serving.

Steamed Carrot & Apple Fingers

A naturally sweet and easy-to-hold dinner option.

Ingredients:

  • 1 carrot, peeled and cut into sticks
  • 1 apple, sliced

Instructions:

  1. Steam both until soft.
  2. Let cool before serving.

FAQs

1. Are these recipes suitable for babies starting BLW?

Yes, the provided recipes are designed for babies around 6 months old who are beginning baby-led weaning. They feature soft textures and appropriate sizes to promote safe self-feeding.

2. How should I prepare the Chicken & Zucchini Meatballs to ensure they're safe for my baby?

Mix ½ pound ground chicken, ½ cup grated zucchini, 1 egg yolk, and ¼ cup whole wheat breadcrumbs. Shape into small meatballs and bake at 375°F (190°C) for 15 minutes until fully cooked and soft.

3. Can I add seasonings to these recipes?

It's best to avoid adding salt or sugar to baby foods. However, mild herbs and spices can be introduced in small amounts to enhance flavor without overwhelming your baby.

4. How do I store leftovers from these meals?

Allow the food to cool completely, then store in an airtight container in the refrigerator for up to 2 days. Ensure thorough reheating before serving to your baby.

5. What should I do if my baby shows disinterest in a particular food?

It's normal for babies to be selective. Continue offering a variety of foods without pressuring them. Repeated exposure can help them become more accepting over time.

Conclusion

Introducing nutritious and simple baby-led weaning (BLW) dinners can transform mealtime into a delightful experience for the entire family. These meals are crafted to supply essential nutrients, fostering your baby’s growth and encouraging self-feeding skills. By embracing BLW-friendly recipes, you support your little one’s journey toward a lifelong appreciation for healthy, wholesome foods. Start incorporating these meals today to promote independence and instill positive eating habits in your baby.

Top 5 Best Baby-Led Weaning Dinner Recipes

A baby practicing baby-led weaning, eating a green vegetable with a plate of nutritious finger foods

Introduction to Baby-Led Weaning Dinners

Baby-led weaning (BLW) is an approach that allows infants to self-feed, encouraging independence and healthy eating habits. Instead of purees, babies explore a variety of nutrient-dense, finger-friendly foods that promote motor skill development and a positive relationship with food. Dinner is a crucial meal for families, and finding the right recipes ensures that your baby enjoys balanced, tasty, and safe meals. Below, we present the best baby-led weaning dinner recipes that are simple, nutritious, and baby-approved.

When preparing BLW-friendly dinners, keep these important factors in mind:

  • Texture & Consistency – Foods should be soft enough to mash with little pressure but firm enough for babies to grasp.
  • Nutrient Balance – Prioritize iron-rich foods, healthy fats, protein, and fiber for optimal growth.
  • Size & Shape – Cut foods into finger-length strips or small, easy-to-grasp pieces.
  • Allergen Awareness – Gradually introduce common allergens like eggs, nuts, and dairy.
  • Minimal Salt & Sugar – Avoid processed foods and add seasonings to protect your baby’s developing kidneys.
Soft turkey and sweet potato patties on a white plate, perfect for baby-led weaning and toddler meals.

1. Soft Turkey & Sweet Potato Patties

These protein-packed patties are perfect for little hands to hold and are full of iron and vitamins.

Ingredients:

  • 1 cup cooked sweet potato, mashed
  • ½ pound ground turkey
  • 1 egg yolk
  • ½ teaspoon garlic powder
  • ÂĽ teaspoon dried thyme

Instructions:

  1. Preheat oven to 375°F (190°C).
  2. Mix all ingredients in a bowl.
  3. Shape into small patties and place on a baking sheet.
  4. Bake for 15–18 minutes, flipping halfway.
  5. Allow to cool before serving.
Golden-brown broccoli and cheese fritters on a white plate, packed with calcium and nutrients for baby-led weaning.

2. Broccoli & Cheese Fritters

These nutrient-dense fritters provide calcium, fiber, and protein, making them an excellent BLW dinner option.

Ingredients:

  • 1 cup steamed broccoli, finely chopped
  • ½ cup shredded cheese
  • 1 egg
  • ÂĽ cup whole wheat flour

Instructions:

  1. Preheat a pan over medium heat.
  2. Mix all ingredients in a bowl.
  3. Scoop small amounts onto the pan and flatten slightly.
  4. Cook for 2–3 minutes per side until golden brown.
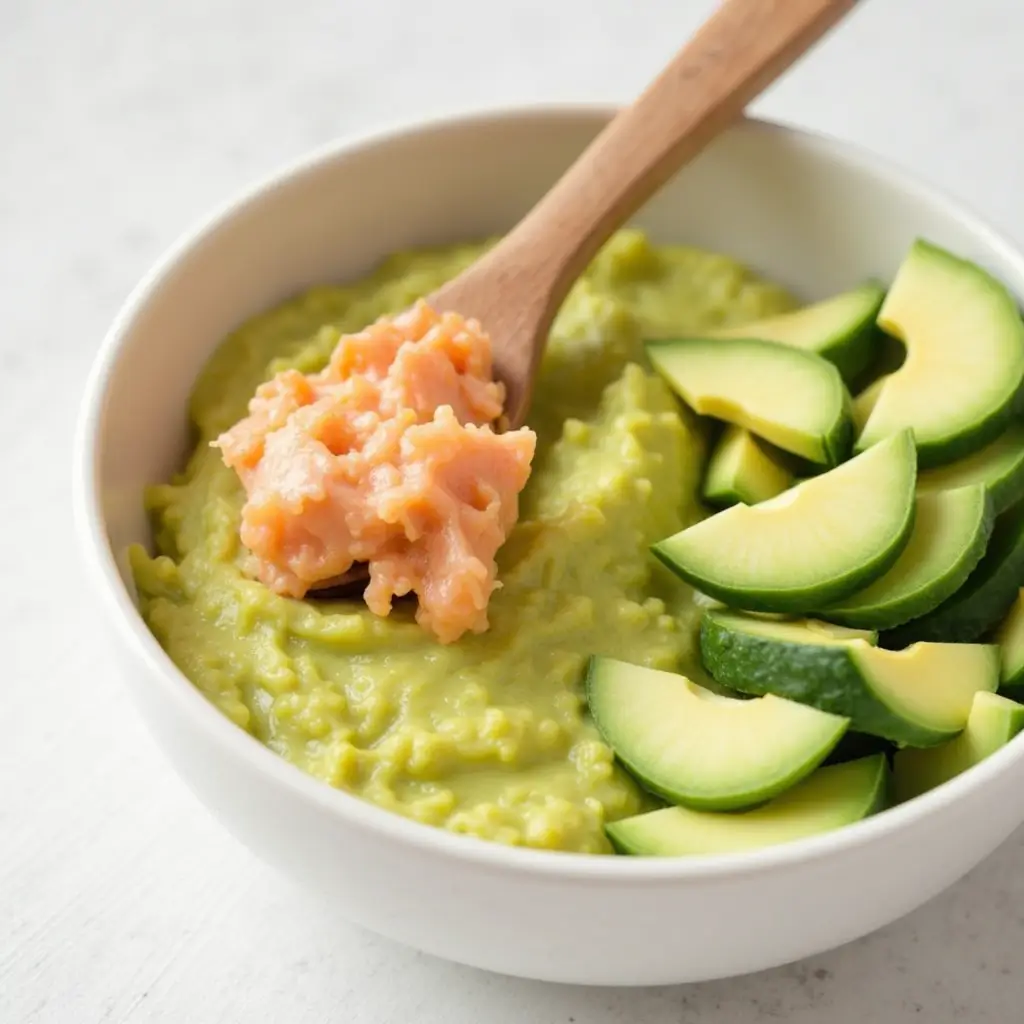
A bowl of soft salmon and avocado mash with zucchini slices, a nutrient-rich baby food packed with omega-3s.

3. Soft Salmon & Avocado Mash

Rich in omega-3 fatty acids, this dish supports brain development and is easy for babies to self-feed.

Ingredients:

  • ½ cup cooked salmon, flaked
  • ½ ripe avocado, mashed
  • Squeeze of lemon juice

Instructions:

  1. Mix all ingredients in a bowl.
  2. Serve in small spoonfuls or spread on soft, steamed vegetable slices.
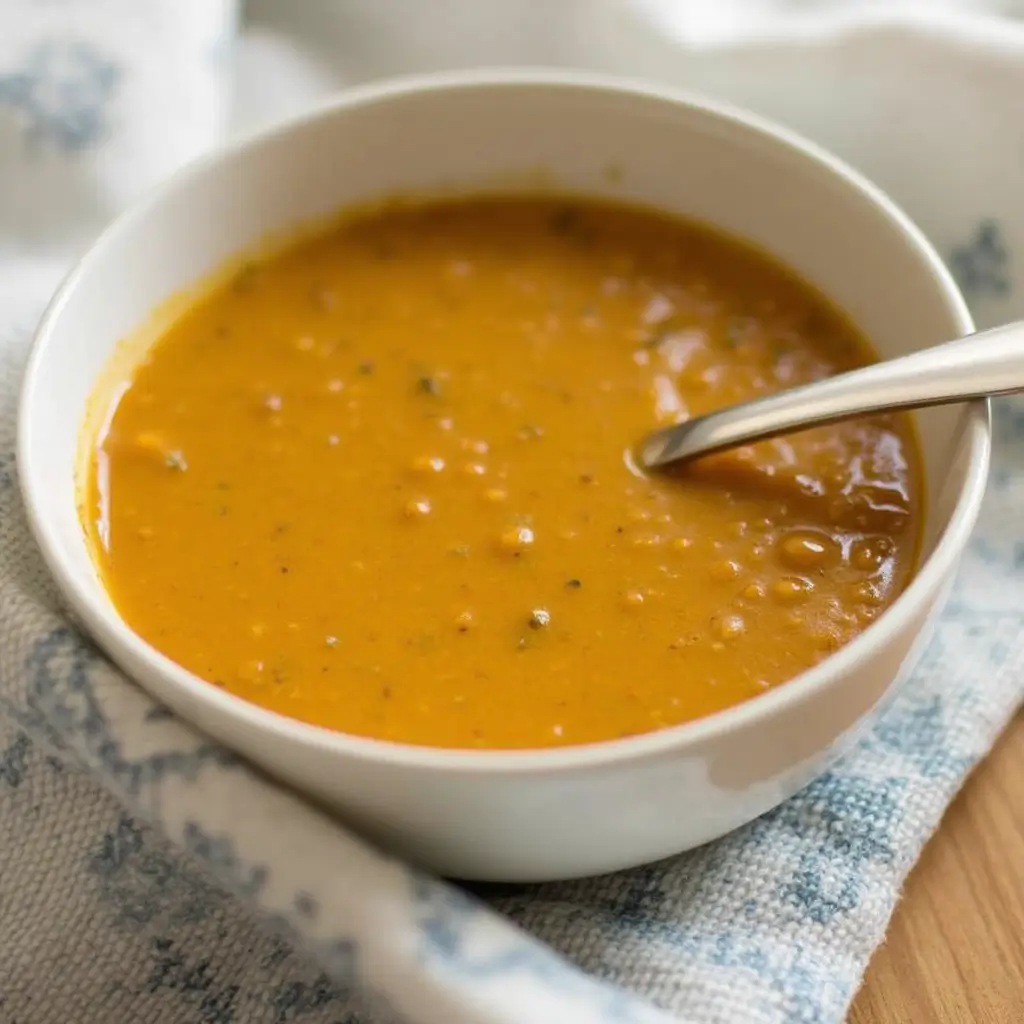
A bowl of creamy lentil and carrot soup with a spoon, perfect for a nutritious baby meal.

4. Lentil & Carrot Soup

A warming, iron-rich soup that’s both filling and gentle on digestion.

Ingredients:

  • ½ cup red lentils
  • 1 carrot, chopped
  • 2 cups low-sodium vegetable broth
  • ½ teaspoon cumin

Instructions:

  1. Simmer all ingredients for 20 minutes until soft.
  2. Blend lightly, keeping some texture for the baby’s chewing practice.
  3. Let cool before serving.
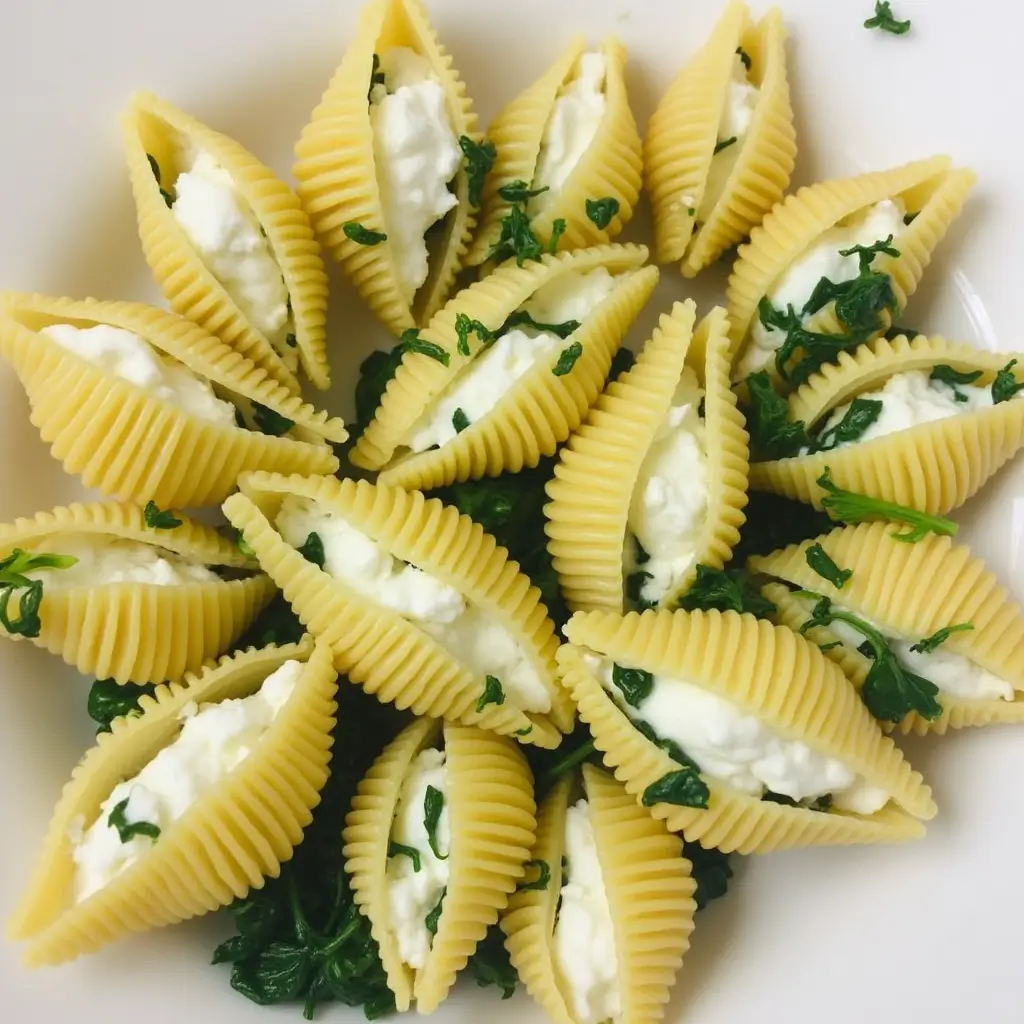
Stuffed pasta shells with creamy ricotta cheese and spinach, served on a plate for a nutritious baby meal.

5. Mini Spinach & Ricotta Pasta Shells

These soft pasta shells offer calcium, protein, and essential vitamins.

Ingredients:

  • 1 cup cooked pasta shells
  • ½ cup ricotta cheese
  • ½ cup steamed spinach, chopped

Instructions:

  1. Mix spinach with ricotta and stuff into pasta shells.
  2. Serve warm as finger food.

FAQs

1. When can I start baby-led weaning dinners?

Babies can start BLW around six months, once they show signs of readiness such as sitting up unassisted and having good head control.

2. How do I prevent choking?

Offer soft, appropriately sized foods, supervise meals, and avoid choking hazards like whole nuts, grapes, or tough meats.

3. What are the best iron-rich foods for babies?

Good sources include lentils, beans, turkey, chicken, eggs, and iron-fortified cereals.

4. Can I use spices in baby food?

Yes, but keep it mild! Herbs like cinnamon, garlic, cumin, and oregano are great choices.

5. How do I introduce allergens safely?

Introduce common allergens one at a time, waiting three to five days between each new food to monitor reactions.

6. What if my baby refuses food?

Stay patient! Offer a variety of foods, model eating behavior, and avoid pressure to eat.

7. Can I meal prep for baby-led weaning dinners?

Absolutely! You can prepare and store BLW-friendly meals in the fridge for up to three days or freeze them for future use.

Conclusion

Introducing nutritious and easy baby-led weaning (BLW) dinners can make mealtime enjoyable for the entire family. These recipes are designed to provide essential nutrients for babies while encouraging them to eat independently. Try these BLW-friendly meals today and help your little one develop a lifelong love for healthy, wholesome foods!

Infant Food Ideas & Recipes

A cheerful baby sitting in a highchair, enjoying a plate of wholesome orange-colored food pieces.

Introduction

Feeding your baby can be both exciting and a bit overwhelming. With so many options, where do you even begin? Whether you’re introducing solids for the first time or expanding your baby’s menu, having a few solid “infant food ideas & recipes” up your sleeve can make mealtime a breeze. This guide inspires you with practical tips, nutritious recipes, and fun ways to keep your baby’s taste buds happy. Let’s dive in!

Why Homemade Baby Food?

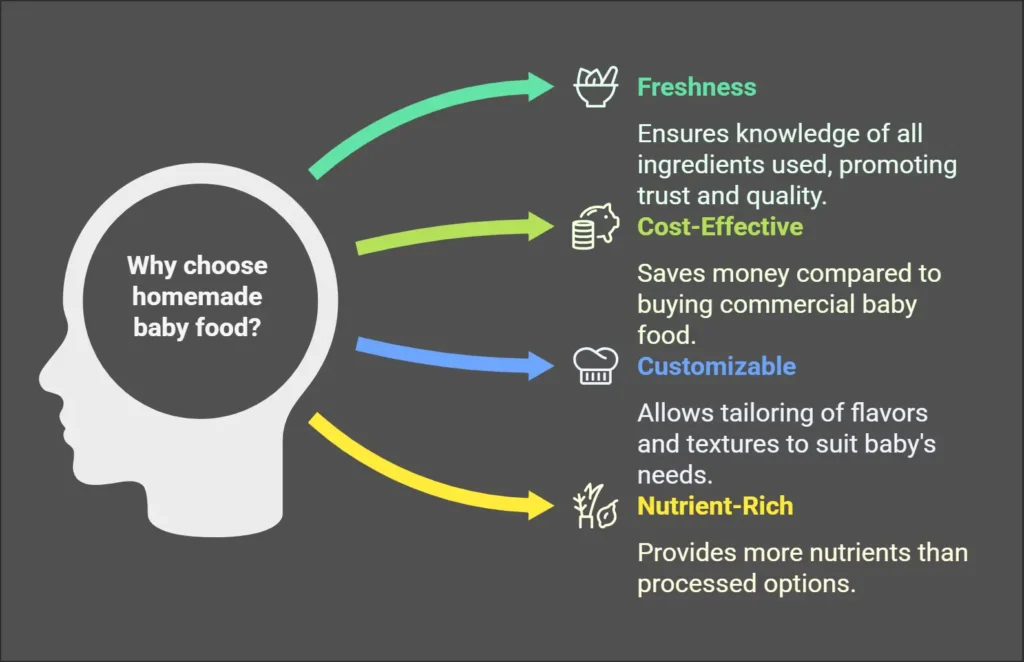
Homemade baby food is a labor of love that offers several perks. Why choose homemade over store-bought? Here are some reasons:

  • Freshness: You know exactly what goes into your baby’s meals.
  • Cost-Effective: Preparing food at home can save a pretty penny.
  • Customizable: You can tailor flavors and textures to your baby’s preferences.
  • Nutrient-Rich: Fresh ingredients often pack more nutrients than processed ones.

Still not sure? Let’s look at how easy it can be to whip up meals your baby will adore.

Diagram explaining the benefits of homemade baby food, highlighting freshness, cost-effectiveness, customizability, and nutrient-rich options.

Getting Started: Tools of the Trade

Before diving into recipes, make sure you’ve got the right tools. You don’t need a fancy kitchen setup—just some basics:

  • Blender or Food Processor: For smooth purees.
  • Steamer Basket: Keeps nutrients locked in while cooking veggies.
  • Ice Cube Trays: Perfect for freezing small portions.
  • Baby Spoons and Bowls: Gentle on gums and easy for little hands.

Ready? Let’s roll up our sleeves and start cooking!

Infographic illustrating essential tools for homemade baby food preparation, including a blender, steamer basket, ice cube trays, and baby spoons.

Introducing solids is a big milestone. Start with single-ingredient purees to monitor for allergies and get your baby used to new textures and flavors.

Classic Puree Recipes

Sweet Potato Mash

  • Ingredients: 1 sweet potato, water, or breast milk/formula.
  • Directions: Peel and steam the sweet potato until soft. Blend until smooth, adding water or milk to achieve the desired consistency.

Creamy Carrot Delight

  • Ingredients: 3 carrots, water.
  • Directions: Steam carrots, then blend with a splash of water until velvety.

Apple-Banana Bliss

  • Ingredients: 1 apple, ½ banana.
  • Directions: Steam the apple, then blend with the banana for a naturally sweet treat.

Pro Tip: Freeze leftover purees in ice cube trays for easy portioning later!

Stage 2: Flavor Combos to Expand the Palate

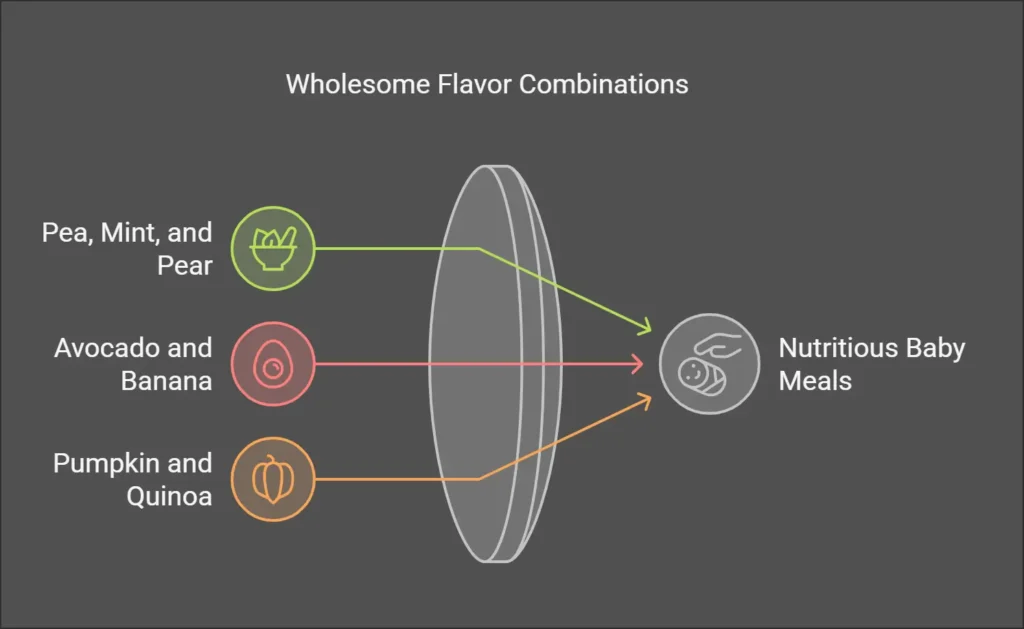
Infographic showing wholesome flavor combinations for baby meals, including pea, mint, and pear; avocado and banana; and pumpkin and quinoa.

Once your baby is comfortable with single ingredients, it’s time to mix things up! Combine flavors and textures for a more exciting mealtime.

Creative Combinations

Pea, Mint, and Pear

  • Sweet and refreshing, this combo is a hit! Blend steamed peas, a ripe pear, and a tiny sprig of mint.

Avocado and Banana

  • Mash together for a creamy, nutrient-packed snack.

Pumpkin and Quinoa

  • Cook quinoa and mix it with steamed pumpkin for a wholesome, hearty meal.

Pro Tip: Add spices like cinnamon or nutmeg (in tiny amounts) to introduce subtle new flavors!

Stage 3: Finger Foods and Beyond

When your baby shows interest in self-feeding, it’s time for finger foods. These recipes will keep your baby engaged and satisfied.

Baby-Friendly Finger Foods

  • Soft Veggie Sticks: Steam carrots, zucchini, or green beans until soft enough to mash between fingers.
  • Mini Pancakes: Whip a batter with mashed banana, oat flour, and an egg. Cook small rounds for easy grabbing.
  • Cheese Cubes: Mild cheeses like mozzarella are perfect for little fingers.

A Week of Meal Ideas

To make life easier, here’s a sample week of meals for your baby:

Monday

  • Breakfast: Mashed avocado and toast fingers.
  • Lunch: Sweet potato and carrot puree.
  • Dinner: Apple-banana mash.

Tuesday

  • Breakfast: Oatmeal with a dash of cinnamon.
  • Lunch: Pumpkin and quinoa mix.
  • Dinner: Steamed broccoli florets.

Repeat with variations for the rest of the week!

FAQs

How do I know if my baby is ready for solids?

Look for signs like sitting up with minimal support, showing interest in your food, and the ability to move food to the back of their mouth.

What’s the best first food?

Single-ingredient purees like sweet potatoes, carrots, or avocados are great options.

How much should I feed my baby?

Start with 1-2 teaspoons per meal and gradually increase as your baby gets used to solids.

Can I season my baby’s food?

Yes! Mild herbs and spices (like cinnamon or dill) are safe in small amounts and can add variety.

Conclusion

Feeding your baby is about more than just nourishment. It’s about laying the foundation for a lifetime of healthy eating. Incorporating these “infant food ideas &  recipes” makes the process fun, easy, and rewarding. Whether mashing avocados or whipping mini pancakes, remember that every bite is a step toward your baby’s growth and happiness. Happy cooking!

Share with us your opinion!

Infant Food

A baby enjoying a plate of nutritious homemade infant food paired with a cup of milk on a highchair.

Introduction:

Have you ever looked at the bewildered expression on your baby’s face as they tasted something entirely new for the first time? It’s downright magical! Watching an infant explore new textures, colors, and flavors can be as exciting as taking a vacation to an uncharted land. But let’s face it: deciding what to feed your baby can feel a bit overwhelming. Should you go for traditional Infant Food (purees…) or jump into the world of baby-led weaning? When is the right time to introduce solids? Will your tiny taster love broccoli as much as you do?

Questions like these crop up fast, and feeling uncertain is perfectly normal! In fact, the sheer variety of “infant food” options homemade, store-bought, plant-based, and allergen-friendly can be both a blessing and a bit bewildering. The good news is that feeding your baby is an incredible journey, one marked by heaps of discovery, giggles, and maybe a few wrinkles on the nose!

So, buckle up as we dive into the extraordinary world of Infant Food and feeding strategies. We’ll explore tips on transitioning to solids, unveiling bold flavor combos, blending up homemade baby meals, and so much more. Let’s get started by unraveling the basics, shall we?

A baby sitting at a table and chewing on a soft food item, exploring the textures as part of infant nutrition learning.

The First Six Months

Many pediatric experts recommend exclusive breastfeeding or formula feeding for the first six months of life. This is a crucial period during which your child receives essential nutrients, antibodies, vitamins, minerals, and the emotional comfort that feeding brings. Yet those chubby, curious hands start to reach for your spoon, and you might be tempted to give them a tiny taste of your mashed potatoes. Is it the right time? Often, signs of readiness include sitting up with minimal support, showing an interest in what you’re eating, and losing the tongue-thrust reflex (that reflex that helps them push food out of their mouths!).

Preparing for Solids

Before jumping to purees and mashed veggies, confirming your little one is developmentally prepared for solids is important. They won’t need a feast immediately, just a small spoonful or two for a start. Introduce new foods gradually. Remember: this process isn’t just about pumping them full of nutrients and letting them explore. Whether you choose baby-led weaning or spoon-feeding purees, ensure it’s a joyful time. No one wants mealtime to become a high-stress event!

Signs They’re Ready

  1. Sitting Up Straight: If your baby can maintain good head and neck control, it’s a definite sign they might be ready to experiment with textures beyond milk.
  2. Interest in Foods: Are they staring you down when you eat? Do they try to grab that spoon of yogurt? Curiosity is a green light for “Bring on the infant food!”
  3. No More Tongue-Thrust Reflex: If your baby can manage to swallow a little spoonful instead of promptly pushing it out, that’s another sign it’s go-time.

Spoon-Fed Purees

Spoon-feeding has been around for a long time, and it’s something our parents and grandparents swore by. If you opt for this route, you’ll likely begin with gentle flavors of mashed bananas, steamed and pureed carrots, and smooth oatmeal. The consistency is soft and easy for them to handle. You might get some messy faces, but it’s all part of the fun!

Advantages

  • Control Over Consistency: You decide how thick or thin the puree is.
  • Less Mess (in Theory!): Though your little one might still fling peas across the room, spoon-feeding can be a bit tidier than baby-led weaning.
  • Gradual Flavor Introduction: You control how fast you introduce new flavors.

Potential Downsides

  • Less Autonomy for Baby: They’re not physically picking up foods on their own as much.
  • Possibility of Overfeeding: Sometimes, it’s easy to sneak in “just one more spoonful,” even if the baby might be done.

Baby-Led Weaning

Baby-led weaning (BLW) flips the spoon-feeding script. Rather than pureeing everything, you provide soft, easy-to-grip pieces of food like steamed carrots cut into stick shapes, avocado wedges, or banana halves and let your baby feed themselves. This approach encourages babies to explore textures and flavors independently.

Advantages

  • Promotes Autonomy: Your baby decides how much to eat and at what pace.
  • Sensory Exploration: They feel the squishy avocado or the mushy sweet potato, stimulating curiosity and motor skills.
  • Family Mealtime: Baby can share similar foods (with necessary modifications) as the rest of the family.

Challenges

  • Mess Factor: Be prepared for banana smears in hair and sweet potato on the highchair, maybe even on the walls!
  • Nervousness Over Gagging: Some caregivers worry about choking, but it’s typically manageable if food is cut appropriately, and you’re watching closely.

Hybrid Approaches

There’s no need to pick sides! Many parents choose a middle path, spoon-feed some meals, and let the baby experiment with self-feeding at others. It might look like giving them pureed butternut squash for lunch while letting them explore a soft piece of ripe peach at dinner. Flexibility is key. Every family is unique, and so is every baby’s feeding journey.

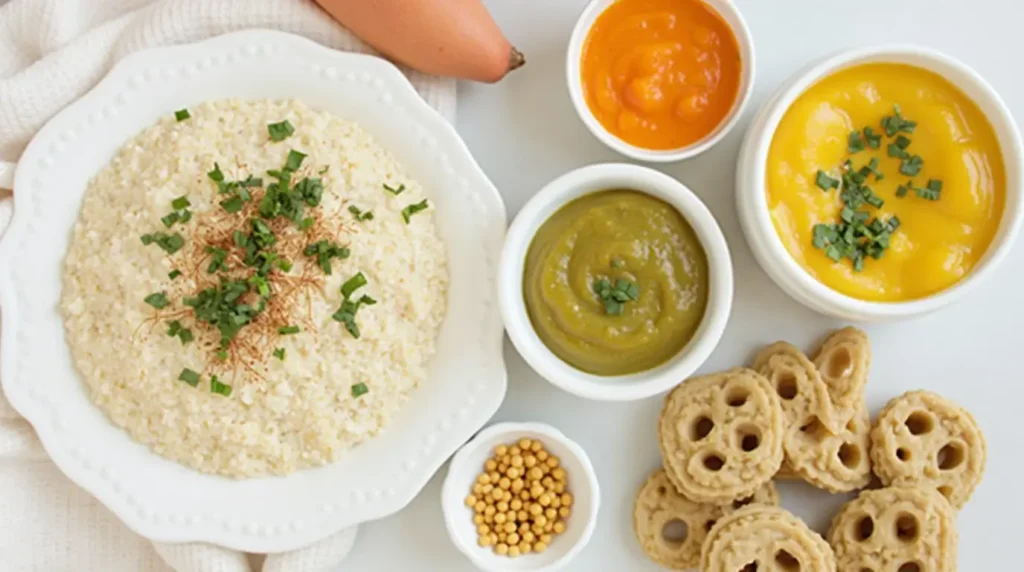
A variety of colorful baby food options, including purees, textured grains, and finger snacks, showcasing the evolution of infant nutrition.

The Evolution of Infant Food: Beyond Plain Purees

Flavor Fusion

Who says babies can’t enjoy seasonings? When used sparingly, certain herbs and spices can excite baby meals. A dash of cinnamon in oatmeal or a tiny sprinkle of mild herbs in mashed vegetables can open the door to palate adventure.

  • Sweet and Savory Combos: Mashed sweet potato with a hint of gentle curry (very gentle, mind you!) introduces unique flavors without overpowering your little one.
  • Herbal Teasers: Add a pinch of rosemary or basil to pureed lentils or chicken. You’ll be amazed at how intrigued the baby might be.

Textural Twists

Babies love exploring textures, so don’t shy away from chunkier purees as they grow. Soft mashed beans, finely shredded chicken, or oatmeal with tiny fruit bits can help develop chewing skills.

  • Varying the Texture: Slowly transition from silky smooth to slightly lumpy. As they handle lumps with ease, move to soft finger foods.
  • Finger Food Fun: Cooked pasta spirals, soft scrambled eggs, or small chunks of banana; give them practice with pincer grips and chewing.

Homemade vs. Store-Bought

People often ask: “Is homemade better than store-bought?” It depends. Homemade baby food lets you control ingredients, freshness, and flavor. But let’s be honest, life gets busy. Sometimes, you’ll need the convenience of pre-made.

  • Homemade: You can bulk-prepare and freeze purees in ice cube trays for quick defrosting. Plus, it’s cost-effective.
  • Store-Bought: On hectic days, quality store-bought options with no additives can be a godsend. Just read the labels and opt for reputable brands with transparent ingredients.

Allergenic foods like peanuts, eggs, and shellfish can make new parents nervous. Recent guidelines suggest introducing potential allergens early, around four to six months, to reduce the likelihood of allergies. But always consult your pediatrician before introducing these foods, especially if there’s a family history of allergies!

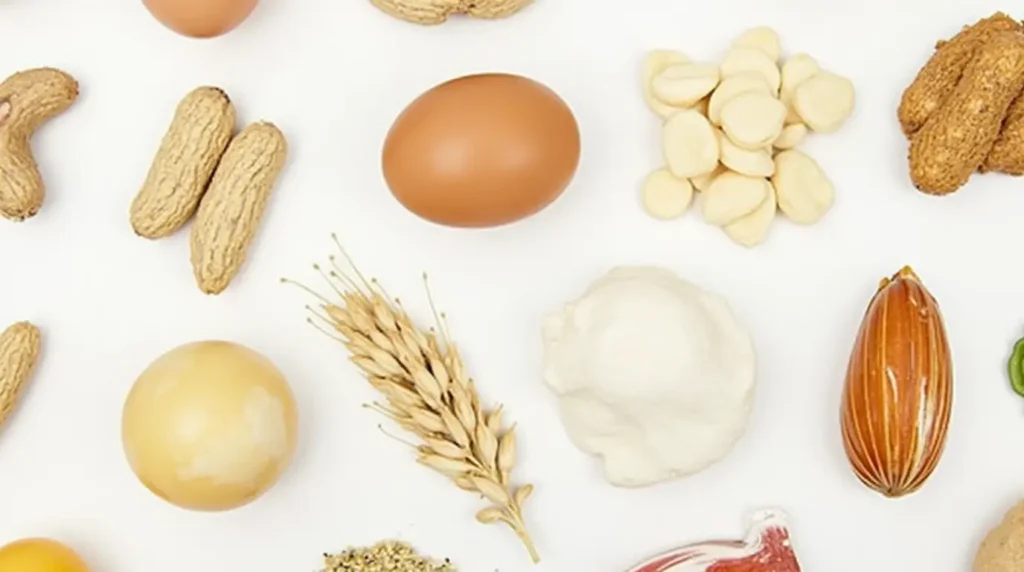
Common Allergens to Watch Out For

  • Peanuts
  • Tree Nuts (almonds, cashews)
  • Eggs
  • Shellfish
  • Dairy (cow’s milk products)
  • Wheat
  • Soy

Tips for Safe Introduction

  1. One Allergen at a Time: Don’t mix peanuts and eggs when testing a new allergen.
  2. Small Quantities: Start with a small dab, like a dab of peanut butter, thinned out with breast milk or formula.
  3. Observe Carefully: Watch for any reactions to hives, rash, swelling, or respiratory issues. If you see something alarming, contact your pediatrician immediately.
Common allergenic foods including eggs, peanuts, almonds, wheat, and dairy products displayed on a white background.

Navigating Nutritional Needs:

Important Nutrients

Babies grow rapidly, so they need a robust nutritional portfolio. By six months or so, iron levels from birth begin dropping, making dietary iron crucial.

  • Iron: Found in fortified cereals, lean meats, beans, and spinach.
  • Vitamin D: Often supplemented through pediatric drops if breastfeeding.
  • Healthy Fats: Essential for brain development! Foods like avocado, full-fat dairy (once they’re old enough), and certain fish (low in mercury) can help.

Hydration and Liquid Intake

Babies get most of their hydration from breast milk or formula. Once solids come into play, you can introduce small sips of water in an open cup. Avoid juices and sweetened beverages, leading to tooth decay and extra sugar intake.

  • Open Cup Practice: Offering water in a tiny, open cup can foster motor skills.
  • Moderation: Don’t go overboard. Water intake should remain minimal for infants under one year, since they still rely on milk for primary hydration.

Cultural Inspirations in Infant Food:

Ever thought about broadening your baby’s culinary horizons through global flavors? From warm spices in Indian dal to mild Mediterranean herbs, the possibilities are thrilling. Of course, we keep things kind and baby-friendly, but there’s no need to stick to the same old bland options.

East Asian-Inspired Bites

  • Rice Congee: A smooth rice porridge that can be mixed with mashed vegetables or tiny bits of shredded chicken.
  • Miso Soup (Mild): Very mild miso can sometimes be introduced, but keep sodium levels in check.

Mediterranean Flavors

  • Mashed Chickpeas (Hummus-Style): A dash of olive oil, perhaps a hint of garlic, can create a hummus-like puree.
  • Soft Cooked Eggplant: The tender texture can be easily mashed and is a perfect sidekick for other pureed veggies.

Latin American Twists

  • Refried Beans: Choose a low-sodium version and blend them with a bit of water or breast milk for smoothness.
  • Mashed Plantains: Sweet, soft, and delicious.

Exploring different cultural recipes can spark your baby’s curiosity, expand their palate, and maybe even reduce picky-eating tendencies later on. Variety is the spice of life!

Meal Planning and Preparation:

A Day in the Life of Feeding

Planning your baby’s meals in advance can be helpful, especially if you have a busy work schedule or other children. Below is a rough sample of a day’s feeding routine once your infant is established on solids. (Remember, every baby is different, so adjust as needed!)

  1. Morning Milk: Breastfeed or formula-feed upon waking.
  2. Breakfast: Infant cereal mixed with breast milk/formula, plus a spoonful of mashed fruit (banana or pear).
  3. Mid-Morning Nap: Possibly a milk feed before or after, depending on the baby’s routine.
  4. Lunch: A puree of sweet potatoes and carrots, maybe a taste of mashed beans for protein.
  5. Afternoon Snack (Optional): If a baby is older, maybe a small serving of yogurt or soft fruit pieces.
  6. Dinner: A spoon-fed puree of chicken and vegetables or a few soft finger foods if doing baby-led weaning.
  7. Bedtime Milk: Breast or formula feed before sleep.

Batch Cooking and Freezing

Feeling like a short-order cook? You can reduce daily prep stress by batch cooking!

  • Choose a Weekend Day: Boil or steam veggies (like carrots, peas, sweet potatoes) in large batches.
  • Puree and Portion: Use an ice-cube tray to freeze puree portions. After freezing, store cubes in labeled freezer bags.
  • Defrost As Needed: Pop a cube or two in a microwave-safe dish (or thaw in the fridge) for quick meals.

Meal Prep Tips

  • Safety First: Always ensure clean cooking areas, utensils, and highchairs.
  • Label Everything: Clearly mark containers with the date and type of food.
  • Rotate Varieties: Don’t freeze 50 cubes of just carrots. Create a rainbow of options to keep the baby’s meals diverse.
A toddler sitting in a high chair with a green bowl, learning self-feeding techniques during mealtime.

Practical Feeding Tips:

Embrace the Mess

No matter the feeding approach, things will get messy. Bibs, plastic mats, and easily wipeable surfaces are your friends! Babies learn by squishing, smearing, and occasionally tossing food around like confetti. Let them have fun within reason, and keep your sense of humor close by.

Watch for Hunger and Fullness Cues

Let your baby guide you! Babies have a remarkable sense of self-regulation if they’re full, they’ll let you know by turning away or losing interest. Respect those cues to build healthy eating habits.

Patience is a Virtue

Some days, they’ll gobble down everything. On other days, they’ll clamp their little mouths shut like a vault! That’s okay. Consistency matters more than perfection. Just keep offering a range of nutritious foods.

FAQs

How often should I introduce new foods?

Most folks find success introducing one new food every three to five days. This helps you track any allergic reaction and gauge your baby’s likes and dislikes.

Is it safe to add salt or sugar to my baby’s meals?

Generally, it’s advised to avoid extra salt or sugar in infant meals. Babies’ kidneys aren’t ready for high sodium, and added sugar can spur an early sweet tooth. Rely on the natural sweetness of fruits and mild seasonings to keep flavors interesting.

What if my baby hates a certain food?

Babies’ palates change over time. If they reject something (like broccoli) keep calm and try again later. It often takes multiple exposures before a baby accepts a new flavor or texture.

When can my baby start drinking cow’s milk?

Whole cow’s milk is typically introduced around the first birthday. Before then, breast milk or formula should be the main milk source, as cow’s milk lacks certain nutrients in the right proportions for infants.

How do I prevent choking?

Always supervise meals closely, ensure foods are soft and in age-appropriate shapes (e.g., cutting grapes into quarters), and be aware of your baby’s chewing abilities. Stay certified or familiar with infant choking procedures for extra peace of mind.

Should I follow a strict feeding schedule?

Many parents do a combination of a routine and on-demand feeding. Babies thrive with some predictability, but flexibility is crucial as their appetite can vary from day to day.

Can I give my baby fruit juice?

It’s best to wait until they’re older. Even 100% fruit juice can be high in natural sugars and low in fiber. If you choose to offer juice later, dilute it with water and serve it sparingly.

Conclusion:

At the heart of it all, remember that “infant food” is not just a means to fill their tiny bellies. It’s a gateway to cultural exploration, sensory development, and quality family bonding. Through each messy spoonful, you’re helping shape an adventurous and healthy eater for the future. Whether you opt for spoon-fed purees, baby-led weaning, or a blend of both, your patience, creativity, and love will guide the way.

So, don’t be afraid to experiment with subtle herbs, offer them a rainbow of tastes, and let them take charge occasionally. You’ve got this! Feeding your baby can become one of the most memorable parts of early parenthood, so savor every squishy dribble moment. Bon appétit, little one!

It’s up to you!

Baby Finger Foods Recipes

Creative baby finger food arrangement shaped like a hand, made from millet and banana puree with blueberry eyes and a smiley face.

Introduction

When your little munchkin is ready to explore the exciting world of solid foods, it’s a milestone worth celebrating. But let’s face it, coming up with ideas for baby finger foods can sometimes feel like cracking a tough nut. You want something easy to prepare, safe, and, of course, irresistibly delicious. Well, you’re in luck! This guide serves up five of the best baby finger food recipes, with tips and tricks to keep your baby’s taste buds singing. So, grab your apron, and let’s get cooking!

Why Finger Foods Matter for Babies

Introducing finger foods isn’t just about feeding your baby; it’s a developmental adventure. Wondering why they’re such a big deal? Here’s the scoop:

  • Encourages Independence: Babies learn to feed themselves, boosting their confidence and fine motor skills.
  • Explores Textures: Different textures help babies become more adventurous eaters.
  • Promotes Hand-Eye Coordination: Picking up small pieces is like a mini workout for their little hands.

How to Choose the Right Finger Foods

Before diving into the recipes, keep these golden rules in mind:

  1. Soft is Key: Ensure foods are soft enough for your baby to gum or chew.
  2. Size Matters: Bite-sized pieces minimize choking risks.
  3. Nutritional Powerhouses: Opt for wholesome ingredients to fuel your baby’s growth.

Baby Finger Foods: 5 Top Recipes

1. Sweet Potato Bites

Who doesn’t love sweet potatoes? They’re naturally sweet, packed with vitamins, and super versatile.

Ingredients:

  • 1 medium sweet potato
  • 1 tablespoon olive oil
  • A pinch of cinnamon (optional)

Instructions:

  1. Preheat your oven to 375°F (190°C).
  2. Peel and dice the sweet potato into small, baby-friendly cubes.
  3. Toss the cubes with olive oil and a sprinkle of cinnamon.
  4. Spread them on a baking sheet and roast for 20–25 minutes, flipping halfway through.
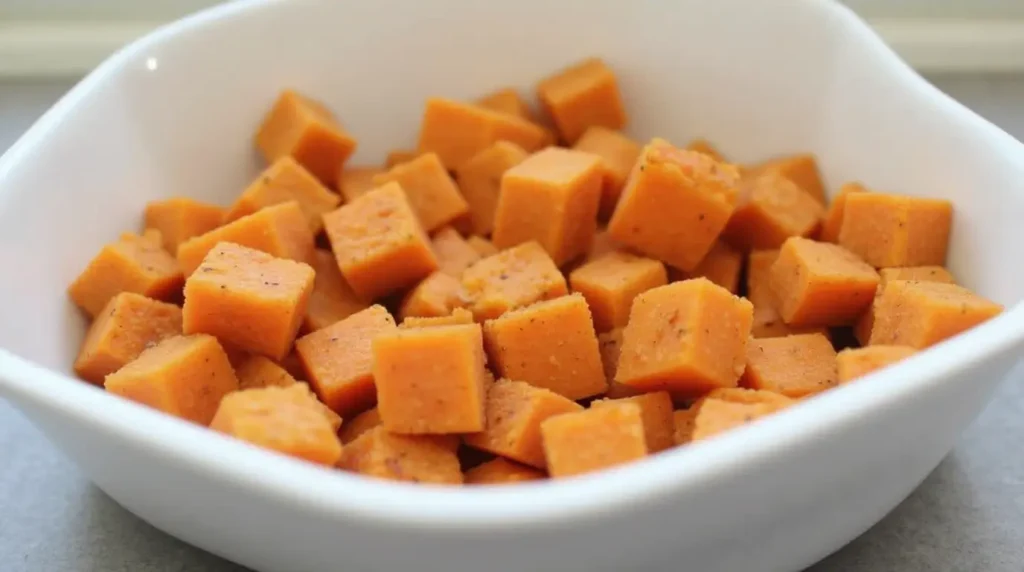
Cubed sweet potato bites in a white bowl, perfect for baby finger food and healthy snacking.

Why it’s a winner: These bites are soft, flavorful, and easy for tiny fingers to grip. Plus, they’re a hit with grown-ups too!

2. Banana Pancake Bites

Breakfast just got a lot cuter (and tastier)!

Ingredients:

  • 1 ripe banana
  • 1 egg
  • 2 tablespoons rolled oats

Instructions:

  1. Mash the banana in a bowl until smooth.
  2. Add the egg and oats, mixing well to form a batter.
  3. Heat a non-stick skillet over medium heat and spoon small dollops of batter onto the pan.
  4. Cook each side for about 1–2 minutes or until golden brown.
A plate of golden banana pancake bites with a soft texture, perfect for babies and toddlers.

Why it’s a winner: These mini pancakes are naturally sweet and easy to hold. Bonus points for being freezable for busy mornings!

3. Cheesy Broccoli Tots

Getting veggies into your baby’s diet has never been this fun.

Ingredients:

  • 1 cup steamed broccoli
  • ÂĽ cup shredded cheddar cheese
  • 1 egg yolk
  • ÂĽ cup breadcrumbs

Instructions:

  1. Preheat your oven to 375°F (190°C).
  2. Finely chop the steamed broccoli.
  3. Mix broccoli, cheese, egg yolk, and breadcrumbs in a bowl.
  4. Shape the mixture into small tots and place them on a baking sheet.
  5. Bake for 15–20 minutes, or until lightly browned.
A plate of golden-brown cheesy broccoli tots, perfect for toddlers and kids as a healthy snack.

Why it’s a winner: These tots are soft, cheesy, and packed with green goodness, perfect for picky eaters!

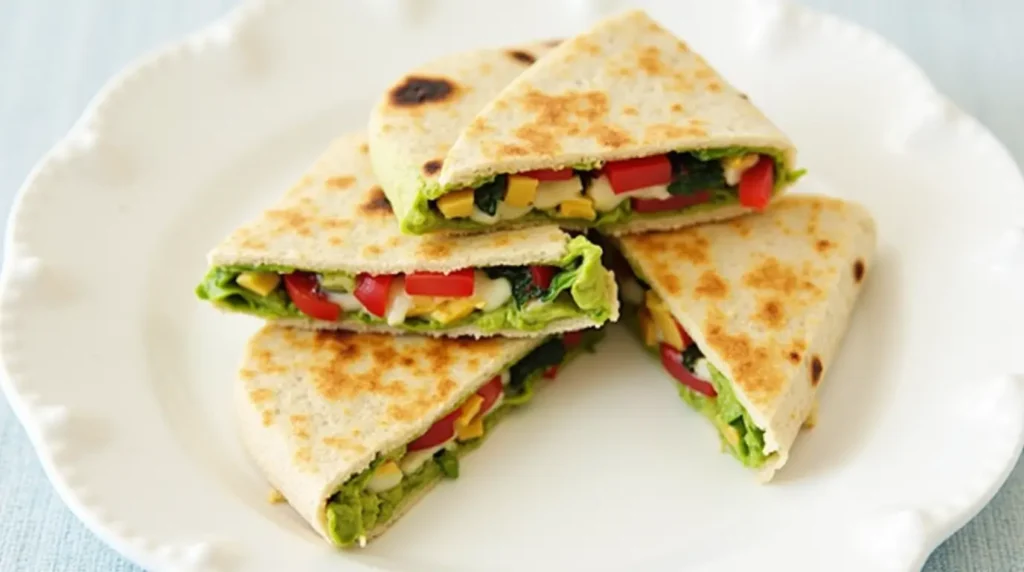
4. Mini Veggie Quesadillas

Mexican night, but make it baby-friendly!

Ingredients:

  • 1 small whole-wheat tortilla
  • 2 tablespoons mashed avocado
  • 1 tablespoon shredded cheese
  • Finely chopped veggies (like tomatoes or spinach)

Instructions:

  1. Spread mashed avocado on half the tortilla.
  2. Sprinkle cheese and veggies on top.
  3. Fold the tortilla in half and cook on a skillet over medium heat until lightly browned.
  4. Cut into small triangles for easy handling.
Close-up of mini veggie quesadillas filled with colorful vegetables and melted cheese, served on a white plate.

Why it’s a winner: These quesadillas are soft, flavorful, and customizable with your baby’s favorite fillings.

5. Fruity Yogurt Melts

A snack that’s cool, creamy, and oh-so-refreshing!

Ingredients:

  • ½ cup plain yogurt
  • 2 tablespoons fruit puree (like strawberry or mango)

Instructions:

  1. Mix the yogurt and fruit puree until well combined.
  2. Use a piping bag or a small spoon to drop tiny dollops onto a baking sheet lined with parchment paper.
  3. Freeze for 2–3 hours until solid.

Close-up of fruity yogurt melts topped with fresh strawberry and mango pieces, arranged on a white surface.

Why it’s a winner: These melts are the perfect on-the-go snack with endless flavor possibilities.

Tips for Introducing Finger Foods

  • Patience Pays Off: Don’t stress if your baby doesn’t take finger foods immediately.
  • Stay Close: Always supervise your baby during meals to ensure safety.
  • Mix It Up: Offer a variety of textures and flavors to keep things exciting.
  • Batch Cooking Saves the Day: Prepare large batches of finger foods and freeze extras for busy days.
  • Embrace the Mess: Mealtime will get messy, and that’s okay! A bib and a splash mat are your best friends.
  • Variety is the Spice of Life: Rotate different foods to keep things interesting for your baby.

FAQs

What if my baby gags on finger foods?

Gagging is actually a natural reflex that helps prevent choking. Stay calm, encourage your baby to keep trying, and always supervise during meals.

How do I know if food is safe?

If it’s soft, small, and easily mashable, it’s likely safe. Avoid foods like whole grapes, nuts, and chunks of meat.

Can I use store-bought options?

Absolutely! Just check the labels for minimal ingredients and no added salt or sugar.

When can I start giving my baby finger foods?

Babies are usually ready for finger foods around 8-10 months, but it’s essential to look for signs like improved hand coordination and the ability to sit up independently.

What should I avoid when preparing baby finger foods?

Avoid hard, sticky, or overly salty foods. Nuts, whole grapes, and raw carrots are common choking hazards.

Can these recipes be stored for later?

Absolutely! Many of these recipes, like the banana pancake bites and broccoli tots, can be frozen for future meals.

How do I encourage my baby to try new foods?

Offer a mix of familiar and new options. Babies may need multiple exposures to a new food before they accept it, so don’t give up too soon.

Conclusion

Introducing finger foods doesn’t have to be a daunting task. With these five top recipes, you’ll have a happy, curious eater in no time. From sweet potato bites to fruity yogurt melts, there’s something here to suit every tiny palate. So, what are you waiting for? Get creative, make mealtime fun, and enjoy this precious phase with your baby. Happy cooking!