Baby-Led Weaning Breakfast Recipes

A fun breakfast idea for babies featuring a sunny-side-up egg nestled inside a slice of bread cut into a cute shape, served on a wooden plate with a fork.

Introduction

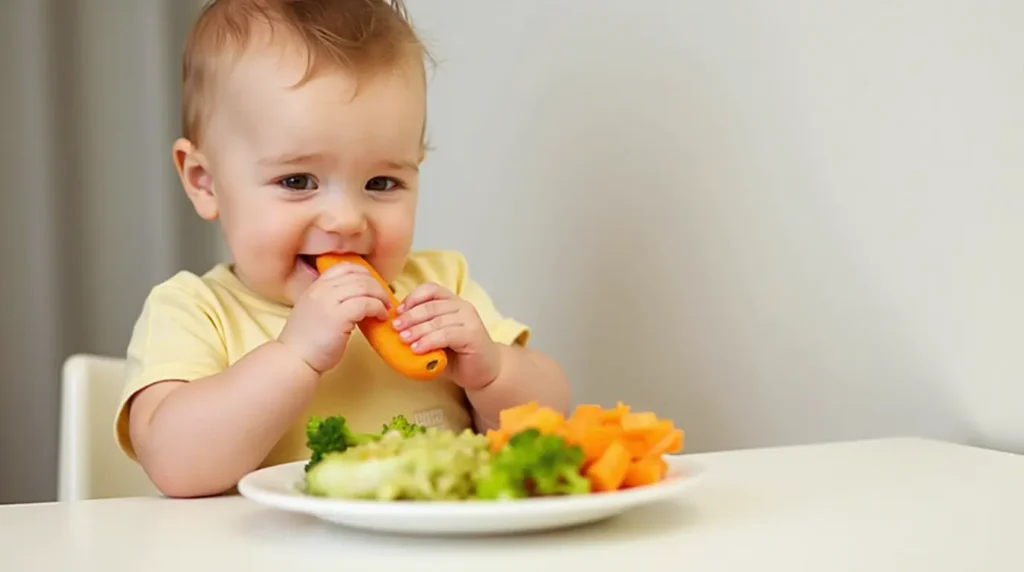
Starting your baby’s journey with food is an exciting milestone. Breakfast is a great place to start if you dive into baby-led weaning (BLW). But what exactly is BLW, and how do you craft safe, tasty, nutritious meals? Well, you’ve come to the right place! This article will cover some creative and nutritious Baby-Led Weaning Breakfast Recipes.

Say goodbye to bland purees and hello to finger-licking fun at the breakfast table!

Before we discuss recipes, let’s briefly explore baby-led weaning (BLW). This method skips spoon-feeding and purees, allowing your baby to feed themselves soft, manageable pieces of food. It encourages independence, fine motor skill development, and healthy eating habits. Sounds great, doesn’t it?

So, what makes a good BLW breakfast? Here are the key points to keep in mind:

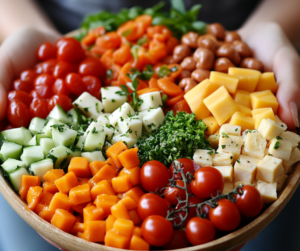
  • Soft texture: Foods should be easy to squish between your fingers.
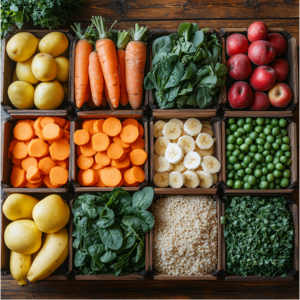
  • Variety: Introduce different flavors and textures to broaden your baby’s palate.
  • Nutrient-dense: Focus on foods rich in vitamins, minerals, and healthy fats.

Now that we’ve got the basics down, let’s dive into the yummy stuff!

Baby-Led Weaning Breakfast Recipes

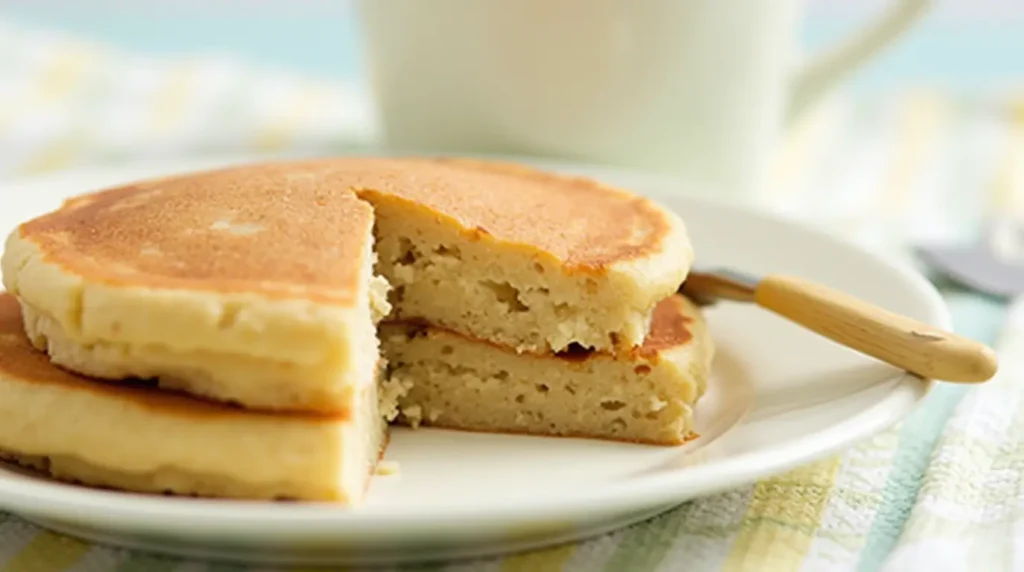
1. Fluffy Banana Pancakes

Who doesn’t love pancakes? These banana pancakes are soft, naturally sweet, and perfect for little hands.

Ingredients

  • 1 ripe banana
  • 1 egg
  • 2 tablespoons of rolled oats (optional)
  • A pinch of cinnamon

Instructions

  1. Mash the banana in a bowl until smooth.
  2. Crack the egg into the banana and mix well.
  3. Stir in rolled oats and cinnamon, if desired.
  4. Heat a non-stick pan over medium heat and spoon small dollops of batter onto the pan.
  5. Cook until bubbles form, then flip and cook for another minute.

A stack of fluffy banana pancakes with a slice removed, served on a white plate with a small wooden-handled knife.

Why It’s Great?

These pancakes are naturally sweetened with banana, easy to hold, and loaded with potassium and protein. Bonus: they’re tasty enough for parents, too!

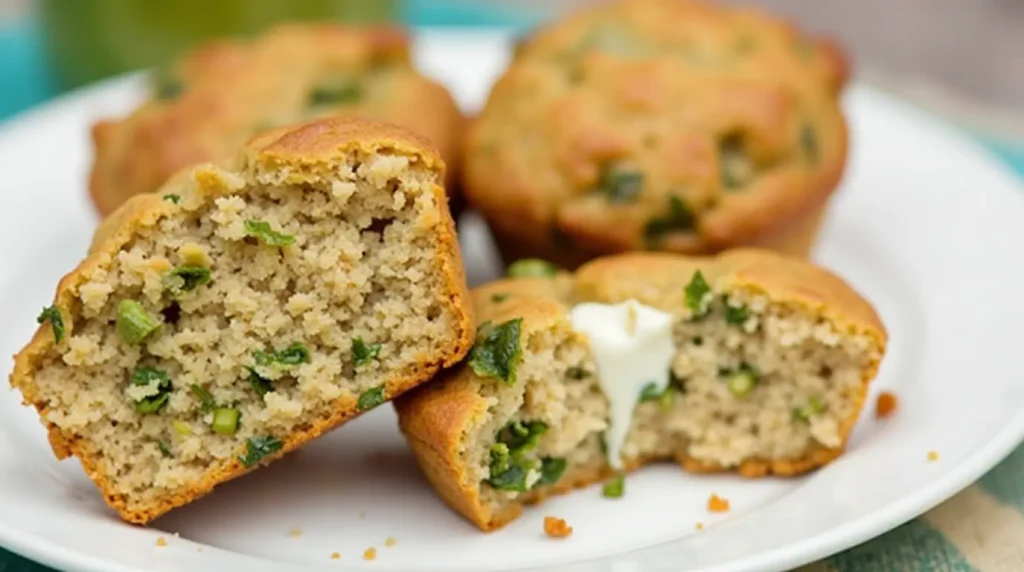
2. Veggie-Packed Mini Muffins

Muffins can be a lifesaver on busy mornings. These mini muffins are packed with veggies, making them a nutrient powerhouse.

Ingredients

  • 1 cup grated zucchini or carrot
  • 1/2 cup whole wheat flour
  • 1/2 teaspoon baking powder
  • 1 egg
  • 1/4 cup plain Greek yogurt
  • A pinch of nutmeg

Instructions

  1. Preheat your oven to 350°F (175°C).
  2. Mix the grated veggies, flour, and baking powder in a bowl.
  3. Add the egg, yogurt, and nutmeg, stirring until combined.
  4. Spoon the mixture into a greased mini muffin tray.
  5. Bake for 12–15 minutes, or until golden brown.
Close-up of veggie-packed mini muffins on a white plate, one split open with a pat of melting butter.

Why It’s Great?

These muffins are soft, flavorful, and freezer-friendly. Plus, sneaking in veggies has never been easier!

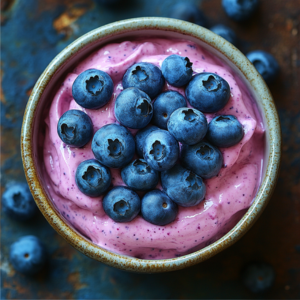
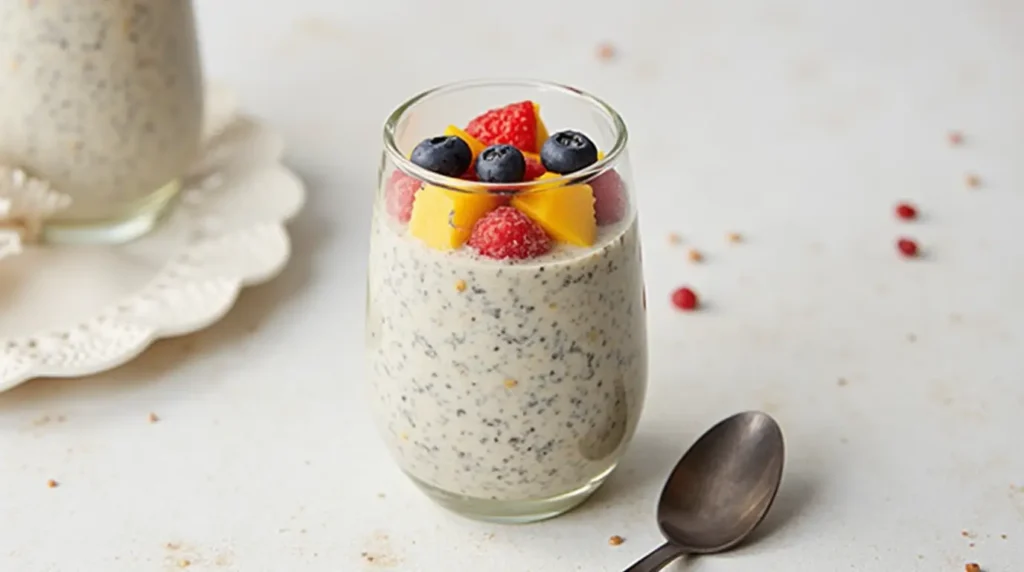
3. Overnight Chia Pudding

Chia pudding is a lifesaver for those mornings when you’re running empty.

Ingredients:

  • 2 tablespoons of chia seeds
  • 1/2 cup of unsweetened coconut milk
  • 1 teaspoon of mashed fruit (like mango or berries)

Instructions:

  1. Mix all ingredients in a small container.
  2. Refrigerate overnight.
  3. Serve with a sprinkle of fruit for extra color and flavor.
A glass of creamy overnight chia pudding topped with fresh blueberries, raspberries, and mango chunks, served with a spoon on a white surface.

Why it’s fantastic?

Chia seeds are packed with omega-3s, perfect for growing brains!

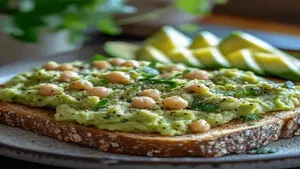
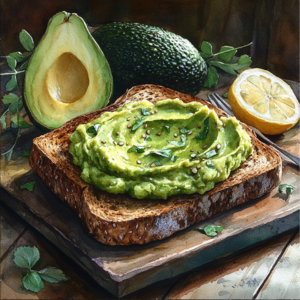
4. Avocado Toast Soldiers

Avocado toast isn’t just for Instagram foodies. It’s also a fantastic BLW breakfast option.

Ingredients

  • 1 slice of whole-grain bread
  • 1/4 ripe avocado

Instructions

  1. Lightly toast the bread and cut it into finger-sized strips.
  2. Mash the avocado and spread it onto the toast soldiers.
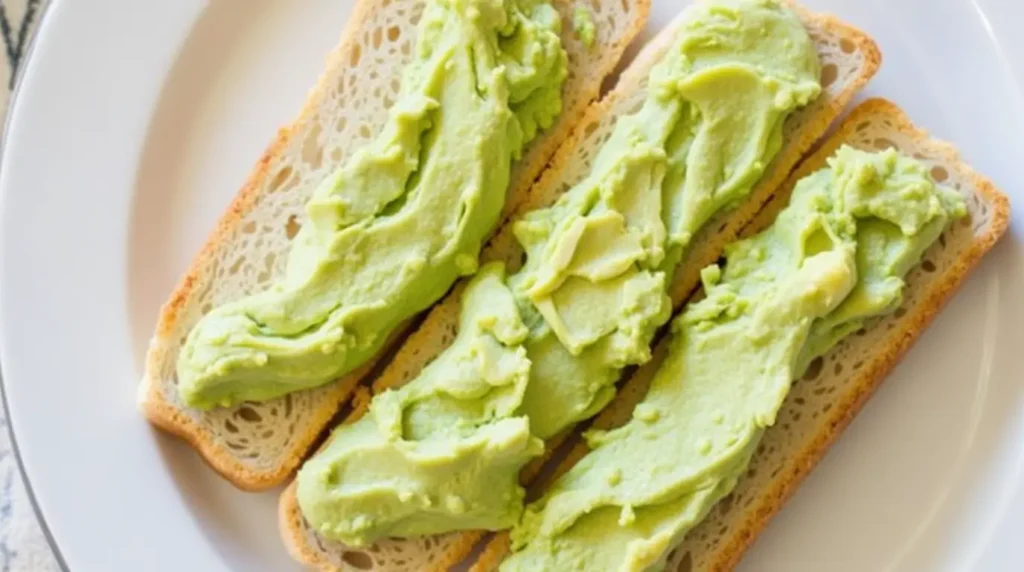
Three slices of bread topped with creamy mashed avocado, served on a white plate.

Why It’s Great?

Avocado is a superfood loaded with healthy fats. The toast provides a chewy texture that’s great for gum development.

FAQs

Can I use butter or salt in BLW recipes?

Avoid adding salt to your baby’s food, as their kidneys can’t process it yet. A little unsalted butter is okay in moderation.

What if my baby gags?

Even the all-powerful Pointing has no control about the blind texts it is an almost unorthographic life One day however a small line

How do I store leftover BLW breakfasts?

Most of these recipes can be refrigerated for 2-3 days or frozen for up to a month. Always check for spoilage before serving.

Here are some helpful suggestions to achieve your goals:

  • Let them lead: Allow your baby to explore the food and eat at their own pace.
  • Mix it up: Rotate recipes to keep mealtimes exciting.
  • Be patient: BLW is messy but worth it. Keep a bib and a good sense of humor handy!
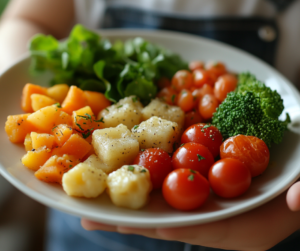
  • Serve manageable portions: Keep the pieces soft and small for easy handling.
  • Monitor allergies: Introduce one new food at a time to spot any reactions.

Conclusion

Baby-led weaning breakfasts don’t have to be complicated or time-consuming. With these easy and nutritious recipes, you can kickstart your mornings with a smile, and so can your baby! From fluffy banana pancakes to creamy avocado toast, the possibilities are endless. Give these a try, and watch your little one fall in love with the joy of self-feeding. Happy breakfasting!

Share your experience!

Baby-Led Weaning Pros and Cons: A Comprehensive Guide

Baby exploring self-feeding during baby-led weaning, showcasing curiosity and motor skill development.

Baby-led weaning (BLW) is an approach to introducing solid foods where babies feed themselves from the very beginning, unlike traditional weaning, which often involves spoon-feeding purees. BLW allows infants to explore whole foods at their own pace by providing appropriately sized portions of family meals. This method empowers babies to control how much they eat and encourages independence. As with any parenting decision, there are advantages and disadvantages. This comprehensive guide will explore the Baby-Led Weaning Pros and Cons, helping parents make an informed choice for their child’s nutritional journey.

Promotes Fine Motor Skills Development

One of the standout advantages of baby-led weaning is its role in enhancing fine motor skills. Babies grasp, pick up, and maneuver foods of various shapes and textures, strengthening their pincer grip and hand-eye coordination. Over time, these skills translate to more precise movements, aiding overall development.

By exposing babies to a wide range of textures, colors, and flavors, baby-led weaning fosters adventurous eaters. Research suggests that early exposure to diverse foods can reduce picky eating behaviors and instill a lifelong preference for balanced diets.

Simplifies Meal Preparation for Families

For parents, baby-led weaning offers the practical benefit of preparing one meal for the whole family. Instead of cooking separate purees, caregivers can adapt family recipes by modifying seasonings or cutting foods into baby-friendly sizes, saving time and effort.

Potential Drawbacks and Challenges of Baby-Led Weaning

A baby attempting to eat a piece of fruit independently during baby-led weaning, highlighting possible challenges such as food size and gagging.

Risk of Choking: Myths and Realities

One of the most common concerns about BLW is the potential choking hazard.

Monitoring babies during mealtime and offering age-appropriate foods is crucial.

Research indicates that BLW does not increase choking risks compared to traditional methods.

Proper education and preparation alleviate much of this fear.

Mess Management: What to Expect

It’s no secret that baby-led weaning can be messy. As babies explore and experiment with food, spills, and smears are inevitable. However, investing in high-quality bibs, easy-to-clean surfaces, and patience can help manage the chaos.

Nutritional Gaps: Ensuring Balance in Baby’s Diet

Without careful planning, there’s a risk of nutrient deficiencies, especially for iron, zinc, and other essential vitamins. Parents should prioritize iron-rich foods like soft-cooked meats, lentils, and fortified cereals to meet their baby’s nutritional needs.

Baby-Led Weaning vs Traditional Weaning

Traditional weaning relies on spoon-feeding purees, gradually transitioning to solids. Baby-led weaning skips purees entirely, allowing babies to engage directly with solid foods. Both methods have their merits, and combining elements can offer a balanced approach tailored to individual baby needs.

When to Start Baby-Led Weaning? Signs of Readiness

The ideal time to begin BLW is around six months, coinciding with a baby’s developmental milestones. Signs of readiness include:

  • Sitting up independently without support.
  • Demonstrating good head and neck control.
  • Showing interest in family meals and reaching for food.
  • Loss of the tongue-thrust reflex, which pushes food out of the mouth.

Best Practices for Successful Baby-Led Weaning

A smiling baby enjoying a soft carrot stick as part of baby-led weaning, highlighting effective self-feeding practices.

Introducing Solid Foods Safely

Safety is paramount during baby-led weaning. Follow these guidelines to minimize risks:

  • Cut foods into appropriate sizes: stick-shaped pieces for easy grasping.
  • Avoid hard, round foods like whole grapes or nuts.
  • Always supervise your baby during meals.

Introduce nutrient-dense foods to support growth and development.

Excellent options include:

  • Steamed vegetables (carrots, broccoli, sweet potatoes)
  • Soft fruits (banana, avocado, ripe pears)
  • Protein sources (shredded chicken, tofu, scrambled eggs)

Common Myths About Baby-Led Weaning Debunked

First Myth: Babies Will Choke More Often with BLW

With proper preparation and supervision, BLW is no more dangerous than traditional weaning. Offering age-appropriate foods ensures safety.

Myth 2: BLW Leads to Nutritional Deficiencies

A well-planned baby-led weaning diet can provide all the necessary nutrients. Incorporating iron-rich and varied foods is key.

Myth 3: BLW Is Too Messy to Be Practical

While messiness is a reality, it’s manageable with the right tools and strategies.

The Pros of Baby-Led Weaning

Encourages Independence and Motor Skills

One of the most celebrated benefits of BLW is the opportunity it provides for infants to develop fine motor skills. Picking up pieces of food enhances hand-eye coordination, grip strength, and dexterity. Additionally, allowing babies to feed themselves fosters a sense of independence and self-confidence as they learn to control their eating.

Promotes Healthy Eating Habits

BLW introduces babies to a wide variety of textures and flavors early on. By participating in family meals, infants become accustomed to eating the same nutritious foods as the rest of the household. Over time, this approach can lead to less picky eating and a willingness to try new foods. Furthermore, it encourages babies to listen to their natural hunger and fullness cues, which may reduce the risk of overeating in the future.

Simplifies Mealtime Preparation

With BLW, preparing separate purees or buying commercial baby food is unnecessary. Families can offer suitable portions of their regular meals, saving time and money. This simplicity is especially beneficial for busy parents.

Supports Social Interaction

When babies participate in family meals, they observe and mimic positive eating behaviors. This inclusion fosters social interaction, making mealtimes more enjoyable and less stressful. Babies who experience BLW often become more comfortable eating in various settings, including restaurants and social gatherings.

Facilitates Long-Term Health Benefits

Research suggests that babies introduced to various foods early may have a lower risk of developing food allergies. BLW also encourages the consumption of whole, minimally processed foods, which can contribute to better nutrition and overall health as children grow.


The Cons of Baby-Led Weaning

Potential for Choking

One of the primary concerns with BLW is the risk of choking. While babies have a natural gag reflex to help prevent choking, it’s essential to offer foods with appropriate size, texture, and shape. Parents and caregivers must be vigilant and educate themselves on choking hazards to ensure safe feeding practices.

Messy Mealtimes

BLW can be a messy process. Babies exploring food with their hands often spill, smear, and drop food on the floor. This may require extra cleaning and patience from parents. However, some families view this as a natural part of the learning process.

Uncertain Nutritional Intake

During the early stages of BLW, babies may play with food more than they eat it. This can lead to concerns about whether they are consuming enough nutrients, particularly iron and other essential vitamins. Parents must ensure that the offered foods are nutrient-dense and monitor their baby’s overall growth and development.

Requires Parental Supervision

BLW demands constant supervision during mealtimes. Parents must be attentive to ensure their baby is eating safely and not putting themselves at risk of choking. This level of vigilance can be challenging for busy or multitasking caregivers.

May Not Work for All Babies

Some babies may struggle with the concept of self-feeding or may have developmental delays that make BLW less suitable. Infants with specific medical conditions or feeding challenges might also require alternative approaches.

FAQs

Can I combine baby-led weaning with traditional weaning?

Yes! Many parents adopt a hybrid approach, offering finger foods alongside spoon-fed purees.

What if my baby doesn’t eat much at first?

This is normal. Babies explore and play with food initially. Nutritional needs are still primarily met through breast milk or formula.

How can I ensure my baby gets enough iron?

Include iron-rich foods like soft meats, eggs, lentils, and fortified cereals in their diet.

Is baby-led weaning suitable for all babies?

Most babies can thrive with BLW, but consult a pediatrician if your baby has developmental delays or specific medical concerns.

How do I handle family meals with BLW?

Adapt your cooking by reducing salt and spices. Offer baby-friendly portions of family dishes.

Conclusion: Should You Choose BLW for Your Baby?

Baby-led weaning offers a dynamic, engaging, and developmental approach to introducing solid foods.

While it comes with challenges like messiness and planning, the benefits of enhanced motor skills, healthier eating habits, and family meal integration are undeniable.

By understanding its pros and cons and following best practices, you can create a safe and enjoyable feeding journey tailored to your baby’s needs.

Take the time to observe your baby’s readiness, introduce various nutrient-dense foods, and enjoy this exciting milestone together.

With patience and preparation, baby-led weaning can become a rewarding experience for the entire family.

Share your experience with us!

BABY LED WEANING RECIPES

A hearty vegetable stew featuring chunks of sweet potato, carrots, and tomatoes, garnished with fresh basil, perfect for baby-led weaning.

Introduction

Baby-led weaning (BLW) is an exciting approach to introducing solid foods that puts your child in control of their eating journey. Instead of relying solely on spoon-fed purees, BLW encourages babies to explore finger foods independently, allowing them to experience different textures, flavors, and smells. Not only does this method promote healthy eating habits, but it also helps develop fine motor skills and self-feeding confidence early on. In this blog post, we’ll share simple, nutritious, and baby-friendly recipes designed to make the transition to solids fun and stress-free for you and your little one.

Baby-led weaning is a method where babies self-feed solid foods instead of being spoon-fed purees. This approach encourages independence, fine motor skills, and a healthy relationship with food from the outset.

Benefits of Baby-Led Weaning

  • Enhanced Motor Development: Grasping and chewing improve coordination.
  • Dietary Variety: Exposure to different foods may reduce picky eating.
  • Family Mealtime Integration: Babies can partake in family meals, fostering social engagement.

Signs Your Baby Is Ready

Before diving into BLW, ensure your baby:

  • Is around 6 months old.
  • Can sit up with minimal assistance.
  • Has good head and neck control.
  • Exhibits interest in food during mealtimes.
  • Has lost the tongue-thrust reflex that pushes food out of the mouth.

Always consult with your pediatrician before beginning BLW to confirm your baby is developmentally ready.

Safety Tips for Baby-Led Weaning

  • Supervise at All Times: Always stay close to your baby during meals to monitor for choking hazards.
  • Prepare Appropriate Sizes: Cut foods into sizes that are easy for your baby to grasp and manage.
  • Avoid Choking Hazards: Clear hard foods, whole nuts, and foods cut into rounds.
  • Introduce Allergens Carefully: Introduce common allergens one at a time and observe for any reactions.

To make the BLW journey smoother, consider having:

  • A sturdy high chair with proper support.
  • Easy-to-grip utensils designed for little hands.
  • Bibs and mats to manage the inevitable mess.

Soft Vegetables

  • Steamed Broccoli Florets: Softened broccoli provides essential nutrients and a tree-like shape that’s easy for babies to hold.
  • Roasted Sweet Potato Wedges: Baked or steamed until soft, sweet potatoes are nutritious and naturally sweet.

Ripe Fruits

  • Banana Halves: Cut bananas into manageable pieces; their soft texture makes them ideal for beginners.
  • Avocado Slices: Rich in healthy fats, avocados can be served ripe and sliced into thick pieces for easy gripping.

Protein Sources

  • Soft-Cooked Scrambled Eggs: Ensure they’re fully cooked for safety.
  • Shredded Chicken: Tender pieces that are easy to handle.
  • Oatmeal Fingers: Cook oats, allow them to cool, and slice into finger-sized pieces for a wholesome snack.

Banana Pancake Bites

A stack of golden banana pancake bites drizzled with honey, served on a ceramic plate, showcasing a fluffy and moist texture.

Ingredients:

  • 1 ripe banana
  • 1 egg
  • 2 tablespoons of whole wheat flour

Instructions:

  1. Mash the banana in a bowl.
  2. Add the egg and flour; mix until combined.
  3. Pour small dollops onto a preheated non-stick pan.
  4. Cook until bubbles form, then flip and cook through.

Spinach and Cheese Omelette Strips

Golden Spinach and Cheese Omelette Strips served on a rustic plate, perfect for baby-led weaning.

Ingredients:

  • 1 egg
  • Handful of finely chopped spinach
  • 2 tablespoons of grated cheese

Instructions:

  1. Whisk the egg in a bowl.
  2. Stir in spinach and cheese.
  3. Pour into a heated non-stick pan.
  4. Cook until set, then cut into finger-sized strips.

Avocado and Chickpea Mash on Toast

Whole grain toast topped with creamy avocado and chickpea mash, garnished with herbs and served alongside sliced avocado.

Ingredients:

  • 1/2 ripe avocado
  • 1/4 cup of cooked chickpeas
  • Whole grain bread slice

Instructions:

  1. Mash avocado and chickpeas together.
  2. Spread onto a lightly toasted bread slice.
  3. Cut into manageable pieces for your baby.

Lentil and Sweet Potato Patties

Golden-brown lentil and sweet potato patties stacked on a plate, garnished with fresh herbs, showcasing a healthy baby-friendly meal.

Ingredients:

  • 1 cup of cooked lentils
  • One cooked sweet potato, mashed
  • 1/4 cup of breadcrumbs

Instructions:

  1. Combine lentils, sweet potato, and breadcrumbs.
  2. Form into small patties.
  3. Pan-fry on medium heat until golden on both sides.

Snack Time: Healthy Nibbles

Yogurt and Fruit Dip

A vibrant bowl of yogurt swirled with berry puree, topped with fresh raspberries and blueberries, surrounded by fruit slices on a colorful background.

Ingredients:

  • 1/2 cup of full-fat plain yogurt
  • Mashed berries or fruit puree

Instructions:

  1. Mix yogurt with mashed berries.
  2. Serve as a dip with soft fruit slices or on its own.

Oatmeal Fingers

A bowl filled with golden oatmeal fingers resting on a rustic wooden surface, perfect for baby-led weaning snacks.

Ingredients:

  • 1 cup of oats
  • One cup of milk or milk alternative
  • 1/2 teaspoon of cinnamon

Instructions:

  1. Combine all ingredients in a saucepan.
  2. Cook on low heat until thickened.
  3. Pour into a shallow dish and let it set.
  4. Once cooled, cut into finger-sized pieces.

FAQs

When should I start baby-led weaning?

Most babies are ready for BLW around 6 months of age, but it's essential to look for signs of readiness and consult with your pediatrician.

How do I know if my baby is getting enough nutrients?

Continue offering breast milk or formula as the primary source of nutrition while introducing solids. Over time, your baby will consume more solid foods and obtain necessary nutrients from them.

What if my baby gags during BLW?

Gagging is a natural reflex as babies learn to manage solid foods. It's different from choking and usually resolves on its own. However, it's crucial to know the difference and be prepared to act if choking occurs.

Can I combine purees with baby-led weaning?

Yes, a mixed approach can be effective. Offering purees alongside finger foods allows babies to experience different textures and practice self-feeding.

How do I handle the mess during BLW?

Messiness is part of the learning process. Using bibs, placing a mat under the high chair, and embracing the mess can make the experience more enjoyable for both you and your baby.

Conclusion

Baby-led weaning is more than just a feeding method; it’s a journey of discovery for both you and your baby. Letting them take charge fosters independence, builds confidence, and creates lifelong healthy habits. 

Welcome to your Reviews

A Parent’s Guide to Weaning Finger Foods

Happy baby reaching for a colorful variety of weaning finger foods on a table, with a smiling mother in the background.

Introduction

Weaning is an exciting milestone for parents and babies alike. It’s that magical phase where your little one transitions from milk to solids, exploring a whole new world of tastes and textures. But let’s be real – it can also be a little daunting. What foods should you start with? How do you make sure they’re safe, tasty, and nutritious? Enter: weaning finger foods! These bite-sized wonders not only make mealtime a blast but also help babies develop crucial motor skills. Ready to dive in? Let’s make this journey finger-lickin’ good!

This guide is packed with practical tips, creative ideas, and answers to common questions about weaning finger foods. So, let’s dive in and make this adventure a breeze!

Weaning finger foods are small, soft, and easy-to-handle foods that babies can grasp and feed themselves. Think of them as your baby’s first step toward independent eating. These foods should be nutritious, easy to chew (even without teeth!), and free from choking hazards.

Why Are They Important?

  • Encourage Self-Feeding: Babies love to explore, and self-feeding fosters independence and coordination.
  • Develop Motor Skills: Grabbing, holding, and munching help fine-tune those tiny fingers.
  • Expose to Varied Textures: Early exposure to different textures can prevent picky eating down the road.
  • Make Mealtimes Fun: Let’s face it, watching your baby discover a slice of avocado is pure entertainment!

When to Begin?

You’re probably wondering, “When’s the right time to introduce finger foods?” The sweet spot is usually around 6-8 months. By this time, most babies have developed the hand-eye coordination to grab food and bring it to their mouths. Look for these signs:

  • Sitting up unsupported
  • Showing interest in your food
  • Losing the tongue-thrust reflex (so food doesn’t just pop right out)

How to Introduce Finger Foods?

Start small. Offer soft, easy-to-hold foods in manageable sizes. Remember, babies don’t need teeth to handle finger foods since their gums are surprisingly strong!

Some tips:

  • Cut foods into strips or small chunks.
  • Make sure everything is soft enough to squish between your fingers.
  • Avoid choking hazards like whole grapes, nuts, and hard veggies.

Pro Tip

Start slow! Introduce one new food at a time and watch for any allergic reactions.

Fruits and Veggies

These are a no-brainer. They’re natural, nutrient-packed, and easy to prepare. Here are some winners:

  • Banana: Soft and easy to mash in the mouth.
  • Avocado: Creamy and rich in healthy fats.
  • Sweet Potato: Roast into finger-sized strips for a tasty treat.
  • Carrot Sticks: Steam or boil until super soft.
  • Cucumber: Serve chilled for teething relief.

Proteins

Who says finger foods can’t be filling? These protein-packed options are perfect:

  • Boiled Eggs: Slice into wedges for easy handling.
  • Chicken Strips: Cook until tender and shred into manageable pieces.
  • Tofu Cubes: Soft, squishy, and baby-approved.

Grains and Carbs

Carbs are energy powerhouses. Include these in your rotation:

  • Soft Pasta: Try penne or fusilli for easy gripping.
  • Rice Cakes: Opt for unsalted varieties.
  • Wholegrain Bread Fingers: Toast lightly for added texture.

Dairy

Introduce small amounts of dairy once your baby is ready:

  • Cheese Sticks: Mild options like mozzarella work best.
  • Yogurt Dips: Pair with soft veggie sticks.

Top 10 Weaning Finger Foods

Ready to fill that tiny plate? Here are some crowd-pleasers to kick off your weaning journey:

  1. Avocado Slices: Creamy, nutritious, and easy to hold.
  2. Banana Strips: Nature’s perfect snack, soft and sweet.
  3. Steamed Carrot Sticks: Packed with vitamins and easy to gum.
  4. Cucumber Spears: Great for teething babies.
  5. Sweet Potato Wedges: Roast them for a naturally sweet treat.
  6. Scrambled Eggs: Soft, fluffy, and full of protein.
  7. Cheese Sticks: Choose mild varieties and cut into easy-to-hold shapes.
  8. Pancakes: Make mini ones using oats or whole wheat flour.
  9. Soft-Cooked Pasta: Penne or fusilli are perfect for tiny hands.
  10. Blueberries: Squish them slightly for safety and watch them disappear!

Tips for Preparing Weaning Finger Foods

  • Size Matters: Cut foods into strips or chunks that are easy for little hands to grab.
  • Texture is Key: Foods should be soft enough to squish between your fingers.
  • Avoid Salt and Sugar: Babies’ kidneys aren’t ready for excess salt, and sugar adds unnecessary calories.
  • Go for Variety: Mix it up to keep things exciting!

Safety First: Avoid These Foods

  • Whole Nuts: Choking hazard.
  • Hard Raw Veggies: Always cook until soft.
  • Honey: Risk of botulism in babies under 1 year.
  • Large Chunks of Meat: Always shred or cut into small, soft pieces.
  • Grapes and Cherry Tomatoes: Slice lengthwise to avoid choking.

Sweet Potato Fries:

  1. Peel and cut sweet potatoes into finger-sized strips.
  2. Toss with a little olive oil.
  3. Bake at 400°F (200°C) for 20-25 minutes, flipping halfway through.
  4. Cool before serving.
Golden-brown sweet potato fries garnished with herbs, served with a side of dipping sauce and fresh basil leaves.

Banana Pancakes:

  1. Mash one ripe banana.
  2. Mix with one egg and a sprinkle of cinnamon.
  3. Cook small dollops in a non-stick pan over low heat.
  4. Let cool and serve.
A stack of golden banana pancakes topped with fresh banana slices, drizzled with syrup, and garnished with mint leaves, with a warm, rustic background.

Avocado Toast:

  1. Lightly toast a slice of wholegrain bread.
  2. Mash a ripe avocado and spread it on top.
  3. Cut into baby-friendly strips.
Wholegrain toast topped with creamy mashed avocado, garnished with seeds, with fresh avocado and lemon in the background

Baby-Friendly Veggie Fritters:

Ingredients:

  • 1 small zucchini, grated
  • 1 small carrot, grated
  • 2 tablespoons flour (or oat flour)
  • 1 egg

Instructions:

  1. Mix all ingredients in a bowl.
  2. Heat a non-stick pan and drop spoonfuls of the mixture onto it.
  3. Cook for 2-3 minutes per side until golden.
  4. Let them cool before serving.

Mini Fruit Muffins:

Stack of golden-brown baby-friendly veggie fritters made with zucchini and carrots, placed on a wooden cutting board with fresh carrots and herbs in the background.

Ingredients:

  • 1 ripe banana, mashed
  • ½ cup unsweetened applesauce
  • ¾ cup whole wheat flour
  • ½ teaspoon baking powder

Instructions:

  1. Preheat oven to 350°F (175°C).
  2. Combine all ingredients in a bowl.
  3. Scoop batter into a mini muffin tin.
  4. Bake for 12-15 minutes.
Mini fruit muffins topped with fresh raspberries, blueberries, and mint leaves, placed on a rustic wooden board with scattered berries around.

Tips for a Smooth Weaning Journey

  • Keep It Simple: Don’t overthink it. Start with one or two foods and build from there.
  • Be Patient: Babies may take time to warm up to new textures.
  • Embrace the Mess: It’s all part of the process! Use a bib and a mat to make cleanup easier.
  • Model Good Eating Habits: Eat together as a family to encourage your baby to try new things.
  • Stay Positive: Celebrate small wins and don’t stress over setbacks.

FAQs

Can I give finger foods if my baby doesn’t have teeth?

Absolutely! Babies use their gums to mash soft foods.

Can finger foods replace purees entirely?

Yes, if you choose. Some parents skip purees altogether and opt for baby-led weaning, which focuses entirely on finger foods.

What’s the best way to prepare finger foods?

Steam, bake, or boil foods to ensure they’re soft enough for your baby to handle safely.

How do I know if a food is safe?

Test it yourself: If you can squish it easily between your fingers, it’s likely safe.

What if my baby gags?

Gagging is a natural reflex and part of learning to eat. Stay calm and monitor your baby closely.

How often should I offer finger foods?

Start with one meal per day and gradually increase as your baby gets the hang of it.

How do I know if my baby is eating enough?

At this stage, solids are more about exploration. Breastmilk or formula will still provide the bulk of their nutrition.

Wrapping It Up

Weaning with finger foods is a fantastic way to introduce your baby to the joys of eating. It’s not just about nourishment—it’s about discovery, independence, and connection. By starting with simple, safe options and gradually expanding their palate, you’re setting your little one up for a lifetime of healthy habits. So, roll up your sleeves, embrace the mess, and enjoy this exciting milestone together!

Weekly Meal Prep for Organic Baby Food

A variety of organic baby food containers and jars neatly arranged on a countertop as part of a weekly meal prep.

Life with a baby is an adventure, but it’s also a juggling act. Between diaper changes, nap schedules, and those adorable baby giggles, finding time to whip up nutritious meals can feel like climbing Mount Everest. That’s where Weekly Meal Prep for Organic Baby Food comes to the rescue! 

It’s All About the Nutrients

Organic baby foods are free from synthetic pesticides, genetically modified organisms (GMOs), and artificial additives. When you go organic, you ensure your little one gets the purest nutrients without unnecessary chemicals.

Taste That’s Out of This World

Let’s be honest: fresh, organic fruits and veggies just taste better. Babies are developing their taste buds, and giving them the good stuff early sets the tone for a lifetime of healthy eating habits.

Supporting the Planet

When you choose organic, you’re not just nourishing your baby but also supporting sustainable farming practices. It’s a win-win for your family and Mother Earth!

Meal prepping is a lifesaver for busy parents. Here are the top reasons to adopt this method:

  • Time Efficiency: Spend one day prepping instead of cooking daily.
  • Cost Savings: Buying ingredients in bulk lowers expenses.
  • Consistency: Maintain a steady supply of healthy meals tailored to your baby’s needs.
  • Stress Reduction: Eliminate the daily scramble of meal planning and preparation.

Gather Your Gear!!!

Before you roll up your sleeves, make sure you have the right tools:

Stock Up on Staples!!!

Here are some organic staples to keep handy:

Fresh produce neatly organized in wooden boxes, featuring carrots, bananas, spinach, peas, apples, and grains, perfect for homemade baby food

Step 1: Plan Your Menu

Start by jotting down a simple menu for the week. Aim for a mix of flavors and textures to keep your baby’s meals exciting. For example:

Also, create a balanced menu featuring a variety of fruits, vegetables, grains, and proteins. Consider your baby’s age and preferences when selecting recipes. Examples include:

  • For 6-8 Months: Single-ingredient purees (e.g., carrot, apple, or sweet potato).
  • For 8-10 Months: Blended options (e.g., broccoli and peas or banana and oatmeal).
  • For 10+ Months: Chunkier textures and finger foods (e.g., steamed veggies or small pasta pieces).

Step 2: Prep in Batches

Set aside 1-2 hours for meal prep. Wash, peel, and chop all your fruits and veggies before cooking. Trust me, batching is a lifesaver!

Step 3: Cook and Blend

Steam or bake your ingredients until they’re tender. Then, toss them in a blender or food processor. For older babies, you can leave some textures chunkier.

Step 4: Portion and Store

Spoon the purees into freezer-safe containers. Label them with the name and date so you don’t mix up apple puree with carrot mash. Store them in the freezer for up to a month or in the fridge for up to 3 days.

Common Mistakes to Avoid

Steer clear of these pitfalls:

  • Overprepping: Avoid preparing too much to prevent waste.
  • Skipping Labels: Always label containers to track freshness.
  • Forgetting Nutritional Balance: Ensure meals include essential nutrients like iron, calcium, and healthy fats.

Sweet Potato and Carrot Mash

. Ingredients: 1 sweet potato, 2 carrots

. Instructions:

  1. Peel and chop the veggies.
  2. Steam until soft.
  3. Blend with a splash of water until smooth.

Apple and Spinach Puree

. Ingredients: 2 apples, 1 cup spinach

. Instructions:

  1. Core and chop the apples.
  2. Steam apples and spinach together.
  3. Puree until creamy.

Banana and Avocado Blend

. Ingredients: 1 ripe banana, 1/2 avocado

. Instructions:

  1. Mash the banana and avocado together with a fork.
  2. Serve immediately – no cooking required!

Pro for Stress-Free Meal Prepping

FAQs

Can I refreeze baby food once it’s thawed?

Nope! Once thawed, it’s best to use the puree within 24 hours. Refreezing can alter the texture and taste.

How do I know if my baby likes a new food?

Watch for cues like excited expressions or a willingness to open their mouth for more. If they’re not into it, try again in a week.

What’s the best way to thaw frozen purees?

You can thaw them in the fridge overnight or place the container in warm water. Avoid using the microwave, as it can create hot spots.

When can I introduce spices?

At around 8 months, you can start adding mild spices like cinnamon or cumin to broaden their palate.

Wrapping It All Up

Meal prepping organic baby foods for the week isn’t just a time-saver – it’s a game-changer. With a little planning and creativity, you can whip up nutritious meals that your baby will gobble up. Plus, you’ll free up precious moments to enjoy those giggles and snuggles. Happy prepping!

Affordable Organic Baby Meals

Outdoor farmers market with fresh organic produce, including vibrant greens, tomatoes, and peppers, surrounded by shoppers and a scenic mountain backdrop

Introduction to Affordable Organic Baby Meals

Eating organic doesn’t have to empty your wallet. With a bit of savvy shopping and knowing where to look, you can enjoy fresh, organic produce without overspending. Let’s dive into the best spots to Affordable Organic Baby Meals

Farmers Markets: Fresh Finds Every Weekend

1. Why Choose Farmers Markets?

Farmers markets are treasure troves of fresh, local produce. By cutting out the middleman, farmers can offer their goods at competitive prices. Plus, you get to chat directly with the folks who grew your food—how cool is that?

2. Finding Farmers Markets Near You

– Search Online: A quick search for “farmers markets near me” will yield local options.
– Community Boards: Check out local bulletin boards or community centers for schedules.
– Apps: There are handy apps that list farmers markets with organic produce in your area.

3. Tips for Scoring Deals

– Shop Late: Vendors might drop prices as the day winds down.
– Buy in Bulk: Purchasing larger quantities can lead to discounts.
– Seasonal Buys: In-season produce is often cheaper and tastier.

Community Supported Agriculture (CSA): Farm Fresh to Your Door

Person riding a bicycle down a scenic market street carrying a wooden crate filled with fresh vegetables and fruits, symbolizing farm-to-door delivery

1. What’s a CSA?

CSA programs let you subscribe to regular boxes of fresh produce straight from local farms. It’s like having a personal farmer!

2. Benefits of Joining a CSA

– Freshness: Produce is harvested and delivered promptly.
– Support Local Farms: Your subscription helps local agriculture thrive.
– Variety: Enjoy a mix of seasonal fruits and veggies.

3. Finding Affordable CSA Programs

– Local Directories: Websites like LocalHarvest.org list CSA programs near you.
– Farm Visits: Drop by local farms to inquire about CSA memberships.
– Community Recommendations: Ask friends or neighbors for suggestions.

1. Top Picks for Budget-Friendly Deliveries

– Misfits Market: Offers organic produce at up to 40% off grocery store prices.
– Thrive Market: Membership-based service with discounted organic goods.
– Hungry Harvest: Delivers rescued produce, reducing food waste and saving you money.

2. Tips for Online Shopping

– Compare Prices: Check multiple sites to snag the best deals.
– Subscription Discounts: Some services offer reduced rates for regular deliveries.
– Seasonal Boxes: Opting for seasonal produce boxes can be more economical.

Bright and colorful organic produce section in a grocery store, showcasing apples, berries, and other fresh fruits with shoppers browsing the aisles.

1. Supermarkets with Affordable Organic Options

– Aldi: Known for its budget-friendly organic selection.
– Walmart: Offers a range of organic products at reasonable prices.
– Costco: Great for buying organic items in bulk, saving you money in the long run.

2. Shopping Tips

– Store Brands: Many supermarkets have their own organic lines that are cheaper.
– Weekly Flyers: Keep an eye on sales and discounts in store flyers.
– Loyalty Programs: Sign up for rewards programs to access exclusive deals.

Urban Farming and Community Gardens: Grow Your Own

1. Getting Started

– Community Gardens: Join local gardens to grow your own organic produce.
– Workshops: Attend urban farming workshops to learn the ropes.
– Starter Kits: Purchase beginner kits to kickstart your home garden.

2. Benefits

– Cost-Effective: Growing your own food can be cheaper than buying.
– Freshness Guaranteed: Harvest your produce at peak ripeness.
– Sustainable Living: Reduce your carbon footprint by producing locally.

Beautiful urban community garden with raised beds of flowers and vegetables, set against a city skyline at sunset, showcasing urban farming.

FAQs

Q1: How can I find cheap organic produce near me?

A: Explore local farmers markets, join a CSA program, or check out supermarkets like Aldi and Walmart for affordable options.

Q2: Are online organic produce deliveries worth it?

A: Absolutely! Services like Misfits Market and Hungry Harvest offer discounts on organic produce, delivering convenience and savings.

Q3: What are the benefits of joining a CSA program?

A: CSAs provide fresh, seasonal produce, support local farmers, and often offer better prices than retail stores.

Q4: How can I save money on organic produce at grocery stores?

A: Look for store-brand organic products, keep an eye on weekly sales, and consider buying in bulk at stores like Costco.

Q5: Is growing my own organic produce feasible in an urban setting?

A: Definitely! Urban farming initiatives and community gardens make it possible to grow your own food even in city environments.

Conclusion

Eating organic doesn’t mean you have to break the bank. By exploring farmers markets, joining CSA programs, utilizing online delivery services, shopping smart at grocery stores, and even growing your produce, you can enjoy fresh, organic foods without overspending. Happy eating!

Quick organic Baby meals

Introduction

Let’s be real—life can get pretty hectic. Whether you’re juggling work, family, or just trying to find some time to breathe, hitting the kitchen can sometimes feel like climbing a mountain. Luckily, cooking doesn’t have to be a time-consuming chore! Enter the world of **Quick and Easy Organic Meals Under 15 Minutes**. Yep, that’s right. You can whip up delicious, healthy, and organic meals in the blink of an eye. With a little planning and some nifty recipes up your sleeve, you’ll be on the fast track to culinary bliss without breaking a sweat.

So, let’s dive into this world of quick, organic deliciousness that’ll have you feeling like a kitchen magician!

Before we get our hands dirty with some recipes, let’s chat about why quick and easy organic meals are worth your time:

1. Nutritional Powerhouses

Organic ingredients are often fresher and free from chemical pesticides. Therefore, you’re not just eating faster; you’re fueling your body with better nutrients.

2. Time-Saving

We all want to spend less time in the kitchen and more time living our lives. Quick meals let you eat delicious food without sacrificing your schedule.

3. Cost-Effective

Making meals at home, especially when using seasonal organic produce, can save you a pretty penny compared to eating out.

4. Flexibility

You can mix and match ingredients based on what you have in your fridge. This flexibility is key for busy lives!

Quick Organic Pantry Staples to Keep On Hand

Vibrant display of fresh fruits, vegetables, and mason jars filled with organic pantry staples like grains, beans, and spices

Alright, so you’re convinced that cooking quickly and organically is the way to go. But what should you stock up on? Here are some pantry staples to have at your fingertips:

  1. Canned Beans (black beans, chickpeas): A fantastic source of protein that can add heft to any meal.
  2. Quinoa or Brown Rice: Both are quick-cooking grains that are satisfying and nutrient-rich.
  3. Fresh Veggies (spinach, bell peppers, cherry tomatoes): These can be tossed into just about anything!
  4. Nuts and Seeds (almonds, chia seeds): Great for adding crunch and healthy fats.
  5. Healthy Oils (olive oil, coconut oil): Perfect for sautéing or drizzling over dishes.
  6. Herbs and Spices: Fresh or dried, these can transform any meal.

Creative and Quick Organic Meal Ideas

Now, onto the pièce de résistance: the meals! Here’s a collection of scrumptious “Quick and Easy Organic Meals Under 15 Minutes” that you’ll adore.

1. 15-Minute Quinoa Salad

What You’ll need:
– 1 cup cooked quinoa (make ahead and refrigerate)
– 1 cup chopped cherry tomatoes
– One cup cucumber, diced
– 1/4 cup red onion, finely chopped
– A handful of baby spinach
– Olive oil, lemon juice, salt, and pepper to taste

Instructions:
1. Toss the quinoa, tomatoes, cucumber, onion, and spinach in a bowl.
2. Drizzle with olive oil and fresh lemon juice.
3. Season with salt and pepper, mix well, and dig in!

2. Veggie-Packed Egg Wraps

What You’ll need:
– 2 large eggs
– 1/2 cup mixed veggies (whatever you have on hand)
– Whole grain or spinach tortillas
– Salt, pepper, and avocado slices

Instructions:
1. Scramble the eggs in a hot skillet for about 3 minutes.
2. Add your mixed veggies and cook for 2 minutes until tender.
3. Spoon the mixture onto a tortilla, add avocado slices, roll it up, and enjoy!

3. Chickpea and Spinach Stir-fry

What You’ll need:
– 1 can of chickpeas, drained and rinsed
– 2 cups fresh spinach
– 1 tablespoon olive oil
– 1 clove garlic, minced
– A splash of soy sauce (or tamari for gluten-free)

Instructions:
1. Heat the olive oil in a pan and toss in the garlic. Sauté for about 30 seconds.
2. Add the chickpeas and spinach, stir well, and cook for about 5 minutes.
3. Drizzle some soy sauce for flavor, and serve warm.

4. Savory Avocado Toast Deluxe

What You’ll need:
– Whole grain or sourdough bread
– 1 ripe avocado
– Sliced radishes
– Red pepper flakes
– Lemon juice, salt, and pepper

Instructions:
1. Toast your bread to perfection.
2. Mash the avocado with lemon juice, salt, and pepper.
3. Spread it generously on your toast, top with radish slices, and sprinkle red pepper flakes for a kick!

5. Smoothie Bowl Surprise

What You’ll need:
– 1 banana
– 1 cup spinach
– 1/2 cup almond milk (or any milk you prefer)
– Toppings: granola, nuts, seeds, or fresh fruits

Instructions:
1. Blend the banana, spinach, and almond milk until creamy.
2. Pour into a bowl and add your favorite toppings. Dig in with a spoon!

Surreal quinoa salad with vibrant tomatoes, cucumbers, and spinach leaves glowing with freshness, set in a whimsical kitchen with oversized lemons and a dreamy pastel background

FAQ About Quick and Easy Organic Meals

What are some quick meal prep tips?

– Batch cook grains like quinoa or rice at the beginning of the week.
– Chop veggies ahead of time and store them in airtight containers.
– Keep your pantry stocked with quick proteins like canned beans or lentils.

Can I use frozen vegetables?

Absolutely! Frozen veggies are often flash-frozen at their peak freshness, making them a healthy and convenient option for quick meals.

What’s the best way to flavor my quick meals?

Experiment with herbs, spices, and condiments. Fresh herbs, curry powder, garlic, and a splash of lemon juice can elevate any dish in a snap!

Are these meals kid-friendly?

For sure! Many of these recipes are adaptable and can be tailored to suit picky eaters. Get creative with toppings and presentations!

Conclusion

Cooking doesn’t have to take an eternity to be enjoyable or nutritious. With a well-stocked pantry and a few quick recipes, you can easily whip up “Quick and Easy Organic Meals Under 15 Minutes” to satisfy your cravings without stressing over the clock. Remember, cooking at home can be a delightful experience, filled with the joy of experimenting and trying new flavors. So don’t shy away from the kitchen! Embrace the journey, and soon enough, you’ll be cooking up a storm in a flash. Enjoy your meals, savor your health, and never forget—cooking can be just as simple as it is delicious! Happy cooking!

Top Benefits of Organic Ingredients for Babies

Introduction to Top Benefits of Organic Ingredients for Babies

In today’s health-conscious society, infant nutrition choices are more critical than ever. Opting for organic ingredients in your baby’s diet can provide many advantages, from reducing exposure to harmful chemicals to enhancing overall health and development. Let’s dive into Affordable Organic Baby Meals.

Organic ingredients are cultivated without the use of synthetic pesticides, fertilizers, genetically modified organisms (GMOs), or irradiation. This method of farming emphasizes natural processes, biodiversity, and ecological balance, ensuring that the food produced is as close to its natural state as possible.

One of the most significant benefits of choosing organic ingredients for your baby is the reduced exposure to harmful chemicals. Conventional farming often employs synthetic pesticides and fertilizers, residues of which can remain on produce and make their way into the food supply. Infants, with their developing systems, are particularly vulnerable to these chemicals. Studies have shown that organic foods have lower levels of pesticide residues, thereby minimizing potential health risks associated with these substances.

Enhanced Nutritional Profile

Organic foods are often richer in essential nutrients compared to their conventionally grown counterparts. Research indicates that organic produce can contain higher levels of vitamins, minerals, and antioxidants, all of which are crucial for a baby’s growth and development. For instance, organic fruits and vegetables may have increased concentrations of vitamin C, iron, magnesium, and phosphorus, contributing to a more robust nutritional intake for your infant.

Introducing organic ingredients into your baby’s diet may also reduce the risk of developing allergies and sensitivities. The absence of artificial additives, preservatives, and GMOs (Genetically Modified Organism) in organic foods means that infants are less likely to encounter substances that could trigger allergic reactions. Moreover, organic dairy and meat products are free from antibiotics and growth hormones, which have been linked to allergic responses in some children.

“”Public opinion on GMOs varies globally, influencing labeling regulations. In the United States, the USDA requires foods containing GMO ingredients to be labeled as “bioengineered.” In the European Union, foods with more than 0.9% GMO content must be labeled accordingly“”

Supporting Immune System Development

A strong immune system is vital for infants as they grow and encounter new environments. The higher antioxidant levels found in organic foods can support immune function, helping to protect your baby against illnesses. Antioxidants combat oxidative stress in the body, which, if left unchecked, can weaken the immune system over time.

Many parents report that organic foods have a more authentic and robust flavor compared to conventionally grown produce. Introducing your baby to these natural tastes early on can encourage a preference for healthy foods as they grow older. Developing a palate for a variety of flavors can lead to healthier eating habits in the long term, reducing the likelihood of picky eating and promoting a balanced diet.

Environmental Benefits

Choosing organic ingredients for your baby also supports environmental sustainability. Organic farming practices are designed to reduce pollution, conserve water, and enhance soil fertility. By opting for organic products, you’re contributing to a farming system that prioritizes ecological balance and the health of our planet, ensuring a better world for your child to grow up in.

While the benefits of organic ingredients are substantial, it's essential to approach this choice thoughtfully:
  • Budget Constraints: Organic products can be more expensive than conventional ones. Prioritize purchasing organic versions of foods that are most susceptible to pesticide residues, often referred to as the “Dirty Dozen,” to make the most of your budget.
  • Availability: Depending on your location, organic options may be limited. Exploring local farmers’ markets or considering home delivery services can expand your access to organic produce.
  • Certification: Look for certified organic labels to ensure the products meet established organic standards. In the United States, the USDA Organic seal is a reliable indicator.

Incorporating Organic Ingredients into Your Baby's Diet

To seamlessly introduce organic ingredients into your baby’s meals, consider the following steps:

  1. Start with Staples: Begin by replacing commonly consumed items with their organic counterparts, such as fruits, vegetables, and grains.
  2. Homemade Baby Food: Preparing baby food at home using organic ingredients allows you to control what goes into your baby’s meals, ensuring freshness and quality.
  3. Gradual Introduction: Introduce new organic foods one at a time and monitor for any adverse reactions, especially if your baby has known food sensitivities.
  4. Educate Yourself: Stay informed about which foods are most beneficial to purchase organic, and seek out reputable sources for your purchases.

FAQs

Q: Are organic baby foods more expensive?

Yes, organic foods can be pricier due to the sustainable farming practices involved. However, many parents find the benefits outweigh the costs!

Q: How do I know if something is truly organic?

Look for the USDA Organic seal when shopping. This ensures the product meets strict organic standards.

Q: Can I feed my baby organic foods if I’m on a budget?

Absolutely! Prioritize buying organic for fruits and veggies with thinner skins, as these tend to absorb more pesticides. You can balance with conventional foods when necessary.

Q: Is there a specific age I should start introducing organic ingredients?

You can start as soon as your baby is ready for solid foods—typically around six months old. Just be sure to introduce one new food at a time!

Conclusion

Opting for organic ingredients in your baby’s diet offers numerous benefits, from reducing exposure to harmful chemicals to providing enhanced nutritional value. While considerations such as cost and availability are important, the potential advantages for your baby’s health and development make organic choices a worthwhile investment. By selecting organic foods, you’re nurturing your child’s well-being and contributing to a more sustainable and healthier planet for future generations.

Best Organic Baby Recipes for Busy Parents

In today’s fast-paced world, providing nutritious meals for your baby can be challenging, especially for busy parents. Ensuring your baby enjoys the benefits of wholesome, organic ingredients is essential for their growth and development. That’s why we’ve curated the best organic baby recipes that are nutrient-packed, quick, and easy to prepare. Let’s explore these delightful Best Organic Baby Recipes for Busy Parents that will keep your baby happy and healthy!

Organic foods are free from synthetic pesticides, chemicals, and genetically modified organisms (GMOs), making them a safer choice for your baby’s sensitive digestive system. They are also rich in natural nutrients, supporting healthy growth while reducing exposure to harmful toxins.

Essential Tips for Preparing Organic Baby Food:

  1. Choose Fresh Ingredients: Always use certified organic produce for optimal nutrition.
  2. Steam or Bake Instead of Boiling: This helps retain vital nutrients.
  3. Invest in Quality Tools: A good blender, food processor, or baby food maker can save time.
  4. Freeze for Convenience: Make large batches and freeze portions for quick meals later.
  5. Introduce New Flavors Gradually: Allow your baby to adjust to different tastes and textures.

1. Sweet Potato and Carrot Puree

Ingredients:
1 medium organic sweet potato
2 organic carrots
Breastmilk, formula, or water (optional)
Instructions:
Peel and chop the sweet potato and carrots into small chunks.
Steam until tender.
Blend into a smooth puree, adding liquid to reach the desired consistency.
This recipe is rich in beta-carotene, promoting healthy vision and immune support.

2. Avocado and Banana Mash

Ingredients:
1/2 ripe organic avocado
1/2 ripe organic banana
Instructions:
Mash the avocado and banana together with a fork until creamy.
Serve immediately to avoid browning.
Packed with healthy fats and potassium, this is a great first food for babies.

3. Organic Apple and Pear Puree

Ingredients:
1 organic apple
1 organic pear
Instructions:
Peel, core, and chop the fruits.
Steam until soft, then puree until smooth.
The natural sweetness makes this a favorite among babies while providing fiber for healthy digestion.

4. Green Bean and Zucchini Blend

Ingredients:
1 cup organic green beans
1 small organic zucchini
Instructions:
Trim and steam the green beans. Slice and steam the zucchini.
Blend together until smooth.
This recipe is a powerhouse of vitamins A and C, essential for your baby’s development.

5. Quinoa and Pumpkin Puree

Ingredients:
1/4 cup organic quinoa
1 cup organic pumpkin puree
Instructions:
Cook quinoa according to package instructions.
Mix with pumpkin puree and blend until creamy.
Quinoa is a complete protein, and pumpkin is packed with antioxidants, making this meal highly nutritious.

Protein-Packed Organic Baby Recipes

6. Chicken and Sweet Potato Mash

Ingredients:
1 small organic chicken breast
1 medium organic sweet potato
Instructions:
Cook the chicken until tender and shred into small pieces.
Steam the sweet potato and blend it with the chicken until smooth.
This recipe is an excellent source of protein and iron for growing babies.

7. Lentil and Spinach Puree

Ingredients:
1/4 cup organic lentils
1/2 cup organic spinach
Instructions:
Cook lentils until soft.
Steam spinach and blend together with the lentils.
Lentils are rich in plant-based protein and iron, while spinach provides essential vitamins.

8. Salmon and Broccoli Mash

Ingredients:
1 small piece of wild-caught organic salmon
1 cup organic broccoli
Instructions:
Bake or steam the salmon.
Steam broccoli until tender. Blend together for a nutrient-dense meal.
This recipe is high in omega-3 fatty acids and calcium, vital for brain and bone development.

Fruity Favorites for Dessert

9. Mango and Coconut Puree

Ingredients:
1/2 cup organic mango
2 tablespoons organic coconut milk
Instructions:
Blend the mango with coconut milk until smooth.
This tropical delight is rich in vitamins and healthy fats.

10. Blueberry Yogurt Blend

Ingredients:
1/4 cup organic blueberries
1/4 cup organic plain yogurt
Instructions:
Blend the blueberries with yogurt until creamy.
Antioxidant-rich blueberries combined with calcium from yogurt make this a healthy treat.

  1. Use Silicone Ice Trays: Freeze portions in trays for easy storage.
  2. Thaw Safely: Defrost frozen baby food in the refrigerator or by steaming.
  3. Serve Warm or Room Temperature: Avoid serving hot food to prevent burns.
  4. Label Containers: Keep track of preparation dates to ensure freshness.

Benefits of Homemade Organic Baby Food

  1. Control Over Ingredients: You know exactly what’s in your baby’s food.
  2. Cost-Effective: Preparing food at home is more economical than purchasing pre-made options.
  3. Freshness Guaranteed: Homemade meals retain their nutritional value when prepared and served fresh.
  4. Customizable Textures: Adjust textures to match your baby’s developmental stage.

FAQs

How do I introduce solid foods to my baby?
Start with single-ingredient purees and wait 3–5 days between introducing new foods to monitor for allergies.

Can I freeze all baby foods?
Yes, most baby foods freeze well. Avoid freezing recipes with dairy or high-water fruits like watermelon.

What’s the ideal texture for baby food?
For younger babies, purees should be smooth. Gradually introduce chunkier textures as your baby grows.

Is organic baby food always necessary?
While not mandatory, organic options reduce exposure to pesticides and are healthier for your baby.

Providing your baby with organic, homemade meals is an act of love that nurtures their health and happiness. With these easy baby food recipes, you can save time while ensuring your little one enjoys the best nutrition. Embrace the joy of creating wholesome meals tailored to your baby’s needs, and watch them thrive daily.

Baby’s Picky Eating Habits

A baby sitting in a high chair, reacting to food with an expression of surprise while holding small vegetable pieces, illustrating picky eating habits.

1. Introduction

Picky eating and sensitivity to textures can create major challenges for children and their families, impacting nutrition and overall well-being. To tackle these issues, it’s important to understand their underlying causes and implement effective strategies to encourage Baby’s Picky Eating Habits.

Baby’s picky eating habits often involve a limited acceptance of certain foods, which may be influenced by taste, appearance, or texture. Texture sensitivities, a specific type of fussy eating, occur when individuals react negatively to particular textures, leading them to avoid those foods. These sensitivities can stem from sensory processing disorders (SPD), where the brain has difficulty processing sensory information, causing individuals to overreact to stimuli like food textures.

3. Identifying the Causes

Several factors contribute to picky eating and texture sensitivities:

  • Sensory Processing Disorders (SPD): Individuals with SPD may find certain textures overwhelming, leading to food aversions. Some individuals may gag when eating foods with certain textures due to sensory overload.
  • Developmental Disorders: Conditions like autism spectrum disorder (ASD) are often associated with heightened sensory sensitivities, including aversions to certain food textures.
  • Medical Conditions: Gastrointestinal issues, oral-motor dysfunction, and food allergies can cause discomfort during eating, leading to avoiding certain foods.
  • Psychological Factors: Negative experiences, such as choking or forced feeding, can create lasting aversions to specific foods or textures.
  1. Gradual Exposure to New Textures: Slowly introducing new textures can help individuals become more comfortable with various foods. Start by incorporating small amounts of the new texture alongside familiar foods, gradually increasing the quantity as acceptance grows.

  2. Involvement in Food Preparation: Encouraging participation in meal preparation can reduce anxiety related to new foods. Handling and preparing foods allows individuals to become familiar with different textures in a non-threatening environment.

  3. Consistent Mealtime Routines: Establishing regular meal and snack times creates a predictable environment, reducing anxiety and improving acceptance of new foods. Consistency helps individuals know what to expect, making them more open to trying new textures.

  4. Positive Reinforcement: Offering praise or small rewards for trying new foods can motivate individuals to expand their diets. Positive reinforcement encourages repeated exposure and acceptance of new textures.

  5. Professional Support: Consulting with occupational therapists, speech therapists, or dietitians can provide tailored strategies to address specific challenges. Professionals can provide interventions like sensory integration therapy to assist individuals in processing various textures more effectively.

  6. Creating a Positive Eating Environment: Ensuring mealtimes are stress-free and enjoyable encourages the exploration of new foods. Avoid pressuring individuals to eat, as this can increase resistance. Instead, provide a selection of different foods and let them choose which ones they would like to try.

  7. Utilizing Food Chaining Techniques: Introduce new foods that are similar in texture or flavor to those already accepted. This method, known as food chaining, helps bridge the gap between familiar and unfamiliar foods, easing the transition to new textures.

  8. Addressing Underlying Medical Issues: Treating medical conditions that contribute to food aversions, such as gastrointestinal discomfort or oral-motor difficulties, is essential. Addressing these issues can alleviate discomfort associated with eating, making individuals more willing to try new foods.

Texture sensitivities can lead to limited diets, potentially causing nutritional deficiencies. Individuals may avoid entire food groups, leading to imbalanced nutrition. Addressing these sensitivities is crucial for promoting a balanced diet and overall health.

6. The Role of Sensory Processing in Eating Behaviors

Sensory processing plays a significant role in eating behaviors. Individuals with sensory sensitivities may have heightened or diminished responses to sensory stimuli, affecting their food preferences and aversions. Understanding these sensory aspects is crucial for developing effective interventions.

7. Implementing Sensory Integration Techniques

Sensory integration therapy can help individuals become more comfortable with various textures. This therapy involves activities that challenge and engage the senses in a controlled, gradual manner, helping individuals process sensory information more effectively.

8. Encouraging Family Involvement

Family support is vital in managing picky eating and texture sensitivities. Involving family members in interventions and maintaining a unified approach can create a supportive environment that encourages positive eating behaviors.

9. Monitoring Progress and Adjusting Strategies

Regularly assess the effectiveness of implemented strategies and make necessary adjustments. Monitoring progress ensures that interventions remain effective and allows for the identification of any new challenges that may arise.

FAQs

1. Why is my baby suddenly refusing foods they used to love?

It’s common for babies to develop food preferences or go through phases of rejecting certain foods. This can be due to teething, sensory changes, or asserting independence. Keep offering a variety of foods without pressure.

2. How can I introduce new foods to my picky eater?

Start by pairing new foods with familiar favorites, offering them in fun shapes, or using dips. Repeated exposure (up to 10-15 times) without forcing your baby to eat increases the chances of acceptance.

3. Should I force my baby to eat if they refuse food?

No, forcing food can lead to negative associations with mealtime. Instead, offer food consistently and let your baby explore at their own pace.

4. When should I be concerned about picky eating?

If your baby consistently refuses multiple food groups, is not gaining weight appropriately, or seems to have difficulty chewing/swallowing, consult your pediatrician for guidance. 💡 Pro Tip: Keep mealtime stress-free, be patient, and celebrate small wins! A positive feeding environment helps babies build healthy eating habits for life.

10. Conclusion

Addressing Baby’s picky eating habits and texture sensitivities requires a multifaceted approach tailored to individual needs. Understanding the underlying causes and implementing targeted strategies can expand dietary variety and improve nutritional intake, enhancing health and quality of life.