Fresh Baby Food Storage

A variety of freshly prepared baby food stored in small containers, showcasing vibrant colors and healthy ingredients.

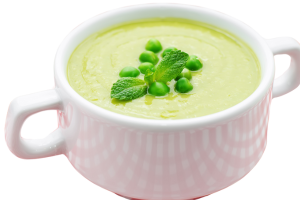
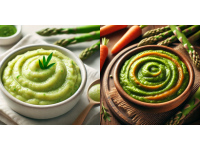
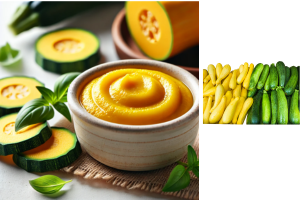
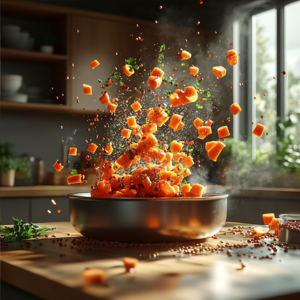
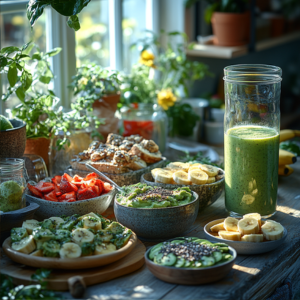
Storing your Fresh Baby Food properly can be a game-changer in ensuring your little one gets the freshest, most nutritious meals possible. By understanding the best methods for refrigerating, freezing, and thawing your creations, you can stay organized, reduce waste, and keep your baby’s meals safe from spoilage. In this blog post, we’ll explore simple yet effective ways to store fresh baby food, which will help you save time, money, and stress while ensuring your growing child always has a healthy meal ready.

Hands holding a container of bright orange baby puree with additional sealed containers on the side, emphasizing safe baby food storage practices.

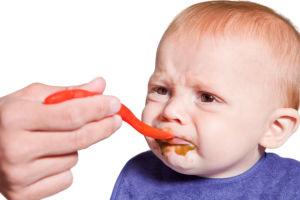
Before you start preparing those delicious baby recipes, let’s talk about the foundation of food safety. Your little one’s developing immune system needs extra protection, so proper storage is crucial. Start by washing your hands thoroughly and ensuring all your storage containers are squeaky clean.

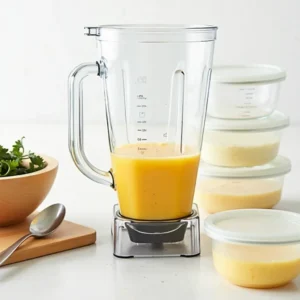
Think of your kitchen as a mini food-prep facility. You’ll want to keep everything sanitized, from your blender to your storage containers. An easy trick is to run storage containers through the dishwasher’s hot cycle before each use.

Remember those moments when you’re not sure if a puree is still good? Trust your instincts! If something smells off or looks different than usual, it’s better to be safe than sorry. Your baby’s tummy will thank you for being cautious.

Temperature control is your best friend when storing homemade baby food. Room temperature is fine for only two hours max. After that, those yummy purees need to find their way to cooler spaces.

Glass containers filled with fresh baby food neatly organized in a refrigerator, demonstrating effective food storage solutions.

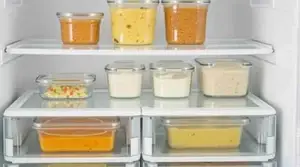
Let’s talk about keeping those baby recipes fresh in your refrigerator. Your fridge is perfect for storing purees you’ll use within the next few days. Think of it as your short-term food storage buddy!

Glass containers are fantastic for fridge storage because they don’t absorb food odors or colors. Plus, you can easily see what’s inside without opening them. 

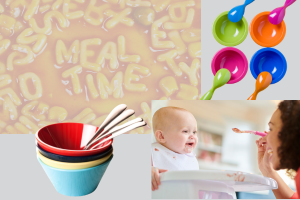
Want to know a cool trick? Label everything with dates using masking tape and a marker. You’ll never have to guess how long that sweet potato puree has been sitting there.

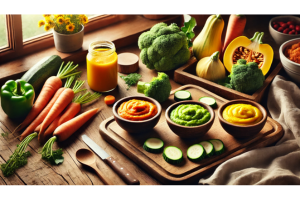
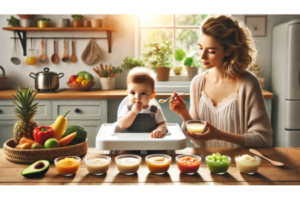
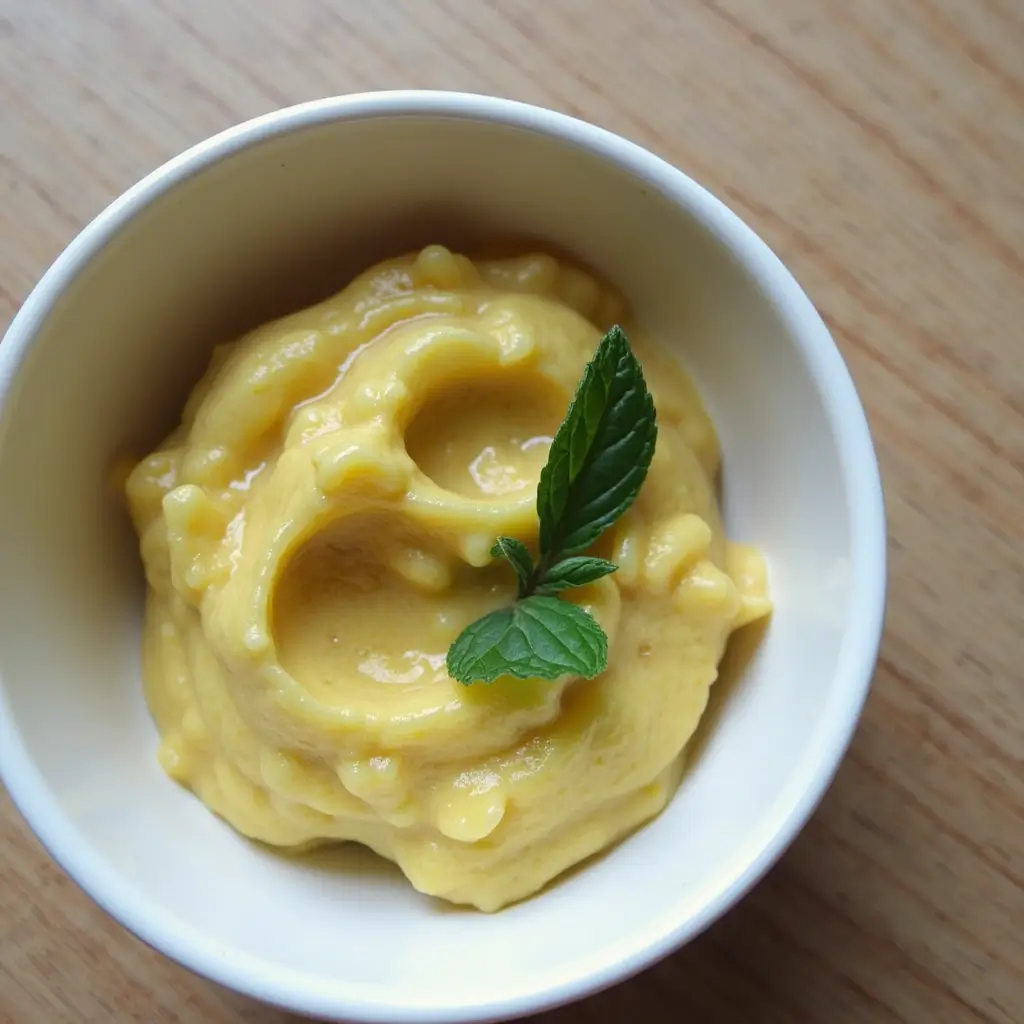
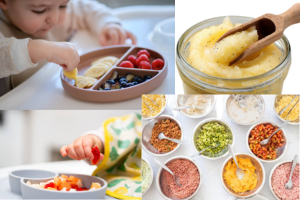
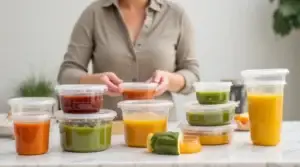
Store your homemade purees in small portions – about 1–2 servings each. This way, you won’t waste food if your little one isn’t hungry. Nobody likes throwing away those carefully prepared meals!

Keep your purees in the main part of the fridge, not the door. The temperature stays more consistent there, keeping your baby’s recipes fresher for longer.

Your refrigerated purees will stay good for about 48 hours. That’s plenty of time to use them up while they’re at their nutritional peak. Always check for any signs of spoilage before serving.

Freezing 101: Your Long-term Storage Strategy

Individual portions of homemade baby food in freezer-safe containers, ready for long-term storage.

This is where the magic happens for busy parents who love making baby recipes in bulk. Your freezer can be your best friend when storing homemade purees.

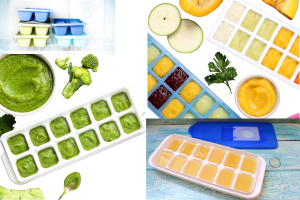
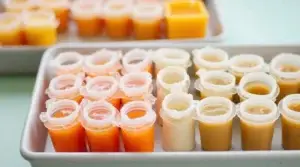
Ice cube trays are perfect for freezing baby food portions. Each cube is about one ounce – just right for tiny tummies! Pop them out once frozen and transfer them to freezer bags.

Speaking of freezer bags, squeeze out as much air as possible before sealing. Less air means less chance of freezer burn, keeping those nutritious purees tasting fresh.

Label everything with contents and dates; you will be so thankful in the future! Include both the date you made it and when it should be used. Organization is key when freezing multiple batches.

Frozen purees can last up to 3 months while maintaining their nutritional value. That’s plenty of time to rotate through your stash of baby recipes. Keep track of what you’ve got to avoid waste.

Consider creating a freezer inventory list. Stick it right on your freezer door to easily track what you have and what needs to be used first. It’s like having your mini food management system!

Smart Thawing Methods: From Freezer to Table

Thawing must be done safely to keep those delicious baby recipes safe and nutritious:

The safest method is overnight thawing in your refrigerator. Pop a few cubes into a container before bedtime, and they’ll be ready for breakfast. It’s like meal prep while you sleep!

In a rush? Place the frozen puree container in a bowl of cold water. This speeds up thawing while keeping everything at a safe temperature. Just remember to change the water every 30 minutes.

Never thaw baby food at room temperature or in hot water. These methods can create warm spots where bacteria love to grow. Keep it cool and safe for your little one.

Once thawed, give the puree a good stir. Sometimes, ingredients can separate during freezing, but a quick mix will bring everything back together. Your baby won’t even know it was frozen!

Use thawed purees within 24 hours for the best quality and safety. This means only thaw what you think your baby will eat in a day. It’s better to thaw more later than waste food!

Pro Tips for Maximum Freshness and Quality

A parent organizing colorful homemade baby food in labeled containers, ensuring maximum freshness and quality.

These insider tips will help you maintain the quality of your delicious baby recipes longer. Every little trick helps when you’re preparing food for your little one!

Consider investing in a vacuum sealer for freezer storage. It removes more air than regular freezer bags, keeping those purees fresher for longer. 

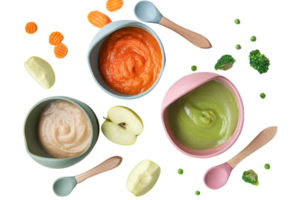
Color-code your storage containers or freezer bags. Green for veggies, orange for fruits, yellow for grains, whatever system works for you! This makes grabbing the right puree super quick.

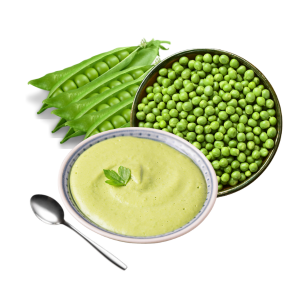
When preparing purees for storage, slightly under-cook vegetables. They’ll finish cooking when you reheat them, preventing them from getting too mushy. Your baby will appreciate the better texture!

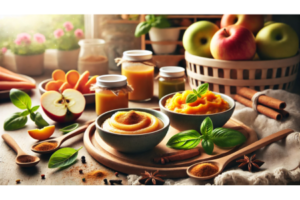
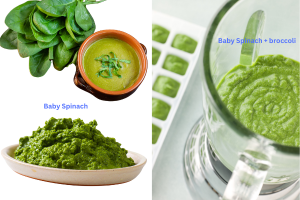
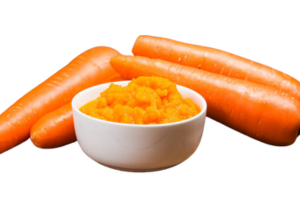
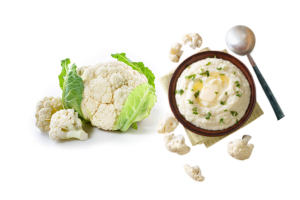
Store strong-smelling purees (like cauliflower or broccoli) separately from fruits. Nobody wants their apple puree to taste like yesterday’s vegetables! Keep those flavors where they belong.

Use small containers, even if you have extra space. The less air in the container, the better your purees will keep. It’s all about minimizing exposure to air and maintaining freshness.

Storage Do's and Don'ts

Let’s wrap up with some essential do’s and don’ts. These simple rules will help you master the art of storing those delicious baby recipes safely.

DO sanitize all storage containers thoroughly before use. Clean containers mean safe food for your little one. Make this a non-negotiable part of your prep routine.

DON’T refreeze purees that have already been thawed. Once thawed, it either gets eaten or needs to be discarded. No second chances with baby food safety!

DO rotate your frozen stock regularly. Use the oldest purees first to maintain a fresh supply. Think of it as a “first in, first out” system for baby food.

DON’T mix new purees with leftover ones. Each batch should be stored separately to prevent contamination. Fresh is always best when it comes to baby food!

DO keep different types of purees separate. This makes it easier to track freshness dates and prevents flavor mixing. Plus, it helps you maintain variety in your baby’s diet.

Conclusion:

Remember, storing baby food properly is just as important as making it. By following these guidelines, you’ll always have safe, nutritious, and delicious baby recipes ready for your little one.

With these storage techniques mastered, you’re on your way to becoming a baby food prep pro! Keep experimenting with different combinations and storage methods until you find what works best for your family’s routine.

Tips for an Easier, More Effective Baby Food Puree-Making Process

A smiling toddler enjoying a meal with homemade baby food puree.

Introduction

Tips for an Easier, More Effective Baby Food Puree-Making Process is a wonderful way to ensure your little one receives essential nutrients and fresh flavors right from the start. By taking charge of every step, from selecting ingredients to blending and storing, you can tailor each meal to your baby’s specific needs. In this post, we’ll share practical, tried-and-true tips to streamline your puree-making process, helping you whip up healthy, delicious meals without the fuss. Whether you’re just starting or looking to refine your skills, you’ll discover techniques that save time, reduce waste, and make mealtime more enjoyable for you and your growing child.

When you’re making these nutrient-packed purees, why not make extra? You can freeze individual portions in ice cube trays for easy meal prep. Just pop out a cube or two when it’s mealtime, defrost, and you’re good to go!

2. Invest in Good Equipment

A good blender or food processor can make your life so much easier. Look for one that can handle both soft and harder foods. Trust me, it’s worth the investment when you’re whipping up delicious baby recipes regularly.

3. Start Simple, Then Combine

When you’re first introducing solids, start with single-ingredient purees. This helps you identify any potential allergies or sensitivities. Once your baby is comfortable with individual foods, you can start combining them into more complex, nutrient-packed purees.

4. Don't Be Afraid of Herbs and Spices

As your baby grows, you can start introducing mild herbs and spices to your purees. A pinch of cinnamon in apple puree or a touch of basil in a veggie blend can help develop your baby’s palate. Just avoid salt and sugar in your delicious baby recipes.

5. Follow Your Baby's Lead

Every baby is different. Some may prefer smoother textures, while others might be ready for chunkier purees sooner. Pay attention to your baby’s cues and adjust your purees accordingly.

Making your own nutrient-packed purees is more than just about nutrition. It’s a labor of love that allows you to know exactly what’s going into your baby’s body. Plus, it’s often more cost-effective than store-bought options.

As you experiment with these delicious baby recipes, you’ll find yourself getting more creative in the kitchen. Who knows? You might even discover flavor combinations that the whole family enjoys!

Remember, introducing solids is a journey. There will be days when your carefully prepared puree ends up more on the floor than in your baby’s tummy. That’s okay! Keep offering a variety of nutrient-packed purees, and your persistence will pay off.

Celebrating Milestones

Each new food your baby tries is a milestone worth celebrating. From that first spoonful of sweet potato to the day they manage to feed themselves, these are precious moments in your baby’s development.

Consider keeping a food diary to track what your baby has tried and what they like. It can be fun to look back on this as they grow and their tastes change. Plus, it’s helpful information for your pediatrician.

Embracing the Mess

Let’s be real – feeding a baby can get messy! But embrace the chaos. Those messy faces and sticky hands are all part of the learning process. Plus, they make for adorable photo opportunities!

Lay down a splat mat under the high chair for easy cleanup. Dress your baby in easy-to-wash clothes or a large bib. And always have a camera ready – you’ll want to capture those priceless expressions as your baby discovers new tastes and textures.

Remember, mealtime is about more than just nutrition. It’s a time for bonding, learning, and exploring. Here are some ways to make mealtime enjoyable:

1. Eat together as a family when possible. Babies learn by watching others.
2. Make positive comments about the food you’re eating.
3. Let your baby explore their food. It might get messy, but it’s part of learning.
4. Don’t force your baby to eat. Trust their hunger and fullness cues.

Your attitude towards food can influence your baby’s relationship with eating. Keep things positive and fun!

Creating a Positive Food Environment

Nourishing Your Baby with Love

Feeding your baby is about more than just nutrition. It’s about introducing them to the wonderful world of food, helping them develop healthy eating habits, and sharing special moments together.

As your little one grows, you’ll discover countless ways to nourish their body and delight their taste buds. Whether it’s a simple sweet potato puree or a more adventurous salmon blend, each spoonful is an opportunity to show your love and care.

So, grab your apron, fire up the blender, and get ready for a delicious adventure with your little one. Here’s to happy, healthy eating for your baby!

How to Prep Purees for Maximum Nutrition

A variety of colorful homemade baby purees, including avocado, carrot, and lentil blends, garnished with fresh herbs for maximum nutrition.

Introduction

Introducing solids is an exciting milestone in your baby’s journey toward independent eating. While store-bought baby food is convenient, making homemade purees ensures your little one gets the freshest, most nutrient-packed meals. But did you know how you prepare purees can impact their nutritional value?

From choosing the right ingredients to using the best cooking methods, small adjustments can help preserve essential vitamins and minerals. In this guide, we’ll walk you through the best techniques to prepare Purees for Maximum Nutrition, support your baby’s growth, and develop healthy eating habits from the start.

Let’s dive in and learn How to Prep Purees for Maximum Nutrition by making nourishing, delicious purees that set the foundation for a lifetime of healthy eating!

Opting to make your own baby purees offers several advantages:

  • Control Over Ingredients: You decide what goes into your baby’s food, ensuring no unwanted additives or preservatives.
  • Freshness Guaranteed: Homemade purees can be made from fresh, organic produce, maximizing nutrient intake.
  • Cost-Effective: Preparing purees at home can be more economical than purchasing commercial baby foods.

Before we get into the nitty-gritty of preparation, it’s crucial to understand the key nutrients your baby needs:

  • Iron: Vital for brain development and found in meats, beans, and fortified cereals.
  • Healthy Fats: Support brain and nerve development; avocados and full-fat yogurt are excellent sources.
  • Fiber: Aids digestion and is abundant in fruits and vegetables like peas, carrots, and apples.

When choosing produce and other ingredients:

  • Opt for Organic: Select organic fruits and vegetables when possible to minimize pesticide exposure.
  • Seasonal Selections: Seasonal produce is often fresher and more nutrient-dense.
  • Check for Ripeness: Ensure fruits and vegetables are ripe but not overripe to maintain optimal nutrient levels.

Smart Preparation Steps

1. Wash Properly: Start thoroughly, even if you plan to peel. Use cold water and gently scrub to remove any residue.

2. Smart Cutting Techniques: Cut vegetables into similar-sized pieces for even cooking. Smaller pieces cook faster, meaning less nutrient loss.

3. Timing Matters: Don’t prep too far in advance. Cut vegetables just before cooking to prevent nutrient loss from exposure to air.

A smiling mother feeding her baby with a spoon, introducing nutritious homemade purees.

Cooking Methods to Preserve Nutrients

How you cook your baby’s food can significantly impact its nutritional value. Here are some methods to consider:

Steaming

Steaming is one of the best ways to preserve vitamins and minerals in food. It uses minimal water and cooks food gently.

How to Steam:

  1. Place a steamer basket in a pot with a small amount of water.
  2. Add chopped vegetables or fruits to the basket.
  3. Cover and cook until tender.

Baking or Roasting

Baking or roasting can enhance the natural flavors of fruits and vegetables without leaching nutrients into water.

How to Bake/Roast:

  1. Preheat your oven to 400°F (200°C).
  2. Place peeled and chopped produce on a baking sheet.
  3. Roast until soft and slightly caramelized.

Boiling

While boiling is common, it can cause water-soluble vitamins to leach into the cooking water. If you choose to boil, use minimal water and consider using the cooking liquid to thin your purees.

How to Boil:

  1. Bring a pot of water to a boil.
  2. Add the chopped produce.
  3. Cook until tender, then drain (reserving the liquid if desired).

Equipment Essentials

Having the right tools makes creating nutritious purees easier:

  1. Quality Steamer Basket: Invest in a good steamer basket that fits your pots. This enables proper steaming without waterlogging vegetables.

  2. High-Speed Blender: A powerful blender creates smooth purees quickly, minimizing exposure to air, which can degrade nutrients.

  3. Glass Storage Containers: Glass containers protect nutrients better than plastic and don’t leach chemicals into food.

A blender filled with homemade baby puree next to glass storage containers and fresh ingredients.

Pureeing to the Perfect Consistency

Achieving the right texture is essential, especially for babies new to solids.

Steps to Puree:

  1. Choose Your Tool: A blender, food processor, or immersion blender works well.
  2. Add Liquid: To reach the desired consistency, add breast milk, formula, or the reserved cooking water.
  3. Blend: Process until smooth, adjusting the thickness as needed.

Safe Storage Practices

Proper storage ensures that your baby’s food remains safe and nutritious.

  • Refrigeration: Store purees in airtight containers in the fridge for 48 hours.
  • Freezing: For longer storage, freeze purees in ice cube trays. Once frozen, transfer the cubes to freezer bags, which can be kept for up to three months.
  • Reheating: Always reheat purees until they’re piping hot throughout, then cool them to a safe feeding temperature.

Time-Saving Batch Preparation

Efficient prep doesn’t mean sacrificing nutrition:

  1. Prep Multiple Vegetables Together: Steam different vegetables that require similar cooking times together.
  2. Portion Immediately: Divide into serving sizes right after pureeing to minimize nutrient loss from repeated temperature changes.
  3. Label Everything: Mark containers with contents and dates to ensure you use them when nutrients are still at their peak.

Advanced Nutrient-Boosting Techniques

Take your purees to the next level:

  1. Sprouting and Soaking: Soak legumes before cooking to increase nutrient availability and reduce cooking time.
  2. Adding Superfoods: Incorporate nutrient-dense foods like chia seeds (ground) or quinoa into purees.
  3. Herb Enhancement: Fresh herbs add nutrients and flavor to simple vegetable purees.
A creamy yellow baby puree garnished with a fresh mint leaf in a small white bowl.

Adapt your prep methods by season:

1. Summer Vegetables: Quick-steam or prepare raw to preserve nutrients in delicate summer produce.

2. Winter Vegetables: Roast or steam heartier winter vegetables until tender to maintain nutritional value.

3. Year-Round Options: Some vegetables maintain consistent nutrient levels year-round and can be prepped similarly regardless of season.

Troubleshooting Common Issues

Solve these common challenges while maintaining nutrition:

  1. Too Thick Purees: Add cooking liquid rather than plain water to thin purees, preserving nutrients from cooking.
  2. Discoloration: Use lemon juice to prevent browning in fruits and some vegetables while adding vitamin C.
  3. Grainy Texture: Adjust cooking time or blending duration without overcooking to maintain smooth texture and nutrients.

Moving Beyond Basic Purees

As your baby grows:

  1. Textured Combinations: Gradually introduce more texture while maintaining the same nutrient-preservation techniques.
  2. Finger Foods: Apply the same nutritious preparation methods to soft-cooked vegetable pieces.
  3. Family Meals: Scale up these preparation methods to create nutritious meals for the whole family.

Future Planning

Think ahead for continued success:

1. Meal Planning: Create a weekly prep schedule to ensure fresh, nutritious purees are always available.

2. Rotating Varieties: Plan to introduce new foods while maintaining proper preparation methods.

3. Scaling Up: Adjust these methods as your baby grows and needs more food.

Remember, creating nutritious purees doesn’t have to be complicated! By following these guidelines, you’ll create delicious baby recipes that maintain maximum nutritional value. Keep experimenting with different combinations and preparations, always focusing on preserving those precious nutrients.

Your efforts in proper preparation now will help establish healthy eating habits that last a lifetime. Happy pureeing, parents!

FAQs

When should I start introducing purees to my baby?

Most babies are ready for purees around six months old, but it's essential to look for signs of readiness, such as sitting up with minimal support and showing interest in food.

Can I add spices to my baby's purees?

Mild spices can be introduced gradually. Avoid adding salt or sugar, but herbs like basil or spices like cinnamon can enhance flavor.

How do I know if my baby is allergic to a new food?

Introduce new foods one at a time and wait 3–5 days before trying another. Watch for signs like rashes, swelling, vomiting, or diarrhea.

Is it safe to use frozen fruits and vegetables for purees?

Yes, frozen produce can be just as nutritious as fresh and is a convenient option, especially when certain items are out of season.

The Best Seasonal Vegetables for Baby Purees

Welcome to Your Seasonal Guide to Delicious Baby Recipes!

Hey there, wonderful parents! Are you ready to explore the colorful world of seasonal vegetables for your little one? Let’s dive into nature’s calendar and discover the perfect veggies for each season. When you work with seasonal produce, you’re giving your baby the freshest, most nutritious start possible.

Spring Sensations: Fresh Picks for Your Little One

As nature awakens, spring brings tender vegetables perfect for your baby’s first foods. These light and nutritious options are ideal for delicious baby recipes that will delight your little one’s developing palate.

1. Sweet Peas

Fresh spring peas are naturally sweet and packed with vitamins. You’ll love how easily they blend into a smooth, vibrant puree.

Steam them lightly to preserve their beautiful color and nutrients. Mix them with a bit of breast milk or formula for the perfect consistency.

2. Asparagus

Don’t let its fancy reputation fool you – asparagus makes wonderful baby food!

Choose thin, tender stalks for the smoothest puree. The mild, grassy flavor pairs beautifully with potato or carrots for a nutrient-rich blend.

3. Baby Spinach

Spring spinach is tender and mild, perfect for introducing leafy greens to your little one. Rich in iron and vitamins, it’s a nutritional powerhouse that blends seamlessly into other purees.

Summertime Stars: Vibrant and Fresh

Summer brings an abundance of colorful vegetables that make creating delicious baby recipes a joy. The warm weather produces sweet, tender vegetables perfect for your baby’s developing taste buds.

1. Summer Squash

Yellow squash and zucchini are perfect summer options. Their high water content makes them easy to puree, and their mild flavor works well with many combinations. Try mixing them with sweet potato for added nutrition.

2. Green Beans

Fresh summer green beans are tender and sweet. Steam them until soft, and they’ll blend into a smooth puree. They’re packed with fiber and vitamins your growing baby needs.

3. Sweet Corn

Nothing says summer like fresh corn! Its natural sweetness makes it a baby favorite. Puree it with a bit of breast milk for a silky smooth consistency. Mix with avocado for a creamy, nutritious treat.

Autumn Treasures: Hearty and Nutritious

Fall brings robust vegetables perfect for creating warming, comforting purees. These seasonal picks are ideal for developing your baby’s palate and providing essential nutrients.

1. Butternut Squash

This fall favorite is a superstar of baby food. Its sweet, nutty flavor and creamy texture make it perfect for delicious baby recipes. Rich in vitamins and fiber, it’s both nutritious and delicious.

2. Sweet Potatoes

Fall sweet potatoes are at their peak sweetness. They’re packed with beta-carotene and make wonderfully smooth purees. Your baby will love their natural sweetness.

3. Pumpkin

Don’t limit pumpkin to pie! It makes fantastic baby food. Rich in fiber and vitamins, pumpkin puree has a mild, sweet taste babies love.

Winter Wonders: Comforting and Rich

Winter vegetables might seem hardy, but they transform into silky smooth purees perfect for your little one. These seasonal picks are packed with nutrients to support winter wellness.

1. Carrots

Winter carrots are sweeter after a frost. They’re rich in beta-carotene and make beautifully smooth purees. Mix them with apple for a sweet-and-savory combination.

2. Parsnips

These winter root vegetables have a naturally sweet, nutty flavor. They’re packed with fiber and vitamins, making them perfect for nutritious winter purees.

3. Cauliflower

Winter cauliflower is mild and creamy when pureed. It’s an excellent source of vitamin C and makes a great base for mixing with other vegetables.

Tips for Preparing Seasonal Vegetables

Getting the most from your seasonal vegetables starts with proper preparation. Here’s how to create the perfect purees every time:

1. Choose Fresh and Ripe

Select vegetables at their peak ripeness for the best flavor and nutrition. Look for bright colors and firm texture.

2. Clean Thoroughly

Wash all vegetables carefully, even if you plan to peel them. This removes any dirt or residues.

3. Cook Until Tender

Steam or roast vegetables until they’re very tender. This makes them easier to puree and digest.

Storage and Freezing Tips

Make the most of seasonal vegetables by preparing them in batches:

1. Freeze in Ice Cube Trays
This creates perfect portion sizes for your baby. Pop them out once frozen and store in freezer bags.

2. Label Everything
Mark containers with the type of vegetable and date prepared. Most purees last 3-6 months in the freezer.

3. Thaw Safely
Move frozen portions to the refrigerator the night before you plan to use them.

Combining Seasonal Vegetables

Creating delicious baby recipes becomes even more exciting when you combine seasonal vegetables:

Spring Combinations:
– Peas and mint
– Asparagus and potato
– Spinach and sweet potato

Summer Combinations:
– Zucchini and corn
– Green beans and summer squash
– Carrots and summer squash

Fall Combinations:
– Butternut squash and apple
– Sweet potato and pear
– Pumpkin and carrot

Winter Combinations:
– Parsnip and pear
– Cauliflower and potato
– Carrot and sweet potato

Signs Your Baby is Enjoying Their Vegetables

Watch for these positive signals:
1. Opening their mouth when the spoon approaches
2. Smiling during feeding
3. Reaching for the spoon or food
4. Making happy sounds while eating

Troubleshooting Common Challenges

Sometimes babies need time to adjust to new flavors. Here are some tips:

1. Mix with Familiar Favorites:
Combine new vegetables with foods your baby already enjoys.

2. Try Different Temperatures:
Some babies prefer their food slightly warm, others cool.

3. Adjust Consistency:
Add more liquid if purees seem too thick, or reduce liquid if too thin.

Making Mealtimes Fun

Creating a positive atmosphere helps your baby develop a healthy relationship with food:

1. Make Silly Faces:
Show your baby how much you enjoy eating vegetables too.

2. Use Colorful Bowls and Spoons:
Make mealtime visually exciting with bright, safe feeding equipment.

3. Maintain a Regular Schedule:
Consistent meal times help your baby know what to expect.

Moving Beyond Pure Purees

As your baby grows, you can start introducing more texture:

1. Mash Instead of Pureeing:
Leave small, soft lumps for your baby to experience different textures.

2. Mix Textures:
Combine smooth purees with well-cooked, mashed vegetables.

3. Finger Foods:
When ready, offer soft-cooked vegetable pieces for self-feeding.

The Journey Continues

Remember, introducing vegetables is a journey, not a race. Each baby develops their own preferences and pace. Keep these points in mind:

1. Stay Patient:
It can take multiple tries before a baby accepts a new vegetable.

2. Keep Offering Variety:
Even if certain vegetables are rejected, continue offering different options.

3. Trust Your Baby:
They’ll let you know when they’re hungry and when they’re full.

Creating delicious baby recipes with seasonal vegetables is a wonderful way to introduce your little one to healthy eating habits. Remember to enjoy this special time of discovery with your baby. Each season brings new opportunities to explore flavors and nutrients that will help your baby grow strong and healthy.

Keep experimenting with different combinations and preparations, and don’t forget to have fun along the way. Your enthusiasm for healthy foods will help shape your baby’s future relationship with eating. Here’s to many happy, healthy meals ahead!

Blueberry and Oatmeal Bonanza

Introduction

Parenthood is a journey filled with milestones, and introducing solid foods is one of the most exciting (and messy) adventures. As parents, we’re always on the lookout for meals that tick all the boxes: healthy, tasty, and easy to prepare. Enter the “Blueberry and Oatmeal Bonanza” – a nutritious gem that’s as simple as it is satisfying. Exclusively, this recipe combines the creamy texture of oatmeal with the burst of flavor from blueberries to create a baby-approved favorite.

But wait, there’s more! This isn’t just a single recipe; it’s a gateway to culinary creativity. From jazzing up the dish with other fruits to pairing it with the popular “Sweet Potato and Apple Delight,” you’ll soon see why this recipe is a cornerstone of baby nutrition. Let’s dive in!

A Nutritional Powerhouse

Blueberries are often touted as a superfood – and for good reason! These tiny berries are packed with:

  • Antioxidants: Perfect for boosting baby’s immune system.
  • Vitamins C and K: Essential for growth and development.
  • Fiber: Helps keep digestion smooth and steady.

Oatmeal, on the other hand, is a tried-and-true staple in many households. It’s:

  • Rich in iron: Vital for brain development.
  • Easy to digest: Gentle on tiny tummies.
  • Versatile: A blank canvas for endless flavor combinations.

The Dynamic Duo

When combined, blueberries and oatmeal create a meal that’s:

  • Nutritionally balanced.
  • Naturally sweet, no added sugar needed.
  • Quick and easy to prepare (because who has hours to cook?).

Ingredients

Here’s what you’ll need:

  • 1/4 cup rolled oats
  • 1/2 cup water or breast milk/formula
  • 1/4 cup fresh or frozen blueberries
  • A pinch of cinnamon (optional)

Instructions

  1. Cook the Oats: In a small saucepan, combine oats and water (or milk). Cook over medium heat, stirring occasionally, until the oats are soft and creamy (about 5-7 minutes).
  2. Add the Blueberries: Toss in the blueberries and continue cooking for another 2-3 minutes. If using frozen blueberries, no need to thaw them beforehand.
  3. Blend or Mash: Depending on your baby’s age and chewing ability, either blend the mixture for a smooth texture or mash with a fork for a chunkier consistency.
  4. Sprinkle the Cinnamon: For an extra flavor boost, add a pinch of cinnamon and mix well.
  5. Cool and Serve: Let the mixture cool to room temperature before serving.
Rustic wooden bowl filled with creamy oatmeal topped with fresh blueberries, surrounded by oats and scattered blueberries on a wooden table

Creative Twists

Make It Your Own

Who says you have to stick to the basics? Try these variations:

  • Mix it up: Add a dollop of plain yogurt for creaminess.
  • Boost the flavor: Stir in a teaspoon of almond butter (for older babies).
  • Pair it with Sweet Potato and Apple Delight: Serve the two dishes side by side for a nutrient-packed meal that’s both filling and flavorful.

Storage Tips

  • Refrigeration: Store leftovers in an airtight container in the fridge for up to 2 days.
  • Freezing: Freeze individual portions in ice cube trays. Thaw and reheat as needed.

FAQs

Can I use steel-cut oats instead of rolled oats?

Yes, but keep in mind that steel-cut oats take longer to cook and have a chewier texture. Adjust cooking times accordingly.

Are blueberries safe for babies?

Absolutely! Blueberries are soft and easy to mash, making them a safe and nutritious choice for babies starting solids.

What’s the best way to introduce cinnamon to my baby?

Start with a tiny pinch and watch for any signs of sensitivity or allergic reaction. Most babies tolerate cinnamon well.

Can I make this recipe dairy-free?

Of course! Use water or a non-dairy milk alternative like oat or almond milk (check for allergens first).

Perfect Pairing

If you’ve tried our “Sweet Potato and Apple Delight” you know how delightful the combination of sweet and savory can be. Pairing this dish with the Blueberry and Oatmeal Bonanza creates a balanced meal that introduces your baby to diverse flavors and textures.

Why It Works?

  • Sweet Potato: Creamy and rich in beta-carotene.
  • Apple: Sweet and loaded with vitamin C.
  • Blueberries and Oats: The perfect complement with their mild sweetness and hearty texture.

Conclusion

The Blueberry and Oatmeal Bonanza is more than just a meal—it’s a moment of connection with your baby, a chance to explore new flavors, and a step towards a lifetime of healthy eating habits.

At www.deliciousbabyrecipes.com, we’re committed to making parenting just a little bit easier (and tastier!). 

Happy cooking, and here’s to creating delicious memories with your little one!

Spinach and Pear Power-Up

Introduction

Ever wondered how to sneak in all those greens without a fight? Look no further than the “Spinach and Pear Power-Up” recipe! This delightful blend, perfect for growing babies, is packed with essential nutrients and just the right touch of sweetness. And guess what? It’s so tasty even the pickiest eaters will gobble it up. We’re all about making healthy eating a breeze for parents and a joy for kids.

Let’s dive into why spinach and pear make such a dynamic duo, how to whip up this quick recipe, and tips to customize it for your little one’s taste buds.

The Nutritional Punch

Spinach is often hailed as a superfood — and for good reason! Loaded with iron, calcium, vitamins A and C, and fiber, it’s a powerhouse for baby’s growth. Pair it with the natural sweetness of pears, and you’ve got a flavor-packed combo that’s as nutritious as it is delicious.

Benefits of Spinach

  • Iron boost: Supports healthy red blood cell production.
  • Vitamin A: Enhances vision and immune health.
  • Calcium: Essential for strong bones and teeth.

Benefits of Pear

  • Natural sweetness: Makes the recipe baby-approved.
  • Fiber-rich: Aids in digestion and prevents constipation.
  • Vitamin C: Boosts immunity and helps absorb iron from spinach.

A Match Made in Culinary Heaven

Combining spinach and pear creates a perfectly balanced flavor profile. While spinach can sometimes be a bit earthy, the juicy, sweet notes of pear smooth everything out. It’s a win-win for parents and babies alike!

Ingredients

Here’s what you’ll need:

  • 1 cup fresh spinach (washed and trimmed)
  • 1 ripe pear (peeled, cored, and chopped)
  • ½ cup water or breast milk (for a smoother consistency)
  • Optional: A pinch of cinnamon for added flavor

Instructions

  1. Prep the Ingredients: Rinse the spinach thoroughly and peel and chop the pear.
  2. Cook: Steam the spinach and pear together for about 5-7 minutes, or until soft.
  3. Blend: Transfer the cooked ingredients to a blender or food processor. Add water or breast milk and blend until smooth.
  4. Cool: Allow the puree to cool before serving. You can also store it in the fridge for up to 3 days or freeze portions for later use.

Pro Tips

  • Use organic produce whenever possible to reduce exposure to pesticides.
  • Adjust the liquid amount based on your baby’s age and texture preferences.
  • Mix in other fruits like apples or sweet potatoes for variety. (Remember the fan-favorite “Sweet Potato and Apple Delight)
A playful and creative depiction of a smiling pear and fresh spinach plant on a kitchen countertop, representing a fun and nutritious baby food recipe

Customizing for Your Baby

Age-Specific Tips

  • 6-8 months: Stick to smooth purees. Add more liquid if needed.
  • 8-10 months: Introduce a slightly chunkier texture by reducing the blending time.
  • 10+ months: Serve as a finger food dip or mix into oatmeal for added nutrition.

Flavor Tweaks

  • Add a dash of nutmeg or vanilla for a festive twist.
  • Mix with yogurt for a creamy delight.

Pairing Ideas

The “Spinach and Pear Power-Up” is versatile! Here’s how you can incorporate it into meals:

  • Breakfast Boost: Mix with oatmeal or baby cereal.
  • Snack Time: Serve as a dip for soft crackers or veggie sticks.
  • Dinner Sidekick: Stir into mashed potatoes or quinoa.

Both recipes shine in their own ways. While the “Sweet Potato and Apple Delight offers a comforting, hearty blend perfect for colder months, the “Spinach and Pear Power-Up” provides a refreshing, nutrient-packed option for any time of the year. Why not try both and keep your baby’s palate excited?

FAQs

Can I use frozen spinach?

Absolutely! Frozen spinach is a convenient alternative. Just be sure to thaw and drain it before using.

What type of pear works best?

Ripe, juicy varieties like Bartlett or Anjou are perfect. They’re naturally sweet and blend well.

How long can I store the puree?

In the fridge, it’s good for up to 3 days. Freeze portions for up to 3 months for an easy grab-and-go option.

Can I skip the steaming step?

While raw spinach and pear might retain more nutrients, steaming makes the texture baby-friendly and easier to digest.

Conclusion

There you have it — a simple yet powerful recipe that’s sure to become a staple in your baby’s diet. The “Spinach and Pear Power-Up” is more than just a meal; it’s a step toward healthier habits for your little one. And don’t forget to explore other tasty options, like the beloved “Sweet Potato and Apple Delight” to keep things interesting.

Ready to get cooking? Your baby’s next favorite meal is just a blend away. Visit www.deliciousbabyrecipes.com for more inspiring recipes and tips!

Carrot & Lentil Surprise

Introduction

When it comes to nourishing your baby, you want meals that tick all the boxes: tasty, nutritious, and easy to whip up. That’s where Carrot & Lentil Surprise comes in! This recipe combines the earthy sweetness of carrots with the hearty texture of lentils to create a dish that’s both comforting and exciting. Think of it as a cousin to the ever-popular Sweet Potato and Apple Delight—but with its own unique charm. Let’s dive into why this recipe deserves a spot in your baby’s meal rotation and how you can make it right at home.

Wondering what makes this dish stand out? Here are a few reasons:

  • Packed with Nutrition: Lentils are protein powerhouses, while carrots bring a hefty dose of beta-carotene.
  • Easy to Digest: Perfect for sensitive little tummies.
  • Versatile: Serve it as a puree, mash, or finger food, depending on your baby’s age.
  • Quick to Make: Minimal prep, maximum flavor!

Ingredients

To make this yummy dish, you’ll need:

  • 1/2 cup red lentils (rinsed)
  • 2 medium carrots (peeled and chopped)
  • 2 cups water or low-sodium vegetable broth
  • 1 tsp olive oil (optional)
  • A pinch of cumin or turmeric (optional, for babies 8 months and older)

1. Prep Your Ingredients

Wash and peel the carrots. Chop them into small pieces for faster cooking. Rinse the lentils under cold water to remove any debris.

2. Cook the Lentils

In a medium-sized pot, add the lentils and water (or broth). Bring to a boil, then reduce the heat and let it simmer for 10 minutes.

3. Add the Carrots

Toss the chopped carrots into the pot. Cook for an additional 15-20 minutes, or until both the lentils and carrots are soft.

4. Blend or Mash

Using an immersion blender, puree the mixture to your desired consistency. For older babies, you can simply mash it with a fork for a chunkier texture.

5. Add Flavors

If your baby is ready for mild spices, sprinkle a pinch of cumin or turmeric for added flavor and health benefits.

6. Serve

Let it cool to room temperature before serving. Store any leftovers in an airtight container in the fridge for up to three days.

Dynamic image of chopped carrots and lentils tossed in the air from a steaming pot in a bright, modern kitchen, symbolizing freshness and creativity in baby food preparation

Tips & Tricks

  • Batch Cooking: Double the recipe and freeze portions for future meals.
  • Mix & Match: Pair it with Sweet Potato and Apple Delight to introduce new textures and flavors.
  • On-the-Go: Store in small, reusable pouches for convenient meals while traveling.

Nutritional Benefits

  • Carrots: Rich in vitamin A, they support eye health and immunity.
  • Lentils: Packed with plant-based protein, fiber, and iron.
  • Olive Oil: A healthy fat that aids in nutrient absorption.

This combo not only satisfies hunger but also contributes to your baby’s overall growth and development. Who wouldn’t love that?

FAQs

Can I use a different type of lentil?

Absolutely! Green or brown lentils work too, but they’ll need a bit more cooking time and might not blend as smoothly.

Is it freezer-friendly?

Yes! Freeze individual portions in silicone molds or containers. Just thaw and reheat when needed.

Can adults eat this?

Of course! Add a pinch of salt and your favorite herbs for a quick and healthy side dish.

Conclusion

Carrot & Lentil Surprise is more than just a meal; it’s a gateway to a world of flavors and nutrients for your baby. Easy to prepare and endlessly adaptable, this dish is sure to become a family favorite. Pair it with Sweet Potato and Apple Delight for an unbeatable combo that’ll have your little one smacking their lips in delight. So, what are you waiting for? Grab your apron and get cooking—your baby’s taste buds will thank you!

Sweet Potato and Apple Delight

Fresh red apple and sliced sweet potato, key ingredients for a nutritious and delicious baby food recipe.

you want the perfect balance of nutrition, taste, and ease of preparation. That’s where the Sweet Potato & Apple Delight comes in! This wholesome recipe is ideal for introducing your baby to new flavors and textures while ensuring they get a healthy dose of essential vitamins and minerals. Whether you’re a seasoned parent or a first-timer navigating the world of baby food, this recipe will quickly become a go-to favorite. Let’s dive in!

Sweet potatoes are packed with beta-carotene, which is great for your baby’s eyesight and immune system. Apples add a touch of natural sweetness and provide fiber for healthy digestion.

Sweet Potatoes: A Nutritional Powerhouse

Sweet potatoes are not just tasty—they’re a superfood for your baby! They’re packed with:

  • Vitamin A: Essential for eye health and immunity.
  • Fiber: Helps with digestion and prevents constipation.
  • Potassium: Aids in muscle development and hydration.

Apples: Nature’s Sweet Treat

Apples are another fantastic ingredient for baby food. They provide:

  • Vitamin C: Boosts immunity and supports skin health.
  • Antioxidants: Protect against harmful free radicals.
  • Natural Sweetness: No need for added sugars!

Combining these two ingredients creates a delightful, nutritious meal that’s easy on your baby’s tummy and tastes amazing.

Ingredients You’ll Need

Here’s what you’ll need to make this Sweet Potato and Apple Delight:

  • 1 medium-sized sweet potato
  • 1 apple (preferably organic)
  • 1/2 cup water or breast milk/formula (for desired consistency)
  • A pinch of cinnamon (optional for babies older than 6 months)
Delicious sweet potato and apple puree topped with fresh apple slices, basil leaves, and chia seeds in a rustic bowl

1. Gather Your Ingredients

Start by picking fresh, organic produce to ensure the best taste and nutrition.

2. Prep and Cook

  • Sweet Potato: Peel and dice into small cubes.
  • Apple: Core, peel, and slice into chunks.
  • Steam or boil both until tender (around 15 minutes). Using the same pot for both saves time and cuts down on dishes!

3. Blend to Perfection

  • Place the cooked sweet potato and apple in a blender or food processor.
  • Add 1/2 cup of water, breast milk, or formula.
  • Blend until smooth. Adjust the liquid to achieve your preferred consistency.

4. Optional Additions

  • Sprinkle a pinch of cinnamon for extra flavor if your baby is ready for spices.

5. Serve or Store

  • Serve fresh and slightly warm.
  • Store leftovers in an airtight container in the fridge for up to 3 days or freeze in portion-sized containers for up to 3 months.

Tips for Success

  • Texture Matters: For younger babies, aim for a very smooth puree. Older babies might enjoy a chunkier texture.
  • Temperature Check: Always test the temperature before serving.
  • Batch Cooking: Make a larger batch and freeze portions to save time later.

FAQ?

Can I use other types of apples?

Absolutely! While sweeter varieties like Fuji or Gala work best, you can experiment with tart apples like Granny Smith for a different flavor profile.

Can I skip the cinnamon?

Of course. Cinnamon is optional and should only be introduced after six months.

What if my baby doesn’t like it?

Babies often need multiple exposures to new foods. Try mixing it with other familiar flavors, like banana or pear.

Is this recipe suitable for older toddlers?

Yes! You can serve it as a side dish or mix it into oatmeal for a heartier meal.

Why Choose Sweet Potato and Apple Delight

This recipe is more than just baby food; it’s a celebration of natural, wholesome ingredients. Sweet Potato and Apple Delight is:

  • Simple: Minimal ingredients and easy preparation.
  • Nutritious: A perfect balance of vitamins, fiber, and natural sweetness.
  • Versatile: Suitable for babies and adaptable for toddlers.

Conclusion

There you have it—a simple, nutritious, and delicious recipe that your baby (and you!) will adore. Sweet Potato & Apple Delight is proof that baby food doesn’t have to be boring or complicated. Give it a try and watch your little one’s face light up with delight. Happy cooking!

Avocado and Banana Bliss

Introduction

When it comes to feeding our little ones, we want meals that tick all the boxes: nutritious, easy to prepare, and absolutely yummy. That’s where “Avocado and Banana Bliss” comes in! These two power-packed fruits are a match made in baby food heaven. Combining creamy avocados and sweet bananas creates a delightful dish that’s loaded with vitamins, minerals, and flavor. Whether you’re a first-time parent or a seasoned pro, this guide will show you how to whip up meals that your baby will devour with glee. Ready to dive in?

Why Avocado and Banana Bliss?

Fresh avocado and banana slices in a glass, showcasing key ingredients for a creamy and nutritious baby food recipe

The Nutritional Dream Team

  1. Avocado Benefits:

  • Rich in healthy fats essential for brain development.
  • Packed with potassium, folate, and vitamin E.
  • Smooth texture perfect for baby’s first bites.
  1. Banana Perks:

  • A natural source of energy with simple sugars.
  • High in fiber to support digestion.
  • Contains vitamin C and B6 for overall health.

Easy to Prepare and Pair

  • No cooking required: Both fruits can be served fresh with minimal effort.
  • Versatile: Blend, mash, or mix with other ingredients to create endless recipes.
  • Budget-friendly: Affordable, widely available, and long-lasting.
A vibrant breakfast spread featuring avocado toast, banana slices, green smoothies, fresh strawberries, and bowls of nutritious snacks in a sunlit kitchen

1. Classic Avocado and Banana Mash

This recipe is a no-brainer! Perfect for babies 6 months and up.

Ingredients:

  • ½ ripe avocado
  • 1 small banana

Instructions:

  • Peel and pit the avocado, then scoop out the flesh.
  • Peel the banana and slice it.
  • Mash both together with a fork until smooth, or blend for an extra creamy texture.

Pro Tip: Add a splash of breast milk or formula for a thinner consistency.


2. Avocado and Banana Smoothie

Introduce your baby to a whole new world of textures!

Ingredients:

  • ½ avocado
  • ½ banana
  • ½ cup unsweetened almond milk (for toddlers) or breast milk/formula (for younger babies)

Instructions:

  • Blend all ingredients until smooth.
  • Serve in a cup or sippy bottle.

Optional: Toss in a handful of spinach for added nutrients.


3. Avocado and Banana Bliss Pancakes

Perfect for breakfast or snack time.

Ingredients:

  • 1 banana
  • ½ avocado
  • 1 egg
  • ½ cup rolled oats

Instructions:

  1. Mash the banana and avocado in a bowl.
  2. Beat the egg and mix it with the mash.
  3. Stir in oats to create a batter.
  4. Heat a non-stick pan and drop spoonfuls of batter to cook until golden brown on both sides.

Pro Tip: Serve with a dollop of unsweetened yogurt for extra creaminess.

Storage Tips for Busy Parents

Artistic depiction of vibrant avocados and bananas surrounded by a colorful swirl, symbolizing nutrition and energy

Fresh is Best

  • Always serve avocado and banana recipes fresh to preserve nutrients and flavor.

Freeze for Later

  • Make large batches of avocado and banana mash, then freeze them in ice cube trays. Once frozen, store the cubes in an airtight container for up to a month.

Avoid Browning

  • Add a squeeze of lemon juice to the avocado mash before freezing to prevent discoloration (for toddlers).

FAQs

When can I introduce avocado and banana to my baby?

Both fruits are suitable for babies as young as 6 months, making them ideal for introducing solids.

Can I mix avocado and banana with other foods?

Absolutely! They pair well with: Yogurt Sweet potatoes Oatmeal Applesauce

Is it okay to serve them every day?

While they’re incredibly healthy, variety is key. Rotate these with other fruits and veggies to ensure your baby gets a balanced diet.

My baby didn’t like it. What now?

No worries! Try mixing the mash with a small amount of their favorite food. Babies’ taste preferences evolve, so don’t give up.

Are there vegan options for these recipes?

Of course! Swap out any dairy ingredients with plant-based alternatives like almond milk or coconut yogurt.

Can kids enjoy these recipes?

Yes, they’re perfect for kids! The natural sweetness of bananas makes them a hit with little ones.

Fun Facts About Avocado and Banana

  • Avocados are technically berries and contain more potassium than bananas.
  • Bananas are one of the most consumed fruits worldwide, often called “nature’s candy.”
  • Both fruits are hypoallergenic, making them safe options for most babies.

Wrapping It Up

Avocado and Banana Bliss isn’t just a recipe; it’s a wholesome, versatile way to nourish your baby with love and care. From simple mashes to fun pancakes, these recipes prove that healthy eating doesn’t have to be complicated. Remember, every spoonful you offer builds the foundation for a lifetime of healthy eating habits. Ready to create your own Avocado and Banana Bliss masterpiece? Let’s get blending!

When to Start Introducing Solid Foods?

Curious baby sitting in a high chair with a spoon and a bowl of mashed vegetables, ready to explore the world of solid foods.

Introduction

Transitioning your baby to solid foods is a huge milestone — for both of you! But let’s face it, the journey can feel like navigating a maze without a map. You might be wondering, “When’s the right time to start?” or “How do I know if my baby’s ready?” Relax, you’re not alone. Let’s dive into everything you need to know about introducing solids in a way that’s simple, stress-free, and fun.

What Does "Solid Foods" Really Mean?

Before we get into the nitty-gritty, let’s clarify something: introducing solids doesn’t mean whipping up a steak dinner for your six-month-old! We’re talking about soft, mashed, or pureed foods that are easy for your baby to swallow and digest.

Age Matters:

The general consensus from pediatricians and nutrition experts is to introduce solid foods around six months. Why not earlier? Babies’ digestive systems need time to mature, and jumping the gun could lead to tummy troubles. Plus, introducing solids too soon can interfere with breastfeeding or formula feeding.

Signs Your Baby Is Ready:

Every baby develops at their own pace, so watch for these telltale signs:

  • Good Head Control: Your baby can hold their head up steadily.
  • Sitting Up with Support: They’re able to sit upright, even if it’s with a little help.
  • Curiosity About Food: Ever caught your baby eyeing your dinner plate like it’s the holy grail? That’s a sign!
  • Loss of the Tongue-Thrust Reflex: Babies are born with a reflex that pushes food out of their mouths. Once this fades, they’re ready to chow down.

Pick the Right First Foods:

Wondering what to serve first? Start with single-ingredient foods that are easy to digest. Here are a few fan favorites:

  • Iron-fortified baby cereal mixed with breast milk or formula.
  • Mashed avocado — creamy and packed with healthy fats.
  • Pureed sweet potatoes or carrots for a touch of natural sweetness.
  • Banana mash, because who doesn’t love bananas?

Make It a Safe Experience:

Safety first! Follow these tips:

  1. Avoid Common Allergens at First: While experts now say early exposure to allergens can help prevent allergies, it’s best to introduce them one at a time.
  2. Cut Food into Small Pieces: Avoid choking hazards by keeping everything soft and bite-sized.
  3. Stay Close: Never leave your baby unattended while eating. Accidents can happen in a split second!

The “Food Face” Phenomenon:

You’ve mashed, blended, and plated the perfect baby food, only to have your little one make a face like you’ve served them poison. Don’t sweat it! Babies often reject new textures and tastes at first. Keep trying; it can take up to 10 attempts before they’ll accept a new food.

Allergies and Intolerances:

Introduce new foods one at a time, with a three-day gap in between. That way, if there’s a reaction like rash, vomiting, or diarrhea, you’ll know the culprit.

Refusing to Eat:

Some babies just aren’t into solids right away. It’s okay to take a break and try again in a few days. Remember, breast milk or formula is still their primary source of nutrition until age one.

Smiling mother and baby in a high chair, enjoying a sunlit kitchen moment with freshly prepared baby food on the tray
  • Embrace the Mess: Yes, your kitchen will look like a war zone, but it’s all part of the process.
  • Use Baby-Friendly Utensils: Brightly colored spoons and bowls can make mealtime more exciting.
  • Eat Together: Babies are natural imitators. If they see you enjoying your meal, they’re more likely to join in.

FAQs

Can I Start Solids Before Six Months?

If your baby shows readiness signs and your pediatrician gives the green light, it’s okay to start as early as four months. However, six months is the golden standard

What Foods Should I Avoid?

Stay away from honey (risk of botulism), cow’s milk as a drink (hard to digest), and high-sodium or sugary foods.

What if My Baby Doesn’t Like a Food?

Don’t force it! Try again later, or mix the new food with a familiar favorite.

Should I Worry About Choking?

Absolutely. Always supervise your baby and stick to soft, easy-to-swallow textures.

Wrapping It Up

Introducing solid foods is a journey full of trial and error, messy moments, and plenty of giggles. Remember, there’s no one-size-fits-all answer to “When to start introducing solid foods?” Follow your baby’s cues, lean on your instincts, and don’t be afraid to ask for advice when you need it. Before you know it, your little one will be enjoying family meals with gusto. Bon appétit, baby!