Simple Homemade Baby Food Recipes

Fun and nutritious homemade baby food arranged as cute animal shapes using rice, whole wheat bread, fruit slices, and berries.

Introduction

Embarking on introducing solid foods to your baby is an exciting and pivotal milestone. As a parent, you naturally want to provide the best nutrition possible, and what better way than crafting wholesome, homemade baby food Recipes? Not only does this ensure your little one receives fresh and nutrient-rich meals, but it also allows you to introduce a variety of flavors and textures tailored to their developing palate. This guide explores simple and delicious recipes like Creamy Carrot and Apple Puree, Banana and Avocado Mash, and Lentil and Vegetable Stew, designed to nourish your baby and make mealtime a delightful experience.

Creamy Carrot and Apple Puree
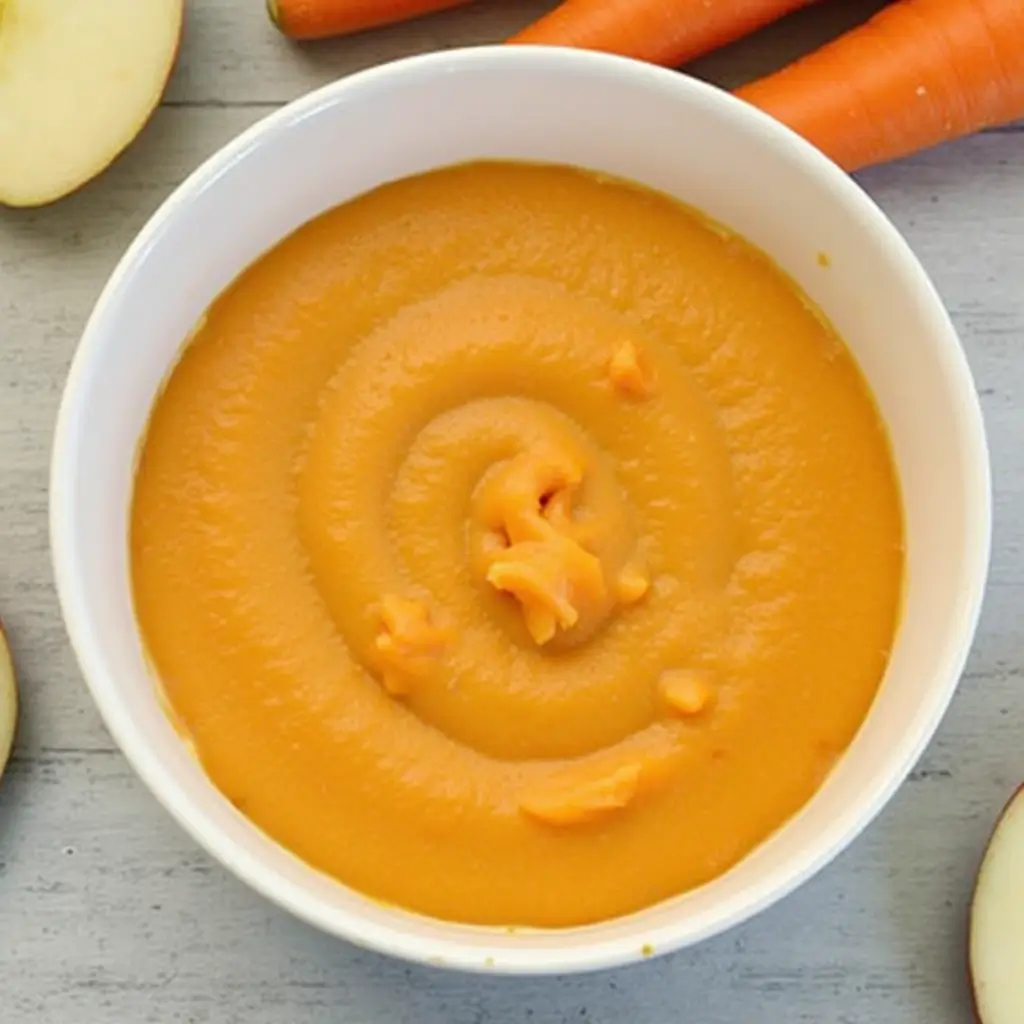
A smooth and nutritious carrot and apple puree in a white bowl, surrounded by fresh carrots and apple slices.

Ingredients:

  • 2 large carrots, peeled and chopped
  • 1 apple, peeled, cored, and chopped
  • Water or breast milk/formula for thinning

Instructions:

  1. Steam carrots and apple pieces until tender.
  2. Transfer to a blender, adding a bit of water or milk.
  3. Puree until smooth, adjusting consistency as needed.

Banana and Avocado Mash
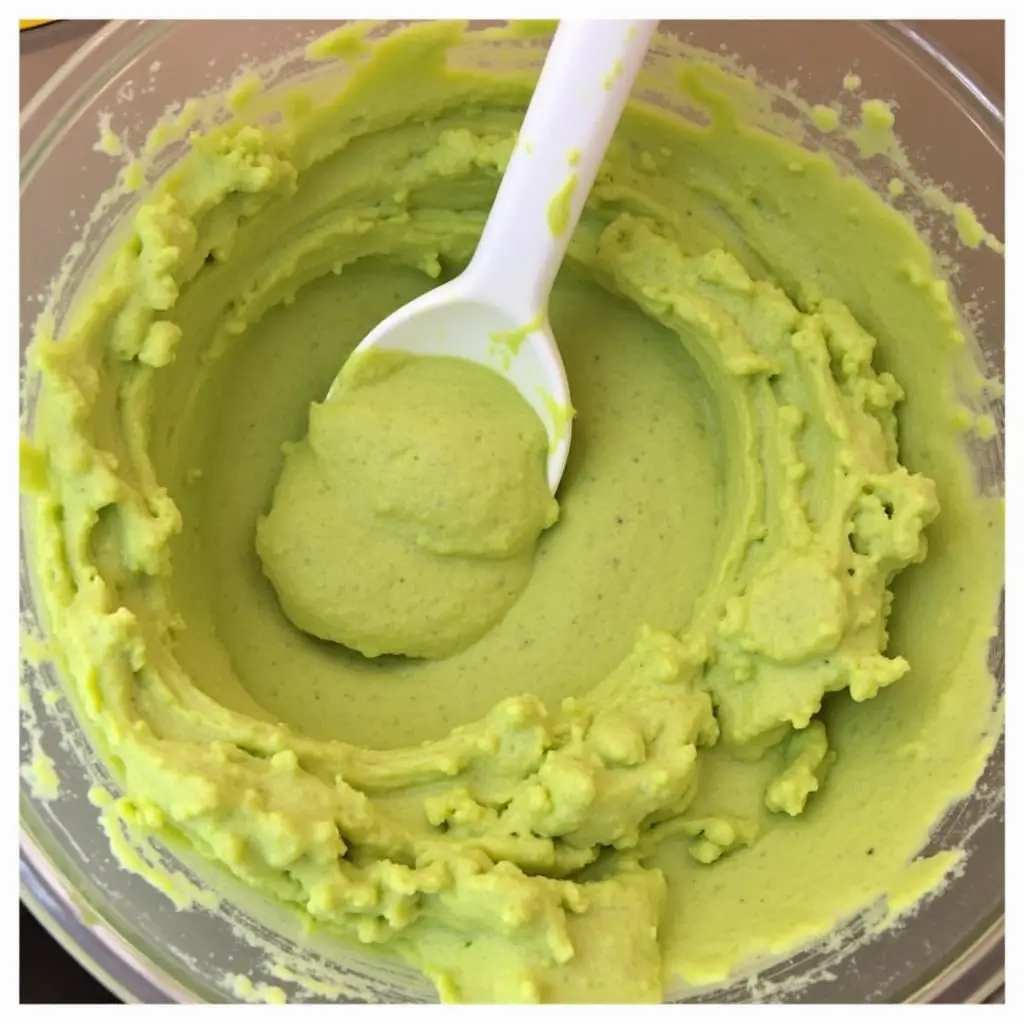
A creamy banana and avocado mash in a bowl with a spoon, featuring a smooth and nutrient-rich baby food texture.

Ingredients:

  • 1 ripe banana
  • 1 ripe avocado

Instructions:

  1. Peel and pit the avocado; scoop the flesh into a bowl.
  2. Add the peeled banana.
  3. Mash together until smooth. Serve immediately to prevent browning.

Lentil and Vegetable Stew
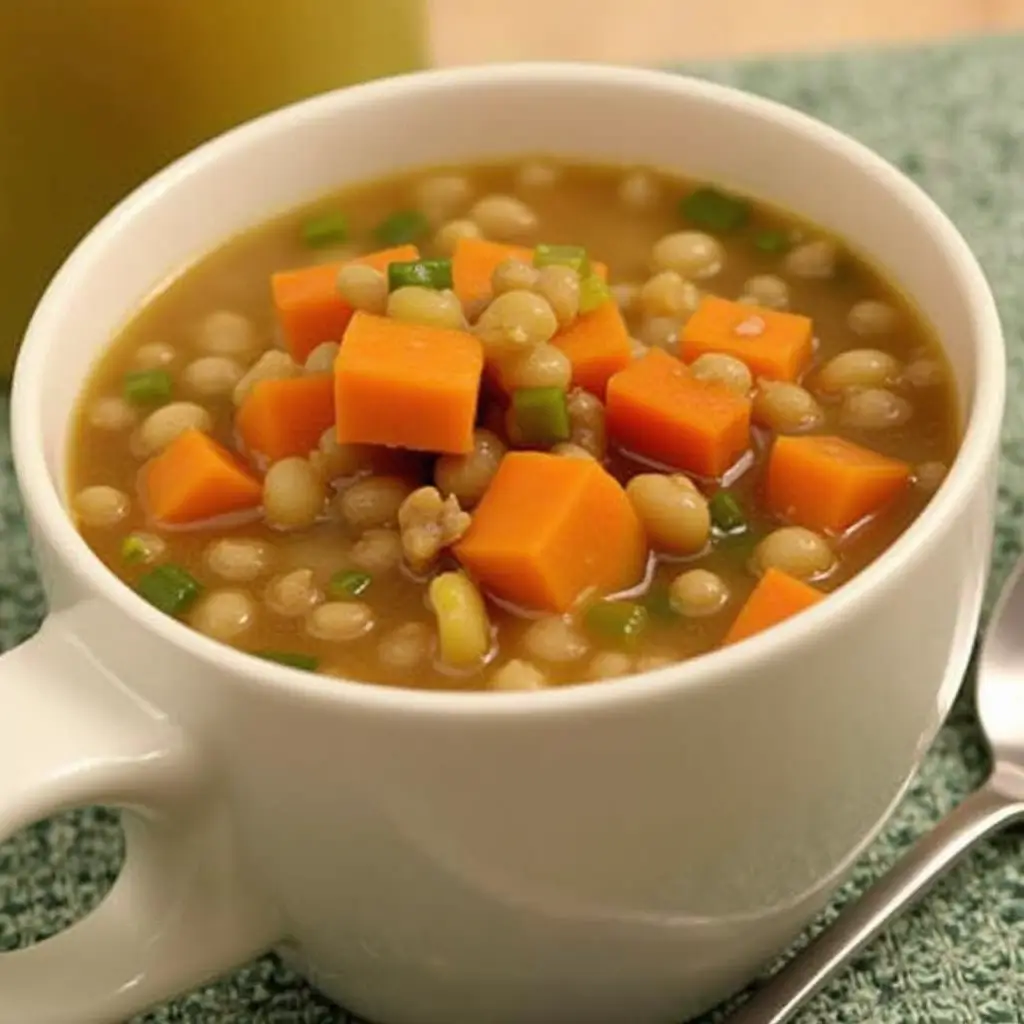
A hearty lentil and vegetable stew in a white cup, featuring diced carrots, lentils, and a flavorful broth.

Ingredients:

  • 1/2 cup red lentils, rinsed
  • 1 small carrot, peeled and diced
  • 1 small potato, peeled and diced
  • 2 cups low-sodium vegetable broth

Instructions:

  1. In a pot, combine all ingredients.
  2. Bring to a boil, then reduce heat and simmer until lentils and veggies are tender.
  3. Mash or blend to desired consistency.

Conclusion

Preparing homemade baby food is a rewarding endeavor that fosters healthy eating habits from the very start. Selecting fresh ingredients and crafting meals with love sets the foundation for your child’s lifelong relationship with food. The recipes shared, Creamy Carrot and Apple Puree, Banana and Avocado Mash, and Lentil and Vegetable Stew, are just the beginning. As you gain confidence, feel free to experiment with different combinations, always keeping your baby’s nutritional needs and taste preferences in mind. Here’s to joyful cooking and even more joyful eating!
FAQs

When should I start introducing solid foods to my baby?

It's generally recommended to begin introducing solids around 6 months of age. Signs that your baby is ready include the ability to sit up with minimal support, showing interest in food, and the loss of the tongue-thrust reflex that pushes food out of the mouth. Always consult with your pediatrician before starting solids to ensure your baby is developmentally ready.

How do I store homemade baby food, and how long does it last?

After preparing your baby's food, allow it to cool before transferring it to airtight containers. Refrigerate portions that will be used within 2-3 days. For longer storage, freeze the puree in ice cube trays; once frozen, transfer the cubes to freezer-safe bags, where they can be stored for up to 2-3 months. Always label containers with the date of preparation. When reheating, ensure the food is warmed evenly and test the temperature before serving to your baby.

Can I use frozen fruits and vegetables for making baby food?

Yes, frozen fruits and vegetables can be a convenient and nutritious option for homemade baby food. They are typically frozen at peak ripeness, preserving their nutritional value. Ensure they are cooked thoroughly before pureeing, and avoid any frozen produce that contains added sugars, salts, or sauces.

How do I know if my baby is allergic to a new food?

When introducing a new food, offer it alone and wait for 3-5 days before adding another new item. This allows you to monitor for any adverse reactions, which may include symptoms like rash, swelling, vomiting, diarrhea, or respiratory issues. If you notice any of these signs, discontinue the food immediately and consult your pediatrician.

Is it necessary to add salt or sugar to my baby's food for flavor?

It's best to avoid adding salt or sugar to your baby's food. Babies have sensitive palates, and introducing them to the natural flavors of foods helps develop healthy eating habits. Additionally, excessive salt and sugar can be harmful to your baby's health. Instead, focus on using fresh, high-quality ingredients to enhance flavor naturally.

Infant Food Ideas & Recipes

A cheerful baby sitting in a highchair, enjoying a plate of wholesome orange-colored food pieces.

Introduction

Feeding your baby can be both exciting and a bit overwhelming. With so many options, where do you even begin? Whether you’re introducing solids for the first time or expanding your baby’s menu, having a few solid “infant food ideas & recipes” up your sleeve can make mealtime a breeze. This guide inspires you with practical tips, nutritious recipes, and fun ways to keep your baby’s taste buds happy. Let’s dive in!

Why Homemade Baby Food?

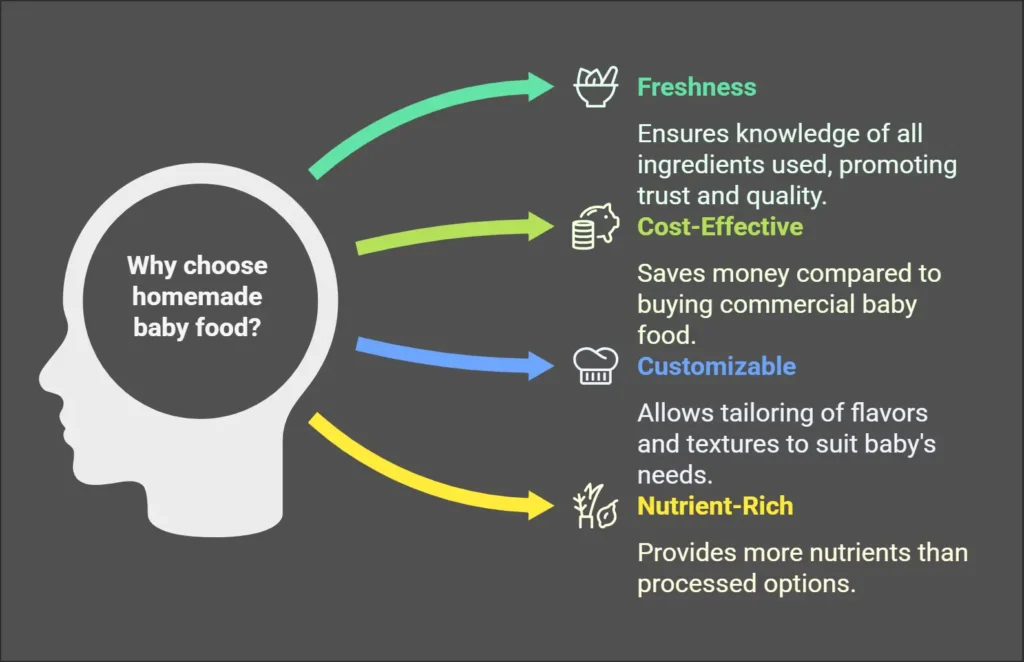
Homemade baby food is a labor of love that offers several perks. Why choose homemade over store-bought? Here are some reasons:

  • Freshness: You know exactly what goes into your baby’s meals.
  • Cost-Effective: Preparing food at home can save a pretty penny.
  • Customizable: You can tailor flavors and textures to your baby’s preferences.
  • Nutrient-Rich: Fresh ingredients often pack more nutrients than processed ones.

Still not sure? Let’s look at how easy it can be to whip up meals your baby will adore.

Diagram explaining the benefits of homemade baby food, highlighting freshness, cost-effectiveness, customizability, and nutrient-rich options.

Getting Started: Tools of the Trade

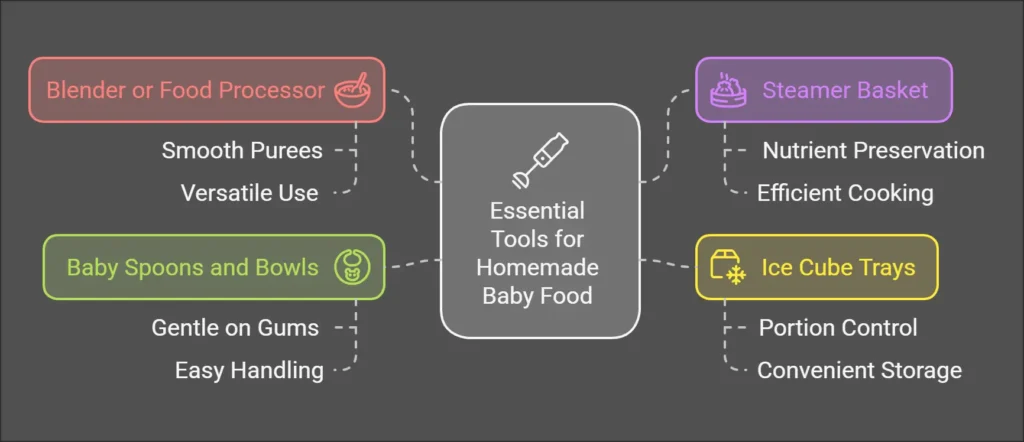
Before diving into recipes, make sure you’ve got the right tools. You don’t need a fancy kitchen setup—just some basics:

  • Blender or Food Processor: For smooth purees.
  • Steamer Basket: Keeps nutrients locked in while cooking veggies.
  • Ice Cube Trays: Perfect for freezing small portions.
  • Baby Spoons and Bowls: Gentle on gums and easy for little hands.

Ready? Let’s roll up our sleeves and start cooking!

Infographic illustrating essential tools for homemade baby food preparation, including a blender, steamer basket, ice cube trays, and baby spoons.

Introducing solids is a big milestone. Start with single-ingredient purees to monitor for allergies and get your baby used to new textures and flavors.

Classic Puree Recipes

Sweet Potato Mash

  • Ingredients: 1 sweet potato, water, or breast milk/formula.
  • Directions: Peel and steam the sweet potato until soft. Blend until smooth, adding water or milk to achieve the desired consistency.

Creamy Carrot Delight

  • Ingredients: 3 carrots, water.
  • Directions: Steam carrots, then blend with a splash of water until velvety.

Apple-Banana Bliss

  • Ingredients: 1 apple, ½ banana.
  • Directions: Steam the apple, then blend with the banana for a naturally sweet treat.

Pro Tip: Freeze leftover purees in ice cube trays for easy portioning later!

Stage 2: Flavor Combos to Expand the Palate

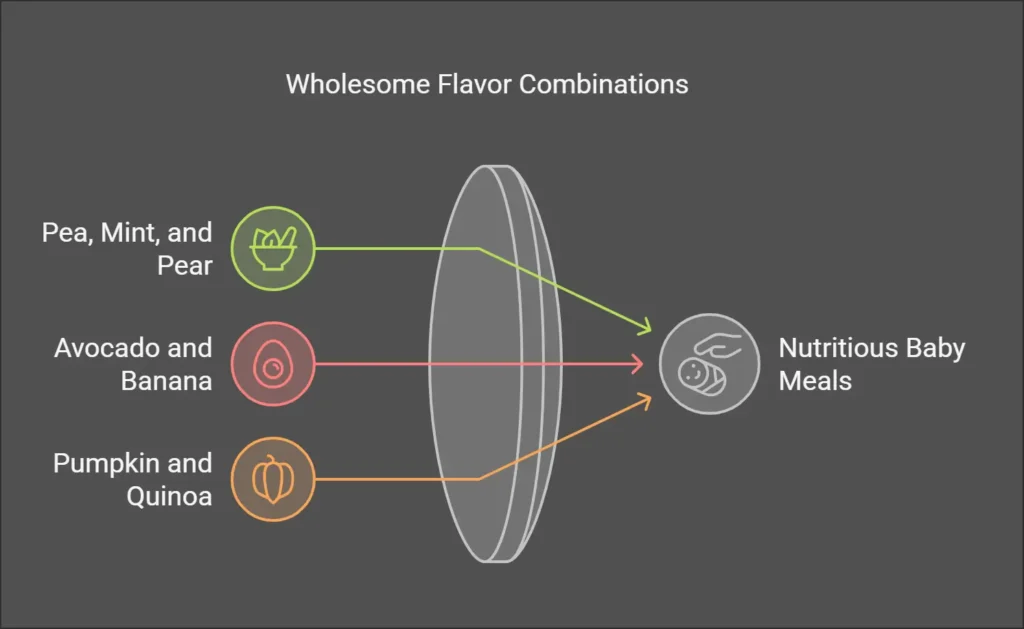
Infographic showing wholesome flavor combinations for baby meals, including pea, mint, and pear; avocado and banana; and pumpkin and quinoa.

Once your baby is comfortable with single ingredients, it’s time to mix things up! Combine flavors and textures for a more exciting mealtime.

Creative Combinations

Pea, Mint, and Pear

  • Sweet and refreshing, this combo is a hit! Blend steamed peas, a ripe pear, and a tiny sprig of mint.

Avocado and Banana

  • Mash together for a creamy, nutrient-packed snack.

Pumpkin and Quinoa

  • Cook quinoa and mix it with steamed pumpkin for a wholesome, hearty meal.

Pro Tip: Add spices like cinnamon or nutmeg (in tiny amounts) to introduce subtle new flavors!

Stage 3: Finger Foods and Beyond

When your baby shows interest in self-feeding, it’s time for finger foods. These recipes will keep your baby engaged and satisfied.

Baby-Friendly Finger Foods

  • Soft Veggie Sticks: Steam carrots, zucchini, or green beans until soft enough to mash between fingers.
  • Mini Pancakes: Whip a batter with mashed banana, oat flour, and an egg. Cook small rounds for easy grabbing.
  • Cheese Cubes: Mild cheeses like mozzarella are perfect for little fingers.

A Week of Meal Ideas

To make life easier, here’s a sample week of meals for your baby:

Monday

  • Breakfast: Mashed avocado and toast fingers.
  • Lunch: Sweet potato and carrot puree.
  • Dinner: Apple-banana mash.

Tuesday

  • Breakfast: Oatmeal with a dash of cinnamon.
  • Lunch: Pumpkin and quinoa mix.
  • Dinner: Steamed broccoli florets.

Repeat with variations for the rest of the week!

FAQs

How do I know if my baby is ready for solids?

Look for signs like sitting up with minimal support, showing interest in your food, and the ability to move food to the back of their mouth.

What’s the best first food?

Single-ingredient purees like sweet potatoes, carrots, or avocados are great options.

How much should I feed my baby?

Start with 1-2 teaspoons per meal and gradually increase as your baby gets used to solids.

Can I season my baby’s food?

Yes! Mild herbs and spices (like cinnamon or dill) are safe in small amounts and can add variety.

Conclusion

Feeding your baby is about more than just nourishment. It’s about laying the foundation for a lifetime of healthy eating. Incorporating these “infant food ideas &  recipes” makes the process fun, easy, and rewarding. Whether mashing avocados or whipping mini pancakes, remember that every bite is a step toward your baby’s growth and happiness. Happy cooking!

Share with us your opinion!

Baby Finger Foods Recipes

Creative baby finger food arrangement shaped like a hand, made from millet and banana puree with blueberry eyes and a smiley face.

Introduction

When your little munchkin is ready to explore the exciting world of solid foods, it’s a milestone worth celebrating. But let’s face it, coming up with ideas for baby finger foods can sometimes feel like cracking a tough nut. You want something easy to prepare, safe, and, of course, irresistibly delicious. Well, you’re in luck! This guide serves up five of the best baby finger food recipes, with tips and tricks to keep your baby’s taste buds singing. So, grab your apron, and let’s get cooking!

Why Finger Foods Matter for Babies

Introducing finger foods isn’t just about feeding your baby; it’s a developmental adventure. Wondering why they’re such a big deal? Here’s the scoop:

  • Encourages Independence: Babies learn to feed themselves, boosting their confidence and fine motor skills.
  • Explores Textures: Different textures help babies become more adventurous eaters.
  • Promotes Hand-Eye Coordination: Picking up small pieces is like a mini workout for their little hands.

How to Choose the Right Finger Foods

Before diving into the recipes, keep these golden rules in mind:

  1. Soft is Key: Ensure foods are soft enough for your baby to gum or chew.
  2. Size Matters: Bite-sized pieces minimize choking risks.
  3. Nutritional Powerhouses: Opt for wholesome ingredients to fuel your baby’s growth.

Baby Finger Foods: 5 Top Recipes

1. Sweet Potato Bites

Who doesn’t love sweet potatoes? They’re naturally sweet, packed with vitamins, and super versatile.

Ingredients:

  • 1 medium sweet potato
  • 1 tablespoon olive oil
  • A pinch of cinnamon (optional)

Instructions:

  1. Preheat your oven to 375°F (190°C).
  2. Peel and dice the sweet potato into small, baby-friendly cubes.
  3. Toss the cubes with olive oil and a sprinkle of cinnamon.
  4. Spread them on a baking sheet and roast for 20–25 minutes, flipping halfway through.
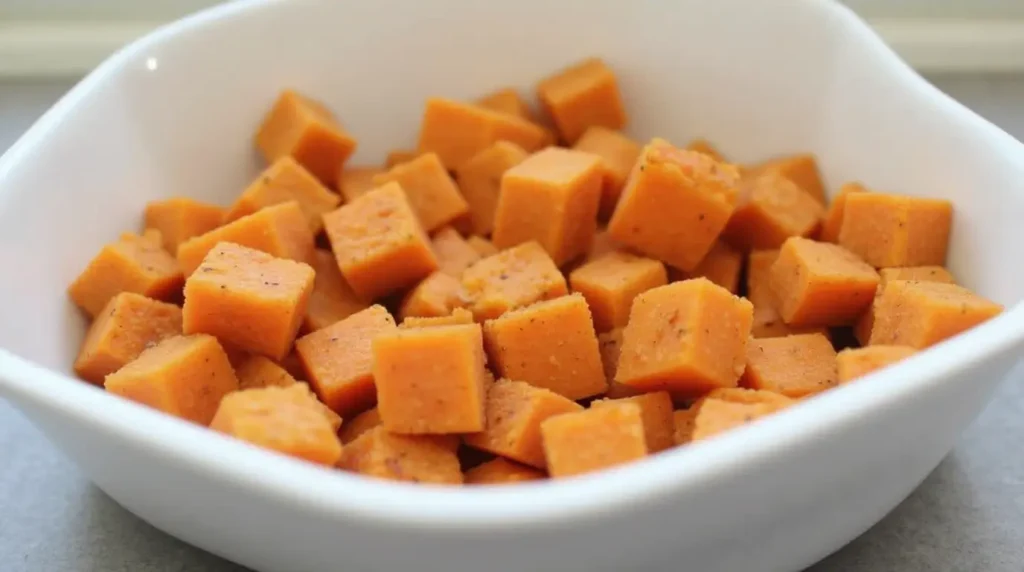
Cubed sweet potato bites in a white bowl, perfect for baby finger food and healthy snacking.

Why it’s a winner: These bites are soft, flavorful, and easy for tiny fingers to grip. Plus, they’re a hit with grown-ups too!

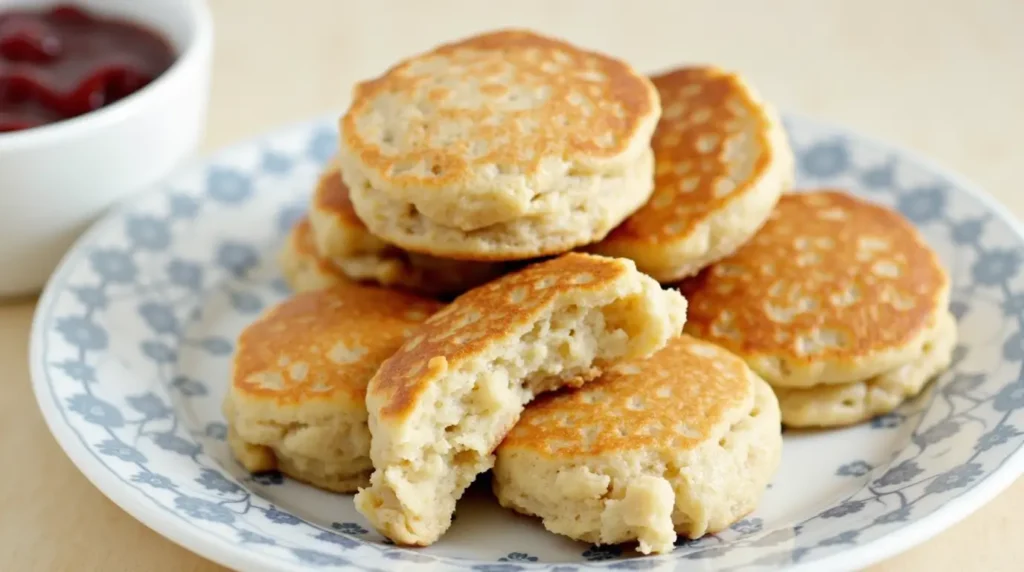
2. Banana Pancake Bites

Breakfast just got a lot cuter (and tastier)!

Ingredients:

  • 1 ripe banana
  • 1 egg
  • 2 tablespoons rolled oats

Instructions:

  1. Mash the banana in a bowl until smooth.
  2. Add the egg and oats, mixing well to form a batter.
  3. Heat a non-stick skillet over medium heat and spoon small dollops of batter onto the pan.
  4. Cook each side for about 1–2 minutes or until golden brown.
A plate of golden banana pancake bites with a soft texture, perfect for babies and toddlers.

Why it’s a winner: These mini pancakes are naturally sweet and easy to hold. Bonus points for being freezable for busy mornings!

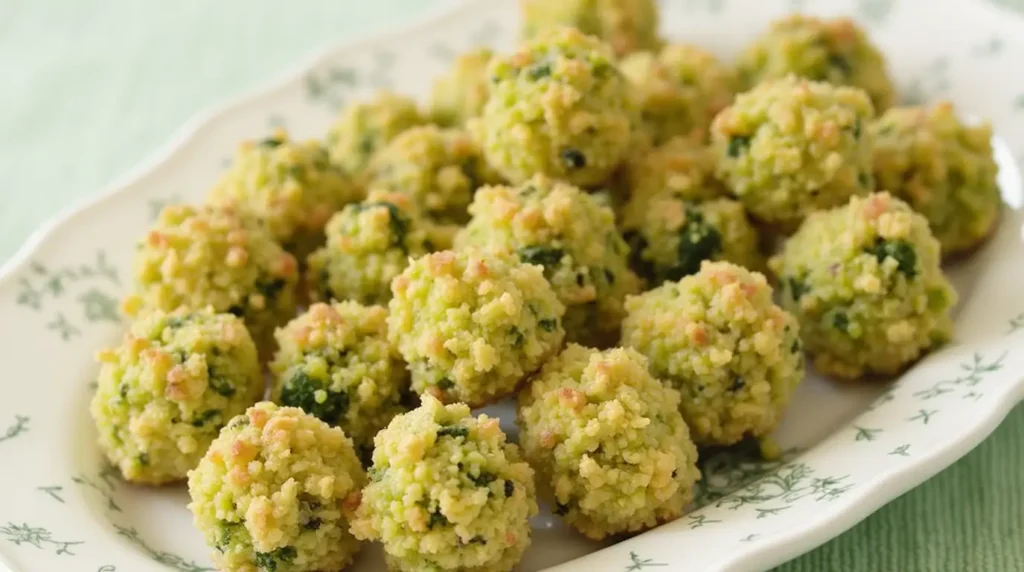
3. Cheesy Broccoli Tots

Getting veggies into your baby’s diet has never been this fun.

Ingredients:

  • 1 cup steamed broccoli
  • ¼ cup shredded cheddar cheese
  • 1 egg yolk
  • ¼ cup breadcrumbs

Instructions:

  1. Preheat your oven to 375°F (190°C).
  2. Finely chop the steamed broccoli.
  3. Mix broccoli, cheese, egg yolk, and breadcrumbs in a bowl.
  4. Shape the mixture into small tots and place them on a baking sheet.
  5. Bake for 15–20 minutes, or until lightly browned.
A plate of golden-brown cheesy broccoli tots, perfect for toddlers and kids as a healthy snack.

Why it’s a winner: These tots are soft, cheesy, and packed with green goodness, perfect for picky eaters!

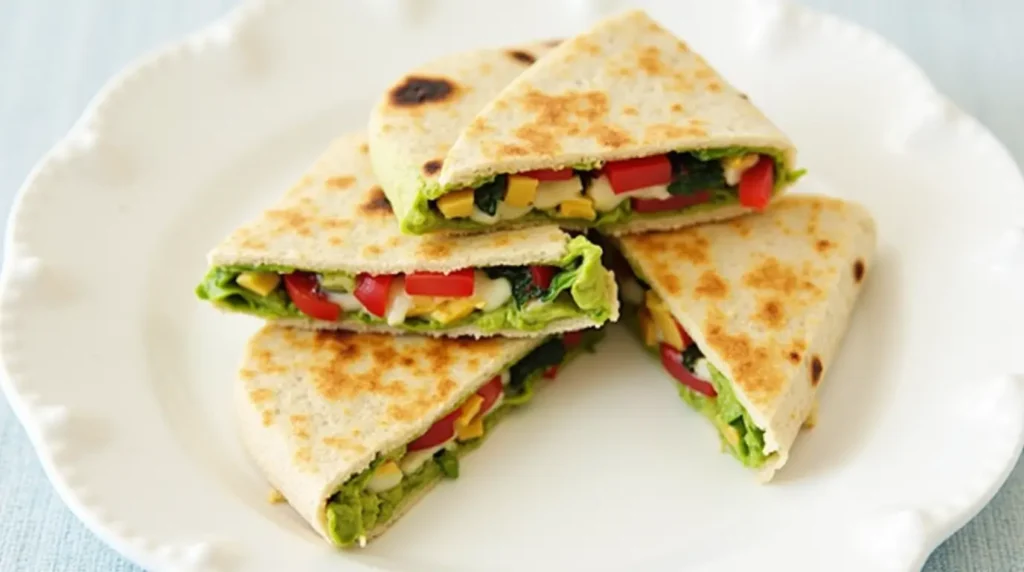
4. Mini Veggie Quesadillas

Mexican night, but make it baby-friendly!

Ingredients:

  • 1 small whole-wheat tortilla
  • 2 tablespoons mashed avocado
  • 1 tablespoon shredded cheese
  • Finely chopped veggies (like tomatoes or spinach)

Instructions:

  1. Spread mashed avocado on half the tortilla.
  2. Sprinkle cheese and veggies on top.
  3. Fold the tortilla in half and cook on a skillet over medium heat until lightly browned.
  4. Cut into small triangles for easy handling.
Close-up of mini veggie quesadillas filled with colorful vegetables and melted cheese, served on a white plate.

Why it’s a winner: These quesadillas are soft, flavorful, and customizable with your baby’s favorite fillings.

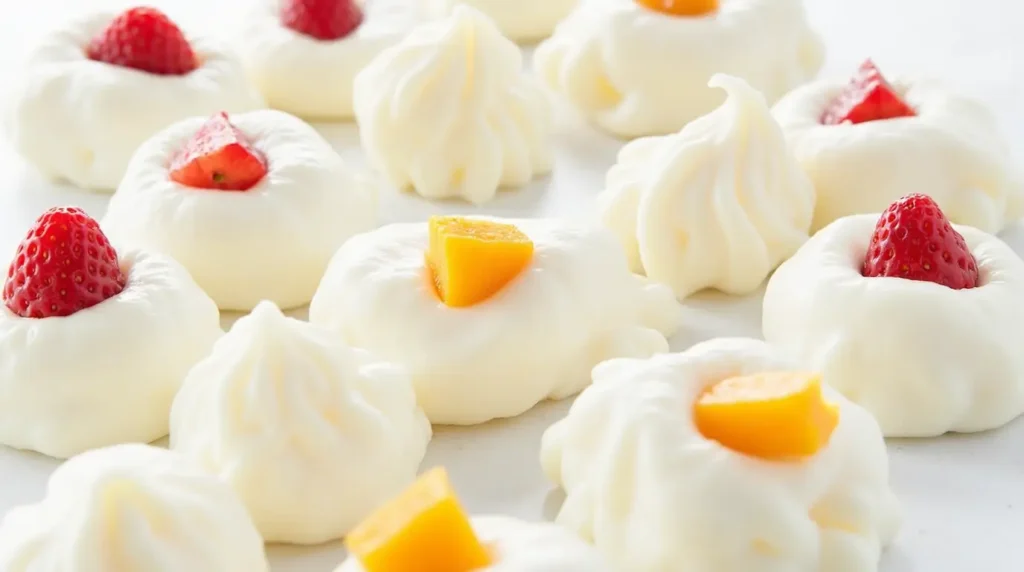
5. Fruity Yogurt Melts

A snack that’s cool, creamy, and oh-so-refreshing!

Ingredients:

  • ½ cup plain yogurt
  • 2 tablespoons fruit puree (like strawberry or mango)

Instructions:

  1. Mix the yogurt and fruit puree until well combined.
  2. Use a piping bag or a small spoon to drop tiny dollops onto a baking sheet lined with parchment paper.
  3. Freeze for 2–3 hours until solid.

Close-up of fruity yogurt melts topped with fresh strawberry and mango pieces, arranged on a white surface.

Why it’s a winner: These melts are the perfect on-the-go snack with endless flavor possibilities.

Tips for Introducing Finger Foods

  • Patience Pays Off: Don’t stress if your baby doesn’t take finger foods immediately.
  • Stay Close: Always supervise your baby during meals to ensure safety.
  • Mix It Up: Offer a variety of textures and flavors to keep things exciting.
  • Batch Cooking Saves the Day: Prepare large batches of finger foods and freeze extras for busy days.
  • Embrace the Mess: Mealtime will get messy, and that’s okay! A bib and a splash mat are your best friends.
  • Variety is the Spice of Life: Rotate different foods to keep things interesting for your baby.

FAQs

What if my baby gags on finger foods?

Gagging is actually a natural reflex that helps prevent choking. Stay calm, encourage your baby to keep trying, and always supervise during meals.

How do I know if food is safe?

If it’s soft, small, and easily mashable, it’s likely safe. Avoid foods like whole grapes, nuts, and chunks of meat.

Can I use store-bought options?

Absolutely! Just check the labels for minimal ingredients and no added salt or sugar.

When can I start giving my baby finger foods?

Babies are usually ready for finger foods around 8-10 months, but it’s essential to look for signs like improved hand coordination and the ability to sit up independently.

What should I avoid when preparing baby finger foods?

Avoid hard, sticky, or overly salty foods. Nuts, whole grapes, and raw carrots are common choking hazards.

Can these recipes be stored for later?

Absolutely! Many of these recipes, like the banana pancake bites and broccoli tots, can be frozen for future meals.

How do I encourage my baby to try new foods?

Offer a mix of familiar and new options. Babies may need multiple exposures to a new food before they accept it, so don’t give up too soon.

Conclusion

Introducing finger foods doesn’t have to be a daunting task. With these five top recipes, you’ll have a happy, curious eater in no time. From sweet potato bites to fruity yogurt melts, there’s something here to suit every tiny palate. So, what are you waiting for? Get creative, make mealtime fun, and enjoy this precious phase with your baby. Happy cooking!

The Best Finger Foods for Baby

When your baby starts exploring food, it’s not just a milestone. It’s an adventure! Finger foods are the perfect way to introduce little ones to the wonderful world of eating independently. They’re convenient and encourage essential motor skills like grasping and hand-eye coordination. Let’s dive into some simple homemade finger food recipes that are easy to prepare, baby-friendly, and oh-so-delicious.

Why Finger Foods Are a Must for Babies?

Finger foods are more than just cute little bites—they’re a practical way to help your baby learn self-feeding. Offering simple, homemade options ensures your baby gets fresh and nutritious food without the preservatives or added sugars often found in store-bought snacks. Plus, you can tailor the ingredients to suit your baby’s taste preferences and dietary needs.

Whether it’s their first taste of solid food or they’re well on their way to toddlerhood, these recipes are bound to delight their taste buds.

1. Soft Veggie Bites: A Perfect Start...

Vegetables are a powerhouse of nutrients, and soft veggie bites are an excellent way to introduce them to your baby. This recipe combines vibrant colors with soft textures that are easy to chew and safe for little mouths.

Recipe: Simple Veggie Bites

Ingredients:
– 1 medium sweet potato
– 1 medium zucchini
– One small carrot
– 1 egg (optional for binding)
– 2 tablespoons of breadcrumbs

Steps:
1. Preheat your oven to 375°F (190°C) and line a baking tray with parchment paper.
2. Steam or boil the sweet potato, zucchini, and carrot until soft.
3. Mash the vegetables together, and add the egg and breadcrumbs to form a soft dough.
4. Shape the mixture into small, baby-sized balls or patties.
5. Bake for 15–20 minutes or until slightly golden. Cool before serving.

These veggie bites are soft enough for young eaters and packed with vitamins to support their growing bodies. Plus, you’ll feel great knowing exactly what’s in them!

2. Mini Fruit Pancakes: Sweet and Nutritious

If you’re looking for a sweet treat that’s also healthy, mini fruit pancakes are your go-to option. These tiny pancakes are easy for babies to hold and packed with natural fruit sweetness. They’re ideal for breakfast or a quick snack on the go.

Recipe: Banana Berry Mini Pancakes

Ingredients:
– 1 ripe banana
– 1/4 cup of mashed blueberries or strawberries
– 1/2 cup of oat flour
– 1/4 cup of milk (breast milk, formula, or any baby-safe alternative)
– A pinch of cinnamon (optional)

Steps:
1. Mash the banana and mix it with the berries.
2. Add the oat flour, milk, and cinnamon to create a thick batter.
3. Heat a non-stick skillet over low heat and spoon small dollops of batter onto the pan.
4. Cook until bubbles form on the surface, then flip and cook for another minute.
5. Cool completely before serving.

These pancakes are soft, easy to chew, and naturally sweet without any added sugar. You can also make a larger batch and freeze extras for busy mornings.

3. Cheesy Cauliflower Tots: Irresistible Flavor

Cheese is a favorite for many babies, and pairing it with cauliflower creates a nutritional boost in these cheesy tots. They’re packed with flavor, easy to handle, and an excellent source of calcium and fiber.

Recipe: Cheesy Cauliflower Tots

Ingredients:
– 1 cup of steamed cauliflower
– 1/4 cup of shredded cheese (mild cheddar or mozzarella works well)
– 1/4 cup of breadcrumbs or crushed baby-friendly crackers
– 1 egg

Steps:
1. Preheat your oven to 400°F (200°C) and grease a mini muffin tin or baking tray.
2. Mash the steamed cauliflower into a coarse texture.
3. Mix in the shredded cheese, breadcrumbs, and egg to form a thick batter.
4. Scoop small portions into the muffin tin or shape them into tot-like logs.
5. Bake for 20 minutes, flipping halfway through, until golden brown. Let them cool before serving.

Not only are these tots finger-friendly, but they’re also customizable. Swap out cauliflower for broccoli or add a sprinkle of herbs for variety.

Avocado is a superfood for growing babies, loaded with healthy fats, vitamins, and a creamy texture that’s easy to eat. Turning it into toast fingers makes it even more appealing for little ones who love to explore new tastes and textures.

Recipe: Baby-Friendly Avocado Toast

Ingredients:
– 1 slice of whole-grain bread
– 1/4 ripe avocado
– A dash of lemon juice (optional)

Steps:
1. Toast the bread lightly to make it firm but not too crunchy.
2. Mash the avocado and mix in a drop of lemon juice for freshness.
3. Spread the avocado onto the toast, then cut it into small, baby-sized strips.
4. Serve immediately, ensuring the toast is soft enough for your baby to chew easily.

Avocado toast fingers are a quick and fuss-free recipe that’s perfect for breakfast or a snack. Plus, they’re a great way to get your baby used to nutrient-dense foods early on.

5. Tips for Serving Finger Foods Safely

You’ve got the recipes, but let’s not forget the golden rules of serving finger foods to babies. Safety is key, so here are a few tips to keep mealtime stress-free:

1. Size Matters: Always cut finger foods into pieces small enough for your baby to hold and chew comfortably.
2. Monitor Closely: Never leave your baby unattended while eating.
3. Texture is Important: Ensure the food is soft and easy to chew, especially if your baby doesn’t have many teeth.
4. Avoid Common Choking Hazards: Skip hard, round foods like whole grapes or nuts.
5. Watch for Allergies: Introduce new ingredients one at a time to monitor for allergic reactions.

Store-bought snacks may seem convenient, but homemade finger foods offer unbeatable benefits. They’re fresh, preservative-free, and made with love, which means you know exactly what your baby is eating. These recipes are simple to make and adaptable to whatever ingredients you have on hand.

Not to mention, cooking for your baby is a wonderful way to bond. You’ll enjoy experimenting with flavors and watching their little face light up as they discover their new favorite food. So roll up your sleeves and have fun making these delicious baby recipes!

7. Final Thoughts

Introducing finger foods doesn’t have to be overwhelming. With a handful of simple, homemade recipes, you’ll have plenty of options to keep your baby’s meals exciting, nutritious, and fun. From veggie bites to cheesy tots and sweet mini pancakes, these dishes are sure to become mealtime favorites.

Remember, every baby is different, so feel free to tweak these recipes to suit your little one’s needs. Whether you’re prepping for a snack, lunch, or a special treat, these homemade creations are the perfect way to explore delicious baby recipes while making lifelong memories together.

Stay tuned for more tips and recipes as we continue exploring the wonderful world of baby-led feeding!

Best Baby Finger Foods (6-12 Months)

A baby enjoying colorful and soft finger foods, including fruits and vegetables, ideal for self-feeding at 6-12 months.

Best Baby Finger Foods (6-12 Months): Starting your little one on solid foods can be exciting yet slightly nerve-wracking. They are experiencing new tastes and textures, and as they learn to chew, finger foods become a pivotal part of their culinary journey. You’ll want to choose delicious, nutritious, and safe foods for your baby to handle independently. This helps them develop healthy eating habits from a young age while gaining the confidence to explore their food. Let’s dive into some top finger foods that can make mealtime fun and engaging for you and your little one!

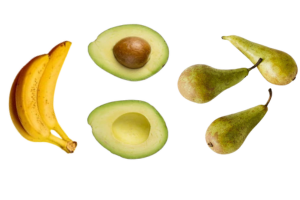
Soft fruits are perfect for introducing some of the Best Baby Finger Foods (6-12 Months). They are not only delicious but also packed with vitamins and antioxidants. You might start with ripe bananas, which you can peel and slice into manageable pieces. Your baby will love the sweetness, and you’ll appreciate how easy they are to prepare.

Another fantastic option is ripe avocados. Just cut them in half, scoop out the flesh, and cut it into small chunks. Avocados are filled with healthy fats that support brain development, making them a must-have on your list of delicious baby recipes. Plus, they are so creamy that your little one will find them delightful to chew!

Ripe pears are another great choice. They can be steamed or simply sliced into thin wedges. The natural sweetness will surely please your baby’s palate. Steamed apples are also lovely and can be cut into bite-sized pieces. Experimenting with various soft fruits will ensure your baby develops a taste for different flavors.

Tip: You can mix a few different fruits on one plate for a fruity medley your baby will enjoy. A rainbow of colors looks appetizing and encourages your little explorer to try everything.

2-Delicious Veggies: A Crunch of Fun

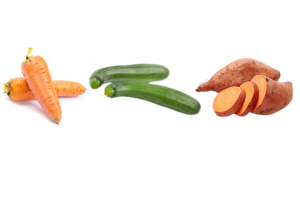
While fruits are often a hit, don’t forget about veggies! Steamed vegetables can make for an excellent finger food option. Start with soft carrots; just peel, chop them into sticks, and steam until they are tender enough to be squished between your fingers. Your baby will find them easy to hold, and they offer a nice crunchy texture as they start learning to chew.

Sweet potatoes are another amazing choice. You can bake or steam them and then cut them into small, chunky pieces. The natural sweetness will entice your baby, and you’ll love knowing they are also rich in vitamins A and C.

Don’t overlook zucchini! This versatile vegetable can be steamed or lightly sautéed to create a tender treat for your baby. Its mild flavor makes it easy to add to other dishes, and you can even load it up with fun spices as your little one grows more accustomed to different tastes.

Pro Tip: Use cookie cutters to create fun shapes out of steamed veggies. Next time you serve a meal, it will look extra inviting, and your baby will be curious to try the unique shapes!

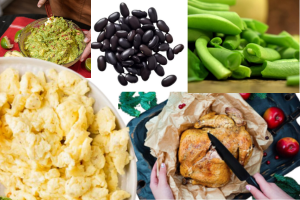
As babies grow, they need proper protein to fuel their development. Soft scrambled eggs are a fantastic source of protein and incredibly easy to prepare. Just whisk the eggs and cook them gently until they’re just set. Once they cool a little, you can cut them into small pieces for your baby to grab.

You might also consider adding small pieces of cooked chicken or turkey. Once cooked thoroughly, ensure you shred or chop them into bite-sized pieces that are easy for your baby to handle. Lean proteins are filling and essential for your baby’s growth and development.

Beans can be another protein-rich option. You can use cooked garbanzo beans (chickpeas) or black beans. They are soft, nutritious, and fun for your baby to pick up. Just be sure to smash them slightly to make them easier to chew. These can be served solo or mixed into mashed avocados for a tasty dip.

Healthy Snack Ideas: Make a veg and protein mix by mashing scrambled eggs with soft avocado, or serve your baby a side of chicken with a blend of mashed sweet potatoes. They’ll love the varied tastes and textures, while you enjoy knowing they are getting essential nutrients.

4-Grains: Soft Yet Satisfying

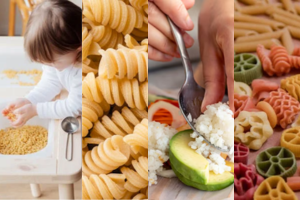
As you explore different delicious baby recipes, grains can be essential to your baby’s diet. Soft bread is a classic finger food that many little ones enjoy. Choose whole grain bread to give your baby more nutrients, and cut it into small squares or strips. You can also lightly toast it to create a nice texture for them to explore.

Pasta is another fantastic option. Cook some small pasta shapes, such as macaroni or fusilli, until they’re soft. You can toss them in a little olive oil or a mild tomato sauce to add flavor. Your baby will find them easy to grab and gnaw on.

Rice can also be a fun finger food, especially when mixed with a bit of vegetable puree or a tiny sprinkle of cheese. Offer it in small amounts so it’s easy for your baby to scoop up, and watch them practice their fine motor skills as they learn to eat.

Creative Presentation: Serve pasta in a “pasta salad” style, mixing soft veggies, proteins, and a light dressing. Not only will your baby love the colors, but the varied textures will keep mealtime playful!

When it comes to feeding your baby, presentation can make a world of difference! You might find that arranging their meals into fun shapes or bright colors sparks their interest. Food faces are always a hit. Use pieces of fruit, vegetables, and proteins to create playful faces on their plate.

Letting your baby explore with their hands will also help them build confidence. You can create a little “food playtime.” Set down a mat, lay out different finger foods, and watch as they experiment with textures. Even if they make a delightful mess, this process is essential for their development.

Try thinking outside the box and incorporate themed meals based on favorite characters or stories. If your little one loves a certain cartoon, use that as inspiration to create meals. For example, if they love a particular animal, you can cut fruits and veggies to resemble it.

Messy but Meaningful: Don’t shy away from the mess! The more your baby plays with their food, the more they engage with it, which will steadily improve their chewing skills and willingness to try new things.

Navigating the world of finger foods can have its hurdles. One common mistake some parents make is overthinking sizes and textures. Remember, your baby is learning! Starting with small pieces that are easy to grab is key. If unsure, cut larger pieces into manageable sizes and watch them go for it!

Another pitfall is rushing the process. It’s perfectly normal for babies to take time to adjust to new foods, and you’ll want to be patient. Encourage exploration, and don’t press them to eat if they seem uninterested. They’re naturally curious, so let them lead the way.

Lastly, it’s important to be vigilant about choking hazards. Always supervise your little one while eating, and avoid foods that are hard or too difficult for them to chew. Sticking to soft, mushy foods until they are more skilled in chewing will create a safe and enjoyable mealtime experience.

Light-hearted Approach: If your baby makes a mess, just laugh it off! It’s all part of learning; you may even uncover your little one’s hidden food art talent along the way.

7-Transitioning to More Complex Flavors

As your little one grows and becomes more comfortable chewing, you’ll notice signs that it’s time to transition to more complex flavors and textures. Your baby might start showing interest in what you are eating, or may even reach for your food. This is an excellent sign that they’re ready to explore new taste adventures!

When transitioning, introduce new foods incrementally, starting with textures their little mouths can comfortably handle. Gradually increase the complexity of the foods offered by including additional spices, flavors, and more challenging textures. Just remember, it’s vital to keep an eye on potential allergens and introduce them slowly.

Be sure to continue exploring delicious baby recipes along their journey! As you expand their palate, they will develop healthy eating habits that last a lifetime. Encourage a positive and adventurous attitude towards food by frequently offering family meals—everyone can enjoy the same range of options!

Adventure Awaits: Mealtime is an excellent opportunity for you and your baby to bond. Discovering new flavors together will provide cherished memories and pave the way for a lifetime of healthy eating habits.

8-Enjoying the Journey

The journey of introducing finger foods to your baby is filled with joyful moments and a few messy mishaps. With soft fruits, delicious veggies, powering proteins, and hearty grains, you’re well-equipped to make mealtime a vibrant and engaging experience. Your little ones will thrive as they learn to chew and explore a world of flavors you set before them.

Based on your unique parenting journey, incorporating these tips and ideas into your baby’s first foods will make mealtime delightful. Approach this stage with creativity, fun, and lightheartedness, setting the foundation for a lifelong appreciation of nutritious foods. Share your favorite delicious baby recipes, and let the adventures begin!

Now, prepare the high chair, prepare the finger foods, and sit back, relax, and enjoy the messy, laughter-filled journey of feeding your baby. Happy munching!

FAQs

When can I start introducing finger foods to my baby?

Babies can start finger foods between 6-8 months when they show interest in self-feeding, can sit independently, and have developed basic hand-eye coordination

What are some good first finger foods?

Start with soft, dissolvable foods like banana slices, avocado, cooked vegetables (e.g., broccoli or carrot sticks), and teething biscuits

How do I prevent choking when introducing finger foods?

Avoid hard, round, or slippery foods like whole grapes, raw veggies, or nuts. Cut foods into small, manageable pieces and always supervise your baby during meals

How do I know if my baby is ready for finger foods?

Signs of readiness include the ability to sit upright, coordinate their eyes, hands, and mouth, and show interest in self-feeding

Can my baby eat finger foods without teeth?

Yes, babies can eat soft foods without teeth as their gums are tough enough to crush foods like banana or avocado