The Benefits of Organic Ingredients for Babies

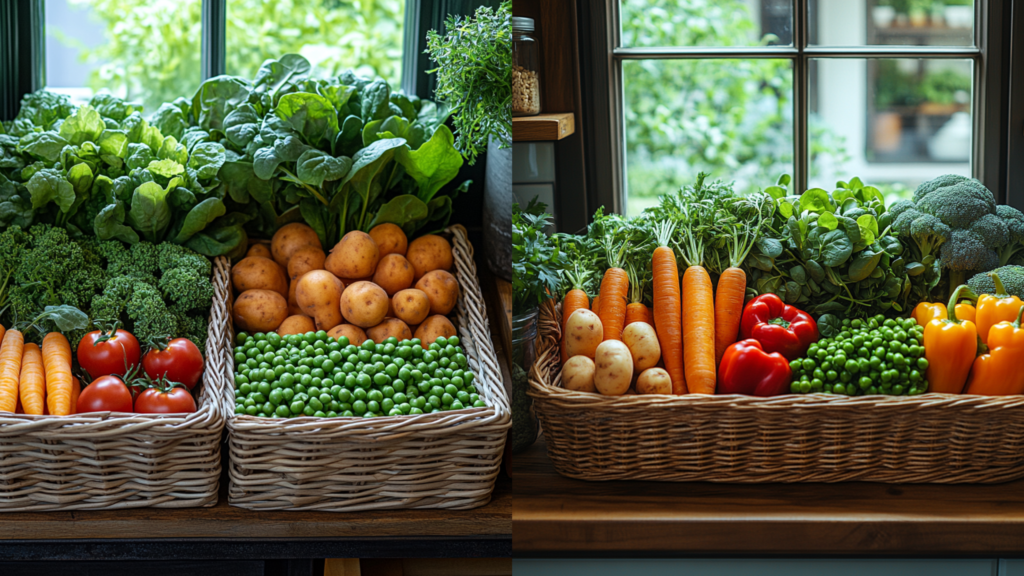
In today’s health-conscious society, the choices we make about our infants’ nutrition are more critical than ever. Opting for organic ingredients in your baby’s diet can provide a multitude of advantages, from reducing exposure to harmful chemicals to enhancing overall health and development.

Organic ingredients are cultivated without the use of synthetic pesticides, fertilizers, genetically modified organisms (GMOs), or irradiation. This method of farming emphasizes natural processes, biodiversity, and ecological balance, ensuring that the food produced is as close to its natural state as possible.

One of the most significant benefits of choosing organic ingredients for your baby is the reduced exposure to harmful chemicals. Conventional farming often employs synthetic pesticides and fertilizers, residues of which can remain on produce and make their way into the food supply. Infants, with their developing systems, are particularly vulnerable to these chemicals. Studies have shown that organic foods have lower levels of pesticide residues, thereby minimizing potential health risks associated with these substances.

Enhanced Nutritional Profile

Organic foods are often richer in essential nutrients compared to their conventionally grown counterparts. Research indicates that organic produce can contain higher levels of vitamins, minerals, and antioxidants, all of which are crucial for a baby’s growth and development. For instance, organic fruits and vegetables may have increased concentrations of vitamin C, iron, magnesium, and phosphorus, contributing to a more robust nutritional intake for your infant.

Introducing organic ingredients into your baby’s diet may also reduce the risk of developing allergies and sensitivities. The absence of artificial additives, preservatives, and GMOs (Genetically Modified Organism) in organic foods means that infants are less likely to encounter substances that could trigger allergic reactions. Moreover, organic dairy and meat products are free from antibiotics and growth hormones, which have been linked to allergic responses in some children.

“”Public opinion on GMOs varies globally, influencing labeling regulations. In the United States, the USDA requires foods containing GMO ingredients to be labeled as “bioengineered.” In the European Union, foods with more than 0.9% GMO content must be labeled accordingly“”

Supporting Immune System Development

A strong immune system is vital for infants as they grow and encounter new environments. The higher antioxidant levels found in organic foods can support immune function, helping to protect your baby against illnesses. Antioxidants combat oxidative stress in the body, which, if left unchecked, can weaken the immune system over time.

Many parents report that organic foods have a more authentic and robust flavor compared to conventionally grown produce. Introducing your baby to these natural tastes early on can encourage a preference for healthy foods as they grow older. Developing a palate for a variety of flavors can lead to healthier eating habits in the long term, reducing the likelihood of picky eating and promoting a balanced diet.

Environmental Benefits

Choosing organic ingredients for your baby also supports environmental sustainability. Organic farming practices are designed to reduce pollution, conserve water, and enhance soil fertility. By opting for organic products, you’re contributing to a farming system that prioritizes ecological balance and the health of our planet, ensuring a better world for your child to grow up in.

While the benefits of organic ingredients are substantial, it's essential to approach this choice thoughtfully:
  • Budget Constraints: Organic products can be more expensive than conventional ones. Prioritize purchasing organic versions of foods that are most susceptible to pesticide residues, often referred to as the “Dirty Dozen,” to make the most of your budget.
  • Availability: Depending on your location, organic options may be limited. Exploring local farmers’ markets or considering home delivery services can expand your access to organic produce.
  • Certification: Look for certified organic labels to ensure the products meet established organic standards. In the United States, the USDA Organic seal is a reliable indicator.

Incorporating Organic Ingredients into Your Baby's Diet

To seamlessly introduce organic ingredients into your baby’s meals, consider the following steps:

  1. Start with Staples: Begin by replacing commonly consumed items with their organic counterparts, such as fruits, vegetables, and grains.
  2. Homemade Baby Food: Preparing baby food at home using organic ingredients allows you to control what goes into your baby’s meals, ensuring freshness and quality.
  3. Gradual Introduction: Introduce new organic foods one at a time and monitor for any adverse reactions, especially if your baby has known food sensitivities.
  4. Educate Yourself: Stay informed about which foods are most beneficial to purchase organic, and seek out reputable sources for your purchases.

FAQs

Q: Are organic baby foods more expensive?

Yes, organic foods can be pricier due to the sustainable farming practices involved. However, many parents find the benefits outweigh the costs!
Q: How do I know if something is truly organic?

Look for the USDA Organic seal when shopping. This ensures the product meets strict organic standards.

Q: Can I feed my baby organic foods if I’m on a budget?

Absolutely! Prioritize buying organic for fruits and veggies with thinner skins, as these tend to absorb more pesticides. You can balance with conventional foods when necessary.

Q: Is there a specific age I should start introducing organic ingredients?

You can start as soon as your baby is ready for solid foods—typically around six months old. Just be sure to introduce one new food at a time!

Conclusion

Opting for organic ingredients in your baby’s diet offers numerous benefits, from reducing exposure to harmful chemicals to providing enhanced nutritional value. While considerations such as cost and availability are important, the potential advantages for your baby’s health and development make organic choices a worthwhile investment. By selecting organic foods, you’re not only nurturing your child’s well-being but also contributing to a more sustainable and healthier planet for future generations.

Effective Strategies for Managing Picky Eating and Texture Sensitivities

1. Understanding and Addressing Picky Eating and Texture Sensitivities

Picky eating and texture sensitivities present significant challenges for individuals and their families, impacting nutritional intake and overall well-being. Addressing these issues requires a comprehensive understanding of their underlying causes and the implementation of effective strategies to promote healthier eating habits.

2. Defining Picky Eating and Texture Sensitivities

Picky eating involves a limited acceptance of foods, often based on taste, appearance, or texture. Texture sensitivities, a subset of picky eating, occur when individuals react adversely to specific food textures, leading to avoidance behaviors. These sensitivities can result from sensory processing disorders (SPD), where the brain struggles to process sensory information, causing overreactions to stimuli such as food textures.

3. Identifying the Causes

Several factors contribute to picky eating and texture sensitivities:

– Sensory Processing Disorders (SPD): Individuals with SPD may find certain textures overwhelming, leading to food aversions. For example, some may gag when consuming foods with specific textures due to sensory overload.

– Developmental Disorders: Conditions like autism spectrum disorder (ASD) are often associated with heightened sensory sensitivities, including aversions to certain food textures.

– Medical Conditions: Gastrointestinal issues, oral-motor dysfunction, and food allergies can cause discomfort during eating, leading to the avoidance of certain foods.

– Psychological Factors: Negative experiences, such as choking or forced feeding, can create lasting aversions to specific foods or textures.

4. Strategies for Managing Picky Eating and Texture Sensitivities

1. Gradual Exposure to New Textures:

Introducing new textures slowly can help individuals become more comfortable with a variety of foods. Start by incorporating small amounts of the new texture alongside familiar foods, gradually increasing the quantity as acceptance grows.

2. Involvement in Food Preparation:

Encouraging participation in meal preparation can reduce anxiety related to new foods. Handling and preparing foods allows individuals to become familiar with different textures in a non-threatening environment.

3. Consistent Mealtime Routines:

Establishing regular meal and snack times creates a predictable environment, which can reduce anxiety and improve acceptance of new foods. Consistency helps individuals know what to expect, making them more open to trying new textures.

4. Positive Reinforcement:

Offering praise or small rewards for trying new foods can motivate individuals to expand their diets. Positive reinforcement encourages repeated exposure and acceptance of new textures.

5. Professional Support:

Consulting with occupational therapists, speech therapists, or dietitians can provide tailored strategies to address specific challenges. Professionals can offer interventions such as sensory integration therapy to help individuals process different textures more effectively.

6. Creating a Positive Eating Environment:

Ensuring mealtimes are stress-free and enjoyable encourages exploration of new foods. Avoid pressuring individuals to eat, as this can increase resistance. Instead, offer a variety of foods and allow them to choose what to try.

7. Utilizing Food Chaining Techniques:

Introduce new foods that are similar in texture or flavor to those already accepted. This method, known as food chaining, helps bridge the gap between familiar and unfamiliar foods, easing the transition to new textures.

8. Addressing Underlying Medical Issues:

Treating any medical conditions contributing to food aversions, such as gastrointestinal discomfort or oral-motor difficulties, is crucial. Addressing these issues can alleviate discomfort associated with eating, making individuals more willing to try new foods.

5. Understanding the Impact of Texture Sensitivities

Texture sensitivities can lead to limited diets, potentially causing nutritional deficiencies. Individuals may avoid entire food groups, leading to imbalanced nutrition. Recognizing and addressing these sensitivities is essential for promoting a balanced diet and overall health.

6. The Role of Sensory Processing in Eating Behaviors

Sensory processing plays a significant role in eating behaviors. Individuals with sensory sensitivities may have heightened or diminished responses to sensory stimuli, affecting their food preferences and aversions. Understanding these sensory aspects is crucial for developing effective interventions.

7. Implementing Sensory Integration Techniques

Sensory integration therapy can help individuals become more comfortable with various textures. This therapy involves activities that challenge and engage the senses in a controlled, gradual manner, helping individuals process sensory information more effectively.

8. Encouraging Family Involvement

Family support is vital in managing picky eating and texture sensitivities. Involving family members in interventions and maintaining a unified approach can create a supportive environment that encourages positive eating behaviors.

9. Monitoring Progress and Adjusting Strategies

Regularly assess the effectiveness of implemented strategies and make necessary adjustments. Monitoring progress ensures that interventions remain effective and allows for the identification of any new challenges that may arise.

10. Conclusion

Addressing picky eating and texture sensitivities requires a multifaceted approach tailored to individual needs. By understanding the underlying causes and implementing targeted strategies, it is possible to expand dietary variety and improve nutritional intake, leading to enhanced health and quality of life.

Why Serving Sizes and Textures Matter for Babies? Tips & Tricks

Smiling baby wearing a bib, enjoying a meal with age-appropriate serving sizes and textures in a bright family dining setting

Safe Serving Sizes and Texture Tips for Baby Food:

Feeding your baby can feel like navigating uncharted territory, right? You want to provide the best, but figuring out serving sizes and textures can be tricky. Don’t worry—we’re breaking it down step by step so you can confidently prepare safe and delicious meals for your little one.

-The Importance of Portion Control:

Babies have tiny tummies, so it’s essential to get the portion sizes right. Offering too much food can overwhelm them, while too little may leave them hungry. Proper serving sizes help you strike the perfect balance, ensuring your baby gets the nutrition they need without overloading their system.

-How Texture Impacts Baby’s Development:

Texture isn’t just about making food interesting—it’s crucial for developing your baby’s oral and motor skills. Starting with smooth purees and gradually transitioning to more complex textures like mashed or finger foods helps them learn to chew, swallow, and eventually feed themselves.

Introducing Baby to Solid Foods: A Step-by-Step Guide

When to Start Introducing Solids?

Most babies are ready for solid foods around 4-6 months. This is when their digestive systems mature, and they start showing curiosity about what you’re eating.

Signs Your Baby is Ready

Look for these cues:
– Sitting up with minimal support
– Showing interest in your meals
– No longer pushing food out with their tongue (tongue-thrust reflex)

Tools You’ll Need for Baby Food Preparation

Equip yourself with the basics:
– A good blender or food processor
– Steamer basket for softening veggies
– Silicone freezer trays for portioning and storing purees

Safe Serving Sizes for Every Stage

4-6 Months: Starting with Single-Ingredient Purees

At this age, babies are just exploring flavors and textures, so start small—around 1-2 tablespoons per meal.

Examples of Safe Portion Sizes:
– Sweet Potato Puree: 1 tablespoon, increasing to 2 tablespoons as they get used to it.
– Mashed Banana: 1 tablespoon to begin, served once a day.

6-8 Months: Moving to Thicker Purees and Soft Mashed Foods

As your baby grows, their appetite will too. Serve about 3-4 tablespoons of food per meal, two to three times a day.

How Much Should You Serve?
– Carrot and Lentil Mash: 2-3 tablespoons.
– Oatmeal with Fruit Puree: 3 tablespoons per serving.

9-12 Months: Finger Foods and Small Pieces

By this stage, babies are exploring self-feeding. Offer ¼ to ½ cup of food per meal, depending on their hunger.

Monitoring Appetite and Signs of Fullness
Watch for cues like turning their head away or pushing food out of their mouth. Babies are great at signaling when they’re full!

Texture Progression: What’s Safe and When?

Smooth Purees: The First Step

Start with silky-smooth purees to help your baby adapt to swallowing solid food. Think steamed and blended carrots or apples.

Gradually Introducing Mashed and Lumpy Textures

Once your baby masters smooth purees, introduce slightly lumpy foods like mashed avocado or soft sweet potatoes. This encourages chewing practice.

Transitioning to Finger Foods

At around 8-9 months, try soft finger foods like steamed broccoli florets or small banana chunks. These foods help develop hand-eye coordination and pincer grasp.

Tips to Make Baby Food Prep Easier

Batch Cooking and Freezing

Save time by preparing large batches of purees and freezing them in small portions. Ice cube trays are perfect for this!

Using Kitchen Tools to Save Time

A steamer and blender are your best friends for baby food prep. Consider investing in a baby food maker for an all-in-one solution.

Common Mistakes to Avoid

Overfeeding or Underfeeding

It’s easy to misjudge how much your baby needs. Start small and adjust portions based on their hunger and fullness cues.

Offering the Wrong Textures Too Soon

Introducing chunky textures or finger foods before your baby is ready can lead to gagging or choking. Follow the texture progression to keep things safe.

Conclusion: Nurturing Baby’s Palate Safely

Feeding your baby is an adventure filled with trial, error, and joy. By paying attention to serving sizes and textures, you can create a positive mealtime experience that supports their development. From smooth purees to chunky finger foods, every stage is a milestone worth celebrating.

Remember, the key is to start small, progress gradually, and enjoy the journey together.

5 Best Vegetables for Babies

The Best Vegetables for Babies: Delicious and Nutritious Choices for Your Little One...

As a parent, you know how important it is to give your baby the best start in life. Regarding introducing solids, vegetables are one of the healthiest options to start with. Packed with essential vitamins, minerals, and fiber, the right veggies can support your baby’s growth and development. In this guide, we’ll dive into the best vegetables for babies that are easy to prepare and super nutritious. Let’s make mealtime fun, stress-free, and full of flavor with “delicious baby recipes” your little one will love!

Why Vegetables Are Perfect for Babies?

Vegetables are a nutrient powerhouse. They provide essential vitamins like A, C, and K, along with minerals like iron and potassium. For growing babies, these nutrients are crucial for development. Plus, introducing a variety of vegetables early on can help your baby develop a taste for healthy foods, setting them up for a lifetime of good eating habits.

As you explore the world of baby-friendly vegetables, remember to keep things simple, experiment with different textures, and don’t stress if your baby takes time to warm up to a new flavor.

Top 5 Vegetables to Start With

When introducing vegetables, it’s best to start with those that are mild in flavor and easy to digest. Here are the top five baby-friendly options:

1. Sweet Potatoes: A Baby’s Best Friend

Sweet potatoes are a popular choice for a reason—they’re naturally sweet, soft when cooked, and packed with nutrients like beta-carotene.
– How to prepare: Steam or bake until soft, then mash or blend with a little water or breast milk.
– Why babies love them: Their sweetness makes them instantly appealing, and their creamy texture is perfect for little mouths.

2. Carrots: Crunchy Goodness Turned Smooth

Carrots are another classic choice, rich in vitamin A and easy to prepare.
– How to prepare: Steam until tender and puree into a smooth consistency. You can also mix them with other veggies like peas.
– Pro tip: Add a pinch of cinnamon for a unique twist that enhances the flavor.

3. Peas: Tiny Nutritional Powerhouses

Don’t let their size fool you—peas are full of vitamin C, iron, and protein.
– How to prepare: Steam and blend into a smooth puree. Strain if needed to remove the skins for younger babies.
– Why include them: Peas are a great way to add protein and fiber to your baby’s diet.

4. Zucchini: A Gentle Veggie for Beginners

Zucchini is mild, hydrating, and easy on the tummy.
– How to prepare: Steam and blend into a light puree. Pair it with sweet potato for a fun flavor combo.
– Extra tip: Zucchini is great for experimenting with textures as your baby grows.

5. Spinach: A Leafy Green Packed with Iron

Spinach might seem bold, but it’s excellent for babies when prepared right.
– How to prepare: Steam or sauté lightly, then puree. Pair it with apples or carrots for added sweetness.
– Why it’s great: It’s loaded with iron, making it a great option for babies who are starting to need more iron-rich foods.

How to Combine Vegetables for Delicious Baby Recipes

Mixing vegetables not only adds variety but also helps balance flavors. Here are some simple and tasty combinations:

1. Carrot and Sweet Potato Puree
A naturally sweet and vibrant puree that’s rich in vitamin A.
– How-to: Steam both veggies, then blend with a splash of water or breast milk until smooth.

2. Pea and Spinach Mash
This combo is perfect for older babies who are ready for bolder flavors.
– How-to: Steam peas and spinach, then puree until creamy. Add a touch of olive oil for extra richness.

3. Zucchini and Potato Medley
A soft, mild dish that’s great for babies new to solids.
– How-to: Steam zucchini and potatoes together, then blend or mash depending on your baby’s stage.

Tips for Introducing Vegetables

Introducing vegetables to your baby can feel overwhelming, but with these tips, you’ll find it’s simpler than you think:
1. Start with one veggie at a time: Give your baby a few days to adjust to each new vegetable before introducing another.
2. Make it fun: Use colorful veggies to make mealtime exciting.
3. Be patient: It’s normal for babies to need multiple exposures to a new flavor before they accept it.
4. Experiment with textures: Start with smooth purees and gradually move to chunkier textures as your baby grows.

Frequently Asked Questions

1. Can I use frozen vegetables for baby food?
Absolutely! Frozen vegetables are often just as nutritious as fresh ones. Just make sure they’re plain with no added salt or seasoning.

2. How do I store homemade baby food?
You can store purees in airtight containers in the fridge for up to three days or freeze them in portions for up to a month.

3. What if my baby doesn’t like a vegetable?
Don’t give up! It can take up to 10 tries for a baby to accept a new flavor. Mix it with a familiar veggie to encourage acceptance.

Organic vs. Conventional: Does It Matter?

For baby food, organic vegetables are a great choice if they fit your budget. They’re grown without synthetic pesticides, making them a cleaner option for your little one. However, conventional vegetables are still highly nutritious, so choose what works best for your family.

Conclusion: Make Veggies the Star of Mealtime

Introducing the best vegetables for babies doesn’t have to be complicated or stressful. With a little preparation and creativity, you can turn simple ingredients into flavorful, delicious baby recipes that your little one will enjoy.

Vegetables are a fantastic way to nourish your baby while helping them develop a love for healthy eating. Start with mild options like sweet potatoes and carrots, then branch out to more adventurous choices like spinach and peas. Remember to have fun, be patient, and celebrate every tiny bite your baby takes!

What are your favorite baby-friendly vegetables? Share your tips and tricks in the comments below!

Baby’s First Foods: A Parent’s Guide to Introducing New Flavors (0-12 Months)

Welcome to the Flavor Journey!

Hey there, amazing parents! Are you ready to embark on an exciting taste adventure with your little one? Introducing new flavors can feel like navigating uncharted territory, but don’t worry – we’ve got you covered! Let’s explore how to make delicious baby recipes a hit with your tiny food critic.

The First Steps: Starting Simple

The Three-Day Rule

Building Your Flavor Foundation

When you begin introducing solid foods, keeping things simple is key. Your baby’s taste buds are brand new to flavors beyond milk. Start with single-ingredient purees to help your baby understand individual tastes.

Single-Ingredient Success Stories:
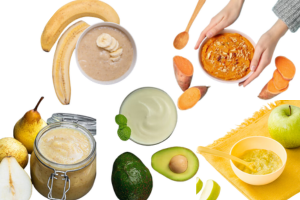
– Mashed banana: Nature’s perfect first food
– Sweet potato puree: Smooth and naturally sweet
– Avocado: Creamy and nutrient-rich
– Pear puree: Gentle on tiny tummies
– Apple sauce: A classic favorite

Before you get creative with delicious baby recipes, remember the three-day rule. Introduce one new food at a time and wait three days before trying another. This helps you identify any potential food sensitivities or allergies.

Signs to watch for:
– Rashes or skin changes
– Changes in bowel movements
– Fussiness or irritability
– Sleep pattern changes
– Breathing difficulties (seek immediate medical attention)

Think of introducing flavors like building a house – you need a strong foundation. Start with mild flavors and gradually work your way up to more complex tastes. Your baby’s palate will develop naturally over time.

Mild to Bold Progression:
1. Week 1-2: Single vegetable purees
2. Week 3-4: Single fruit purees
3. Week 5-6: Simple combinations
4. Week 7-8: Adding mild herbs
5. Week 9+: More complex combinations

The Art of Combining Flavors

Adding Herbs and Spices

Texture Transitions

Once your baby is comfortable with single ingredients, you can start creating exciting combinations. Mix familiar favorites with new tastes to make delicious baby recipes more appealing. Remember to keep portions small and textures appropriate.

Winning Combinations:
– Apple and sweet potato
– Banana and avocado
– Pear and squash
– Carrot and apple
– Sweet potato and pea

Don’t be afraid to introduce mild herbs and spices! They can transform simple purees into exciting taste experiences. Just remember to add tiny amounts at first and avoid salt or sugar.

Baby-Friendly Seasonings:
– Cinnamon with apple puree
– Basil with sweet potato
– Mint with pea puree
– Mild curry with carrot
– Ginger with squash

As your baby grows, gradually introduce different textures. Start with smooth purees and progress to more textured foods. This helps develop chewing skills and prevents feeding difficulties later.

Texture Progression:
1. Smooth purees
2. Thick purees
3. Mashed with soft lumps
4. Soft chunks
5. Finger foods

Reading Your Baby's Cues

Making Mealtimes Fun

Dealing with Food Rejection

Every baby is different, and yours will let you know what they like and don’t like. Watch for these signals:

Positive Signs:
– Opens mouth for more
– Leans forward
– Smiles during feeding
– Makes happy sounds

Signs of Dislike:
– Turns head away
– Pushes spoon away
– Makes faces
– Becomes fussy

Creating a positive eating environment helps your baby associate food with enjoyment. Here are some ways to make mealtimes fun:

Enjoyable Feeding Tips:
– Use colorful bowls and spoons
– Make airplane noises
– Smile and show enthusiasm
– Talk about the food
– Be patient and relaxed

Don’t worry if your baby refuses certain foods – it’s completely normal! Here’s how to handle food rejection gracefully:

Rejection Strategies:
– Try again another day
– Mix with familiar favorites
– Change the texture
– Stay positive
– Keep offering variety

The Power of Persistence

Creating a Routine

Seasonal Flavor Adventures

Did you know it can take up to 15 tries before a baby accepts a new food? Don’t give up after the first few attempts. Keep offering various flavors in different ways.

Persistence Tips:
– Offer small amounts
– Try different temperatures
– Change presentation
– Mix with favorites
– Stay patient

Establishing a feeding routine helps your baby know what to expect. This makes trying new foods less stressful for everyone involved.

Routine Elements:
– Regular meal times
– Consistent feeding location
– Proper seating position
– Family mealtimes when possible
– Clean-up ritual

Take advantage of seasonal produce to introduce new flavors. Fresh, seasonal foods often taste better and have more nutrients.

Seasonal Suggestions:
Spring: Peas, Asparagus, Strawberries…

Summer: Peaches, Zucchini, Green beans…

Fall: Pumpkin, Sweet potato, Apple…

Winter: Butternut squash, Pear, Carrot…

Making Your Own Baby Food

Food Safety First

Celebrating Success

Creating your own delicious baby recipes allows you to control ingredients and experiment with flavors. Plus, it’s more economical and environmentally friendly!

Basic Equipment Needed:
– Steamer or pot
– Blender or food processor
– Ice cube trays
– Storage containers
– Labels

When introducing new flavors, food safety is crucial. Follow these guidelines to keep your baby’s food safe:

Safety Tips:
– Wash hands thoroughly
– Clean all equipment
– Store properly
– Check temperatures
– Watch expiration dates

Remember to celebrate small victories along the way! Each new food your baby accepts is a win worth celebrating.

Milestone Moments:
– First solid food
– First combined flavor
– First textured food
– First finger food
– First family meal

Looking Ahead

Trust Your Instincts

As your baby grows, continue to introduce new flavors and textures. This builds a foundation for healthy eating habits that will last a lifetime.

Future Food Goals:
– Joining family meals
– Self-feeding skills
– Trying new cuisines
– Developing food preferences
– Building healthy habits

You know your baby best. Trust your parental instincts while introducing new flavors, and don’t hesitate to adjust your approach based on your baby’s responses.

Remember:
– Every baby is different
– Progress at your own pace
– Stay positive and patient
– Keep trying new things
– Enjoy the journey

The joy of introducing new flavors to your baby is a special part of parenthood. Take your time, stay patient, and remember that each small step forward is progress. Creating delicious baby recipes and watching your little one discover new tastes is a wonderful adventure you’ll both enjoy.

Keep exploring, keep trying, and most importantly, keep having fun with food. Your baby’s relationship with food starts here, and you’re doing a great job guiding them through this exciting journey of flavor discovery!

Raising a Baby on a Vegan Diet: Challenges and Tips

Raising a baby on a vegan diet can be a rewarding experience, but it does come with challenges that require careful planning. With the right approach, it’s entirely possible to provide all the necessary nutrients to support your baby’s growth and development. Here’s a breakdown of the key aspects:

Challenges of a Vegan Baby Diet

1. Nutritional Balance: Ensuring your baby gets enough protein, iron, calcium, omega-3 fatty acids, and vitamins B12 and D can be tricky, as some of these nutrients are predominantly found in animal products.
2. Meal Preparation: Vegan diets may require more planning and preparation, especially to incorporate a variety of foods that meet all nutritional needs.
3. Medical Supervision: Regular pediatric checkups are essential to monitor your baby’s growth and to address any deficiencies early.

Natural Foods for a Vegan Baby Diet

To meet your baby’s nutritional needs, include the following food groups:

1. Protein Sources:
– Lentils
– Chickpeas (mashed or pureed for younger babies)
– Tofu and tempeh
– Nut butters (thinly spread to avoid choking hazards)

2. Iron-Rich Foods:
– Fortified cereals
– Spinach (cooked and blended)
– Sweet potatoes
– Lentils and beans

Pair iron-rich foods with vitamin C sources like oranges or tomatoes to enhance absorption.

3. Healthy Fats:
– Avocados
– Flaxseeds (ground)
– Chia seeds
– Walnuts

4. Calcium and Vitamin D:
– Fortified plant milks (e.g., almond or soy milk)
– Broccoli
– Kale
– Fortified cereals

5. Vitamin B12:
– Nutritional yeast (fortified with B12)
– Fortified plant-based milks

6. Omega-3 Fatty Acids:
– Ground flaxseeds
– Chia seeds
– Hemp seeds

7. Snacks and Finger Foods:
– Sliced bananas
– Cooked carrot sticks
– Whole grain toast strips with avocado

Tips for Success

– Variety is Key: Introduce a diverse range of foods to ensure your baby gets a wide spectrum of nutrients.
– Supplements: Include a vegan baby supplement for B12, vitamin D, and omega-3s as recommended by your pediatrician.
– Monitor Growth: Regularly track your baby’s growth to ensure their diet supports proper development.
– Stay Informed: Consult with a pediatrician or a vegan dietitian for tailored advice and meal planning.

Final Thoughts

While raising a baby on a vegan diet requires extra attention to nutrition and meal planning, it can be a healthy and ethical choice when done correctly. With access to a variety of plant-based foods and supplements, your baby can thrive and enjoy delicious, natural meals. Always consult with healthcare professionals to ensure your baby’s needs are met.

Your Complete Guide to Fresh Baby Food Storage

Safe Storage Tips for Homemade Baby Food: The Complete Guide

Want to make delicious baby recipes in bulk but unsure how to store them properly?

You’ve come to the right place! I know the struggle of keeping homemade purees fresh and nutritious. Let’s dive into everything you need to know about storing your baby’s food safely and efficiently.

The Basics of Safe Storage: What Every Parent Should Know

Before you start preparing those delicious baby recipes, let’s talk about the foundation of food safety. Your little one’s developing immune system needs extra protection, so proper storage is crucial. Start by washing your hands thoroughly and ensuring all your storage containers are squeaky clean.

Think of your kitchen as a mini food-prep facility. You’ll want to keep everything sanitized, from your blender to your storage containers. An easy trick is to run storage containers through the dishwasher’s hot cycle before each use.

Remember those moments when you’re not sure if a puree is still good? Trust your instincts! If something smells off or looks different than usual, it’s better to be safe than sorry. Your baby’s tummy will thank you for being cautious.

Temperature control is your best friend when storing homemade baby food. Room temperature is fine for only two hours max. After that, those yummy purees need to find their way to cooler spaces.

Fresh Storage Solutions: Making the Most of Your Fridge

Let’s talk about keeping those delicious baby recipes fresh in your refrigerator. Your fridge is perfect for storing purees you’ll use within the next few days. Think of it as your short-term food storage buddy!

Glass containers are fantastic for fridge storage because they don’t absorb food odors or colors. Plus, you can easily see what’s inside without opening them. No more mystery containers hiding in the back of your fridge!

Want to know a cool trick? Label everything with dates using masking tape and a marker. You’ll never have to guess how long that sweet potato puree has been sitting there.

Store your homemade purees in small portions – about 1-2 servings each. This way, you won’t waste food if your little one isn’t super hungry. Nobody likes throwing away those carefully prepared meals!

Keep your purees in the main part of the fridge, not the door. The temperature stays more consistent there, keeping your delicious baby recipes fresher for longer.

Your refrigerated purees will stay good for about 48 hours. That’s plenty of time to use them up while they’re at their nutritional peak. Always check for any signs of spoilage before serving.

Freezing 101: Your Long-term Storage Strategy

Ready to become a freezing pro? This is where the magic happens for busy parents who love making delicious baby recipes in bulk. Your freezer can be your best friend in storing homemade purees.

Ice cube trays are perfect for freezing baby food portions. Each cube is about one ounce – just right for tiny tummies! Simply pop them out once frozen and transfer to freezer bags.

Speaking of freezer bags, squeeze out as much air as possible before sealing. Less air means less chance of freezer burn, keeping those nutritious purees tasting fresh.

Label everything with contents and dates – future you will be so thankful! Include both the date you made it and when it should be used by. Organization is key when freezing multiple batches.

Frozen purees can last up to three months while maintaining their nutritional value. That’s plenty of time to rotate through your stash of delicious baby recipes. Keep track of what you’ve got to avoid waste.

Consider creating a freezer inventory list. Stick it right on your freezer door to easily track what you have and what needs to be used first. It’s like having your own mini food management system!

Smart Thawing Methods: From Freezer to Table

Now, let’s talk about getting those frozen treasures ready for your little one. Thawing needs to be done safely to keep those delicious baby recipes safe and nutritious.

The safest method is overnight thawing in your refrigerator. Pop a few cubes into a container before bedtime, and they’ll be ready for breakfast. It’s like meal prep while you sleep!

In a rush? Place the frozen puree container in a bowl of cold water. This speeds up thawing while keeping everything at a safe temperature. Just remember to change the water every 30 minutes.

Never thaw baby food at room temperature or in hot water. These methods can create warm spots where bacteria love to grow. Keep it cool and safe for your little one.

Once thawed, give the puree a good stir. Sometimes ingredients can separate during freezing, but a quick mix will bring everything back together. Your baby won’t even know it was frozen!

Use thawed purees within 24 hours for the best quality and safety. This means only thaw what you think your baby will eat in a day. Better to thaw more later than waste food!

Pro Tips for Maximum Freshness and Quality

Want to level up your storage game? These insider tips will help you maintain the quality of your delicious baby recipes longer. Every little trick helps when you’re preparing food for your little one!

Consider investing in a vacuum sealer for freezer storage. It removes more air than regular freezer bags, keeping those purees fresher for longer. Think of it as giving your baby food a protective shield!

Color-code your storage containers or freezer bags. Green for veggies, orange for fruits, yellow for grains – whatever system works for you! This makes grabbing the right puree super quick.

When preparing purees for storage, slightly under-cook vegetables. They’ll finish cooking when you reheat them, preventing them from getting too mushy. Your baby will appreciate the better texture!

Store strong-smelling purees (like cauliflower or broccoli) separately from fruits. Nobody wants their apple puree tasting like yesterday’s vegetables! Keep those flavors where they belong.

Use small containers even if you have extra space. The less air in the container, the better your purees will keep. It’s all about minimizing exposure to air and maintaining freshness.

Storage Do's and Don'ts: Quick Reference Guide

Let’s wrap up with some essential do’s and don’ts. These simple rules will help you master the art of storing those delicious baby recipes safely.

DO sanitize all storage containers thoroughly before use. Clean containers mean safe food for your little one. Make this a non-negotiable part of your prep routine.

DON’T refreeze purees that have already been thawed. Once it’s thawed, it either gets eaten or needs to be discarded. No second chances with baby food safety!

DO rotate your frozen stock regularly. Use the oldest purees first to maintain a fresh supply. Think of it as a “first in, first out” system for baby food.

DON’T mix new purees with leftover ones. Each batch should be stored separately to prevent contamination. Fresh is always best when it comes to baby food!

DO keep different types of purees separate. This makes it easier to track freshness dates and prevents flavor mixing. Plus, it helps you maintain variety in your baby’s diet.

Remember, storing baby food properly is just as important as making it. By following these guidelines, you’ll always have safe, nutritious, and delicious baby recipes ready for your little one.

With these storage techniques mastered, you’re well on your way to becoming a baby food prep pro! Keep experimenting with different combinations and storage methods until you find what works best for your family’s routine.

Tips to make your puree-making process easier and more effective

1. Batch Cooking is Your Friend

When you’re making these nutrient-packed purees, why not make extra? You can freeze individual portions in ice cube trays for easy meal prep. Just pop out a cube or two when it’s mealtime, defrost, and you’re good to go!

2. Invest in Good Equipment

A good blender or food processor can make your life so much easier. Look for one that can handle both soft and harder foods. Trust me, it’s worth the investment when you’re whipping up delicious baby recipes regularly.

3. Start Simple, Then Combine

When you’re first introducing solids, start with single-ingredient purees. This helps you identify any potential allergies or sensitivities. Once your baby is comfortable with individual foods, you can start combining them into more complex, nutrient-packed purees.

4. Don't Be Afraid of Herbs and Spices

As your baby grows, you can start introducing mild herbs and spices to your purees. A pinch of cinnamon in apple puree or a touch of basil in a veggie blend can help develop your baby’s palate. Just avoid salt and sugar in your delicious baby recipes.

5. Follow Your Baby's Lead

Every baby is different. Some may prefer smoother textures, while others might be ready for chunkier purees sooner. Pay attention to your baby’s cues and adjust your purees accordingly.

The Joy of Homemade Baby Food

Making your own nutrient-packed purees is more than just about nutrition. It’s a labor of love that allows you to know exactly what’s going into your baby’s body. Plus, it’s often more cost-effective than store-bought options.

As you experiment with these delicious baby recipes, you’ll find yourself getting more creative in the kitchen. Who knows? You might even discover flavor combinations that the whole family enjoys!

Remember, introducing solids is a journey. There will be days when your carefully prepared puree ends up more on the floor than in your baby’s tummy. That’s okay! Keep offering a variety of nutrient-packed purees, and your persistence will pay off.

Celebrating Milestones

Each new food your baby tries is a milestone worth celebrating. From that first spoonful of sweet potato to the day they manage to feed themselves, these are precious moments in your baby’s development.

Consider keeping a food diary to track what your baby has tried and what they like. It can be fun to look back on this as they grow and their tastes change. Plus, it’s helpful information for your pediatrician.

Embracing the Mess

Let’s be real – feeding a baby can get messy! But embrace the chaos. Those messy faces and sticky hands are all part of the learning process. Plus, they make for adorable photo opportunities!

Lay down a splat mat under the high chair for easy cleanup. Dress your baby in easy-to-wash clothes or a large bib. And always have a camera ready – you’ll want to capture those priceless expressions as your baby discovers new tastes and textures.

Remember, mealtime is about more than just nutrition. It’s a time for bonding, learning, and exploring. Here are some ways to make mealtime enjoyable:

1. Eat together as a family when possible. Babies learn by watching others.
2. Make positive comments about the food you’re eating.
3. Let your baby explore their food. It might get messy, but it’s part of learning.
4. Don’t force your baby to eat. Trust their hunger and fullness cues.

Your attitude towards food can influence your baby’s relationship with eating. Keep things positive and fun!

Creating a Positive Food Environment

Nourishing Your Baby with Love

Feeding your baby is about more than just nutrition. It’s about introducing them to the wonderful world of food, helping them develop healthy eating habits, and sharing special moments together.

As your little one grows, you’ll discover countless ways to nourish their body and delight their taste buds. Whether it’s a simple sweet potato puree or a more adventurous salmon blend, each spoonful is an opportunity to show your love and care.

So, grab your apron, fire up the blender, and get ready for a delicious adventure with your little one. Here’s to happy, healthy eating for your baby!

How to Prep Purees for Maximum Nutrition

Welcome to Your Guide to Creating Nutrient-Rich Purees!

Hey there, amazing parents! Ready to unlock the secrets of making super-nutritious purees for your little one? Let’s dive into the world of delicious baby recipes that pack a powerful nutritional punch!

Understanding Nutrient Retention

Before we jump into preparation methods, let’s talk about why proper preparation matters. The way you prepare your baby’s food can significantly impact its nutritional value. You want to keep all those wonderful vitamins and minerals intact!

Best Cooking Methods for Maximum Nutrition

1. Steaming: Your New Best Friend

Steaming is the champion of nutrient retention! This gentle cooking method preserves vitamins while making vegetables tender enough for pureeing. Keep steaming times short to maintain maximum nutrition.

2. Roasting: Flavor and Nutrients Combined


Roasting vegetables can enhance their natural sweetness while maintaining nutritional value. Just avoid overcooked edges, as these might contain fewer nutrients.

3. Raw Preparation (When Appropriate)


Some fruits like ripe bananas and avocados don’t need cooking. They retain all their nutrients and make perfectly smooth purees.

Smart Preparation Steps

1. Wash Properly


Start with thorough washing, even if you plan to peel. Use cold water and gently scrub to remove any residue.

2. Smart Cutting Techniques

Cut vegetables into similar-sized pieces for even cooking. Smaller pieces cook faster, meaning less nutrient loss.

3. Timing Matters

Don’t prep too far in advance. Cut vegetables just before cooking to prevent nutrient loss from exposure to air.

Equipment Essentials

Having the right tools makes creating nutritious purees easier:

1. Quality Steamer Basket
Invest in a good steamer basket that fits your pots. This enables proper steaming without waterlogging vegetables.

2. High-Speed Blender
A powerful blender creates smooth purees quickly, minimizing exposure to air which can degrade nutrients.

3. Glass Storage Containers
Glass containers protect nutrients better than plastic and don’t leach chemicals into food.

Temperature Control Matters

Keep these temperature guidelines in mind:

1. Steam at Medium Heat
Avoid high-temperature steaming that can destroy sensitive nutrients.

2. Cool Properly
Let food cool naturally rather than using ice baths, which can wash away water-soluble vitamins.

3. Store at Appropriate Temperatures
Refrigerate promptly and freeze in small portions to maintain nutritional value.

Combining for Maximum Benefits

Some nutrients work better together! Here are some power combinations:

1. Iron-Rich Foods + Vitamin C
Combine iron-rich spinach with vitamin C-packed sweet potatoes to enhance iron absorption.

2. Healthy Fats + Fat-Soluble Vitamins
Add a tiny drizzle of olive oil to carrot puree to help absorb vitamin A.

3. Protein + Complex Carbs
Mix lentils with sweet potato for sustained energy and complete nutrition.

Time-Saving Batch Preparation

Efficient prep doesn’t mean sacrificing nutrition:

1. Prep Multiple Vegetables Together
Steam different vegetables that require similar cooking times together.

2. Portion Immediately
Divide into serving sizes right after pureeing to minimize nutrient loss from repeated temperature changes.

3. Label Everything
Mark containers with contents and date to ensure you use them when nutrients are still at their peak.

Advanced Nutrient-Boosting Techniques

Take your purees to the next level:

1. Sprouting and Soaking
Soak legumes before cooking to increase nutrient availability and reduce cooking time.

2. Adding Superfoods
Incorporate nutrient-dense foods like chia seeds (ground) or quinoa into purees.

3. Herb Enhancement
Fresh herbs add both nutrients and flavor to simple vegetable purees.

Storage Solutions for Nutrient Preservation

Proper storage maintains nutritional value:

1. Freezer Organization
Arrange containers to use oldest purees first, preventing nutrient degradation from long storage.

2. Appropriate Portions
Store in small portions to avoid repeated thawing and refreezing, which can decrease nutritional value.

3. Air-Tight Containers
Use containers with tight-fitting lids to prevent oxidation of nutrients.

Adapt your prep methods by season:

1. Summer Vegetables
Quick-steam or prepare raw to preserve nutrients in delicate summer produce.

2. Winter Vegetables
Roast or steam heartier winter vegetables until just tender to maintain nutritional value.

3. Year-Round Options
Some vegetables maintain consistent nutrient levels year-round and can be prepped similarly regardless of season.

Troubleshooting Common Issues

Solve these common challenges while maintaining nutrition:

1. Too Thick Purees
Add cooking liquid rather than plain water to thin purees, preserving nutrients from cooking.

2. Discoloration
Use lemon juice to prevent browning in fruits and some vegetables while adding vitamin C.

3. Grainy Texture
Adjust cooking time or blending duration without overcooking to maintain smooth texture and nutrients.

Moving Beyond Basic Purees

As your baby grows:

1. Textured Combinations
Gradually introduce more texture while maintaining the same nutrient-preservation techniques.

2. Finger Foods
Apply the same nutritious preparation methods to soft-cooked vegetable pieces.

3. Family Meals
Scale up these preparation methods to create nutritious meals for the whole family.

Special Dietary Considerations

Adapt these methods for different needs:

1. Allergies
Use separate preparation areas and equipment for allergen-free foods to prevent cross-contamination.

2. Dietary Restrictions
Modify cooking methods to accommodate special diets while maintaining maximum nutrition.

3. Cultural Preferences
Incorporate traditional cooking methods that align with nutrient preservation.

Quality Control Measures

Ensure consistent nutrition:

1. Check for Doneness
Learn to recognize when foods are properly cooked but not overcooked.

2. Assess Texture
Perfect the consistency without excessive processing that might reduce nutrients.

3. Monitor Temperature

Use a food thermometer to ensure safe temperatures without overcooking.

Future Planning

Think ahead for continued success:

1. Meal Planning
Create a weekly prep schedule to ensure fresh, nutritious purees are always available.

2. Rotating Varieties
Plan to introduce new foods while maintaining proper preparation methods.

3. Scaling Up
Adjust these methods as your baby grows and needs more food.

Remember, creating nutritious purees doesn’t have to be complicated! By following these guidelines, you’ll create delicious baby recipes that maintain maximum nutritional value. Keep experimenting with different combinations and preparations, always focusing on preserving those precious nutrients.

Your efforts in proper preparation now will help establish healthy eating habits that last a lifetime. Happy pureeing, parents!