Fresh Baby Food Storage

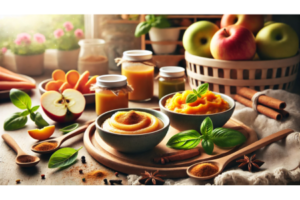
A variety of freshly prepared baby food stored in small containers, showcasing vibrant colors and healthy ingredients.

Storing your Fresh Baby Food properly can be a game-changer in ensuring your little one gets the freshest, most nutritious meals possible. By understanding the best methods for refrigerating, freezing, and thawing your creations, you can stay organized, reduce waste, and keep your baby’s meals safe from spoilage. In this blog post, we’ll explore simple yet effective ways to store fresh baby food, which will help you save time, money, and stress while ensuring your growing child always has a healthy meal ready.
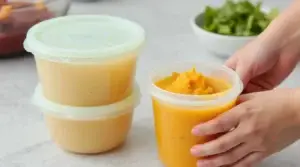
Hands holding a container of bright orange baby puree with additional sealed containers on the side, emphasizing safe baby food storage practices.

Before you start preparing those delicious baby recipes, let’s talk about the foundation of food safety. Your little one’s developing immune system needs extra protection, so proper storage is crucial. Start by washing your hands thoroughly and ensuring all your storage containers are squeaky clean.

Think of your kitchen as a mini food-prep facility. You’ll want to keep everything sanitized, from your blender to your storage containers. An easy trick is to run storage containers through the dishwasher’s hot cycle before each use.

Remember those moments when you’re not sure if a puree is still good? Trust your instincts! If something smells off or looks different than usual, it’s better to be safe than sorry. Your baby’s tummy will thank you for being cautious.

Temperature control is your best friend when storing homemade baby food. Room temperature is fine for only two hours max. After that, those yummy purees need to find their way to cooler spaces.
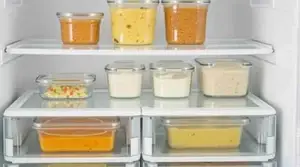
Glass containers filled with fresh baby food neatly organized in a refrigerator, demonstrating effective food storage solutions.

Let’s talk about keeping those baby recipes fresh in your refrigerator. Your fridge is perfect for storing purees you’ll use within the next few days. Think of it as your short-term food storage buddy!

Glass containers are fantastic for fridge storage because they don’t absorb food odors or colors. Plus, you can easily see what’s inside without opening them. 

Want to know a cool trick? Label everything with dates using masking tape and a marker. You’ll never have to guess how long that sweet potato puree has been sitting there.

Store your homemade purees in small portions – about 1–2 servings each. This way, you won’t waste food if your little one isn’t hungry. Nobody likes throwing away those carefully prepared meals!

Keep your purees in the main part of the fridge, not the door. The temperature stays more consistent there, keeping your baby’s recipes fresher for longer.

Your refrigerated purees will stay good for about 48 hours. That’s plenty of time to use them up while they’re at their nutritional peak. Always check for any signs of spoilage before serving.

Freezing 101: Your Long-term Storage Strategy
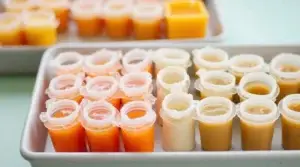
Individual portions of homemade baby food in freezer-safe containers, ready for long-term storage.

This is where the magic happens for busy parents who love making baby recipes in bulk. Your freezer can be your best friend when storing homemade purees.

Ice cube trays are perfect for freezing baby food portions. Each cube is about one ounce – just right for tiny tummies! Pop them out once frozen and transfer them to freezer bags.

Speaking of freezer bags, squeeze out as much air as possible before sealing. Less air means less chance of freezer burn, keeping those nutritious purees tasting fresh.

Label everything with contents and dates; you will be so thankful in the future! Include both the date you made it and when it should be used. Organization is key when freezing multiple batches.

Frozen purees can last up to 3 months while maintaining their nutritional value. That’s plenty of time to rotate through your stash of baby recipes. Keep track of what you’ve got to avoid waste.

Consider creating a freezer inventory list. Stick it right on your freezer door to easily track what you have and what needs to be used first. It’s like having your mini food management system!

Smart Thawing Methods: From Freezer to Table

Thawing must be done safely to keep those delicious baby recipes safe and nutritious:

The safest method is overnight thawing in your refrigerator. Pop a few cubes into a container before bedtime, and they’ll be ready for breakfast. It’s like meal prep while you sleep!

In a rush? Place the frozen puree container in a bowl of cold water. This speeds up thawing while keeping everything at a safe temperature. Just remember to change the water every 30 minutes.

Never thaw baby food at room temperature or in hot water. These methods can create warm spots where bacteria love to grow. Keep it cool and safe for your little one.

Once thawed, give the puree a good stir. Sometimes, ingredients can separate during freezing, but a quick mix will bring everything back together. Your baby won’t even know it was frozen!

Use thawed purees within 24 hours for the best quality and safety. This means only thaw what you think your baby will eat in a day. It’s better to thaw more later than waste food!

Pro Tips for Maximum Freshness and Quality
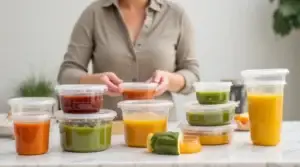
A parent organizing colorful homemade baby food in labeled containers, ensuring maximum freshness and quality.

These insider tips will help you maintain the quality of your delicious baby recipes longer. Every little trick helps when you’re preparing food for your little one!

Consider investing in a vacuum sealer for freezer storage. It removes more air than regular freezer bags, keeping those purees fresher for longer. 

Color-code your storage containers or freezer bags. Green for veggies, orange for fruits, yellow for grains, whatever system works for you! This makes grabbing the right puree super quick.

When preparing purees for storage, slightly under-cook vegetables. They’ll finish cooking when you reheat them, preventing them from getting too mushy. Your baby will appreciate the better texture!

Store strong-smelling purees (like cauliflower or broccoli) separately from fruits. Nobody wants their apple puree to taste like yesterday’s vegetables! Keep those flavors where they belong.

Use small containers, even if you have extra space. The less air in the container, the better your purees will keep. It’s all about minimizing exposure to air and maintaining freshness.

Storage Do's and Don'ts

Let’s wrap up with some essential do’s and don’ts. These simple rules will help you master the art of storing those delicious baby recipes safely.

DO sanitize all storage containers thoroughly before use. Clean containers mean safe food for your little one. Make this a non-negotiable part of your prep routine.

DON’T refreeze purees that have already been thawed. Once thawed, it either gets eaten or needs to be discarded. No second chances with baby food safety!

DO rotate your frozen stock regularly. Use the oldest purees first to maintain a fresh supply. Think of it as a “first in, first out” system for baby food.

DON’T mix new purees with leftover ones. Each batch should be stored separately to prevent contamination. Fresh is always best when it comes to baby food!

DO keep different types of purees separate. This makes it easier to track freshness dates and prevents flavor mixing. Plus, it helps you maintain variety in your baby’s diet.

Conclusion:

Remember, storing baby food properly is just as important as making it. By following these guidelines, you’ll always have safe, nutritious, and delicious baby recipes ready for your little one.

With these storage techniques mastered, you’re on your way to becoming a baby food prep pro! Keep experimenting with different combinations and storage methods until you find what works best for your family’s routine.

Tips for an Easier, More Effective Baby Food Puree-Making Process

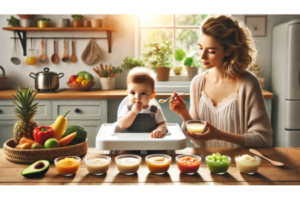
A smiling toddler enjoying a meal with homemade baby food puree.

Introduction

Tips for an Easier, More Effective Baby Food Puree-Making Process is a wonderful way to ensure your little one receives essential nutrients and fresh flavors right from the start. By taking charge of every step, from selecting ingredients to blending and storing, you can tailor each meal to your baby’s specific needs. In this post, we’ll share practical, tried-and-true tips to streamline your puree-making process, helping you whip up healthy, delicious meals without the fuss. Whether you’re just starting or looking to refine your skills, you’ll discover techniques that save time, reduce waste, and make mealtime more enjoyable for you and your growing child.

When you’re making these nutrient-packed purees, why not make extra? You can freeze individual portions in ice cube trays for easy meal prep. Just pop out a cube or two when it’s mealtime, defrost, and you’re good to go!

2. Invest in Good Equipment

A good blender or food processor can make your life so much easier. Look for one that can handle both soft and harder foods. Trust me, it’s worth the investment when you’re whipping up delicious baby recipes regularly.

3. Start Simple, Then Combine

When you’re first introducing solids, start with single-ingredient purees. This helps you identify any potential allergies or sensitivities. Once your baby is comfortable with individual foods, you can start combining them into more complex, nutrient-packed purees.

4. Don't Be Afraid of Herbs and Spices

As your baby grows, you can start introducing mild herbs and spices to your purees. A pinch of cinnamon in apple puree or a touch of basil in a veggie blend can help develop your baby’s palate. Just avoid salt and sugar in your delicious baby recipes.

5. Follow Your Baby's Lead

Every baby is different. Some may prefer smoother textures, while others might be ready for chunkier purees sooner. Pay attention to your baby’s cues and adjust your purees accordingly.

Making your own nutrient-packed purees is more than just about nutrition. It’s a labor of love that allows you to know exactly what’s going into your baby’s body. Plus, it’s often more cost-effective than store-bought options.

As you experiment with these delicious baby recipes, you’ll find yourself getting more creative in the kitchen. Who knows? You might even discover flavor combinations that the whole family enjoys!

Remember, introducing solids is a journey. There will be days when your carefully prepared puree ends up more on the floor than in your baby’s tummy. That’s okay! Keep offering a variety of nutrient-packed purees, and your persistence will pay off.

Celebrating Milestones

Each new food your baby tries is a milestone worth celebrating. From that first spoonful of sweet potato to the day they manage to feed themselves, these are precious moments in your baby’s development.

Consider keeping a food diary to track what your baby has tried and what they like. It can be fun to look back on this as they grow and their tastes change. Plus, it’s helpful information for your pediatrician.

Embracing the Mess

Let’s be real – feeding a baby can get messy! But embrace the chaos. Those messy faces and sticky hands are all part of the learning process. Plus, they make for adorable photo opportunities!

Lay down a splat mat under the high chair for easy cleanup. Dress your baby in easy-to-wash clothes or a large bib. And always have a camera ready – you’ll want to capture those priceless expressions as your baby discovers new tastes and textures.

Remember, mealtime is about more than just nutrition. It’s a time for bonding, learning, and exploring. Here are some ways to make mealtime enjoyable:

1. Eat together as a family when possible. Babies learn by watching others.
2. Make positive comments about the food you’re eating.
3. Let your baby explore their food. It might get messy, but it’s part of learning.
4. Don’t force your baby to eat. Trust their hunger and fullness cues.

Your attitude towards food can influence your baby’s relationship with eating. Keep things positive and fun!

Creating a Positive Food Environment

Nourishing Your Baby with Love

Feeding your baby is about more than just nutrition. It’s about introducing them to the wonderful world of food, helping them develop healthy eating habits, and sharing special moments together.

As your little one grows, you’ll discover countless ways to nourish their body and delight their taste buds. Whether it’s a simple sweet potato puree or a more adventurous salmon blend, each spoonful is an opportunity to show your love and care.

So, grab your apron, fire up the blender, and get ready for a delicious adventure with your little one. Here’s to happy, healthy eating for your baby!

How to Prep Purees for Maximum Nutrition

A variety of colorful homemade baby purees, including avocado, carrot, and lentil blends, garnished with fresh herbs for maximum nutrition.

Introduction

Introducing solids is an exciting milestone in your baby’s journey toward independent eating. While store-bought baby food is convenient, making homemade purees ensures your little one gets the freshest, most nutrient-packed meals. But did you know how you prepare purees can impact their nutritional value?

From choosing the right ingredients to using the best cooking methods, small adjustments can help preserve essential vitamins and minerals. In this guide, we’ll walk you through the best techniques to prepare Purees for Maximum Nutrition, support your baby’s growth, and develop healthy eating habits from the start.

Let’s dive in and learn How to Prep Purees for Maximum Nutrition by making nourishing, delicious purees that set the foundation for a lifetime of healthy eating!

Opting to make your own baby purees offers several advantages:

  • Control Over Ingredients: You decide what goes into your baby’s food, ensuring no unwanted additives or preservatives.
  • Freshness Guaranteed: Homemade purees can be made from fresh, organic produce, maximizing nutrient intake.
  • Cost-Effective: Preparing purees at home can be more economical than purchasing commercial baby foods.

Before we get into the nitty-gritty of preparation, it’s crucial to understand the key nutrients your baby needs:

  • Iron: Vital for brain development and found in meats, beans, and fortified cereals.
  • Healthy Fats: Support brain and nerve development; avocados and full-fat yogurt are excellent sources.
  • Fiber: Aids digestion and is abundant in fruits and vegetables like peas, carrots, and apples.

When choosing produce and other ingredients:

  • Opt for Organic: Select organic fruits and vegetables when possible to minimize pesticide exposure.
  • Seasonal Selections: Seasonal produce is often fresher and more nutrient-dense.
  • Check for Ripeness: Ensure fruits and vegetables are ripe but not overripe to maintain optimal nutrient levels.

Smart Preparation Steps

1. Wash Properly: Start thoroughly, even if you plan to peel. Use cold water and gently scrub to remove any residue.

2. Smart Cutting Techniques: Cut vegetables into similar-sized pieces for even cooking. Smaller pieces cook faster, meaning less nutrient loss.

3. Timing Matters: Don’t prep too far in advance. Cut vegetables just before cooking to prevent nutrient loss from exposure to air.

A smiling mother feeding her baby with a spoon, introducing nutritious homemade purees.

Cooking Methods to Preserve Nutrients

How you cook your baby’s food can significantly impact its nutritional value. Here are some methods to consider:

Steaming

Steaming is one of the best ways to preserve vitamins and minerals in food. It uses minimal water and cooks food gently.

How to Steam:

  1. Place a steamer basket in a pot with a small amount of water.
  2. Add chopped vegetables or fruits to the basket.
  3. Cover and cook until tender.

Baking or Roasting

Baking or roasting can enhance the natural flavors of fruits and vegetables without leaching nutrients into water.

How to Bake/Roast:

  1. Preheat your oven to 400°F (200°C).
  2. Place peeled and chopped produce on a baking sheet.
  3. Roast until soft and slightly caramelized.

Boiling

While boiling is common, it can cause water-soluble vitamins to leach into the cooking water. If you choose to boil, use minimal water and consider using the cooking liquid to thin your purees.

How to Boil:

  1. Bring a pot of water to a boil.
  2. Add the chopped produce.
  3. Cook until tender, then drain (reserving the liquid if desired).

Equipment Essentials

Having the right tools makes creating nutritious purees easier:

  1. Quality Steamer Basket: Invest in a good steamer basket that fits your pots. This enables proper steaming without waterlogging vegetables.

  2. High-Speed Blender: A powerful blender creates smooth purees quickly, minimizing exposure to air, which can degrade nutrients.

  3. Glass Storage Containers: Glass containers protect nutrients better than plastic and don’t leach chemicals into food.

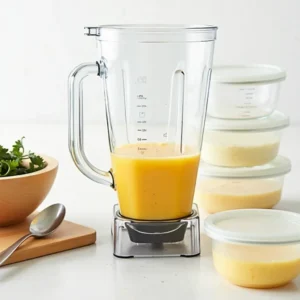
A blender filled with homemade baby puree next to glass storage containers and fresh ingredients.

Pureeing to the Perfect Consistency

Achieving the right texture is essential, especially for babies new to solids.

Steps to Puree:

  1. Choose Your Tool: A blender, food processor, or immersion blender works well.
  2. Add Liquid: To reach the desired consistency, add breast milk, formula, or the reserved cooking water.
  3. Blend: Process until smooth, adjusting the thickness as needed.

Safe Storage Practices

Proper storage ensures that your baby’s food remains safe and nutritious.

  • Refrigeration: Store purees in airtight containers in the fridge for 48 hours.
  • Freezing: For longer storage, freeze purees in ice cube trays. Once frozen, transfer the cubes to freezer bags, which can be kept for up to three months.
  • Reheating: Always reheat purees until they’re piping hot throughout, then cool them to a safe feeding temperature.

Time-Saving Batch Preparation

Efficient prep doesn’t mean sacrificing nutrition:

  1. Prep Multiple Vegetables Together: Steam different vegetables that require similar cooking times together.
  2. Portion Immediately: Divide into serving sizes right after pureeing to minimize nutrient loss from repeated temperature changes.
  3. Label Everything: Mark containers with contents and dates to ensure you use them when nutrients are still at their peak.

Advanced Nutrient-Boosting Techniques

Take your purees to the next level:

  1. Sprouting and Soaking: Soak legumes before cooking to increase nutrient availability and reduce cooking time.
  2. Adding Superfoods: Incorporate nutrient-dense foods like chia seeds (ground) or quinoa into purees.
  3. Herb Enhancement: Fresh herbs add nutrients and flavor to simple vegetable purees.
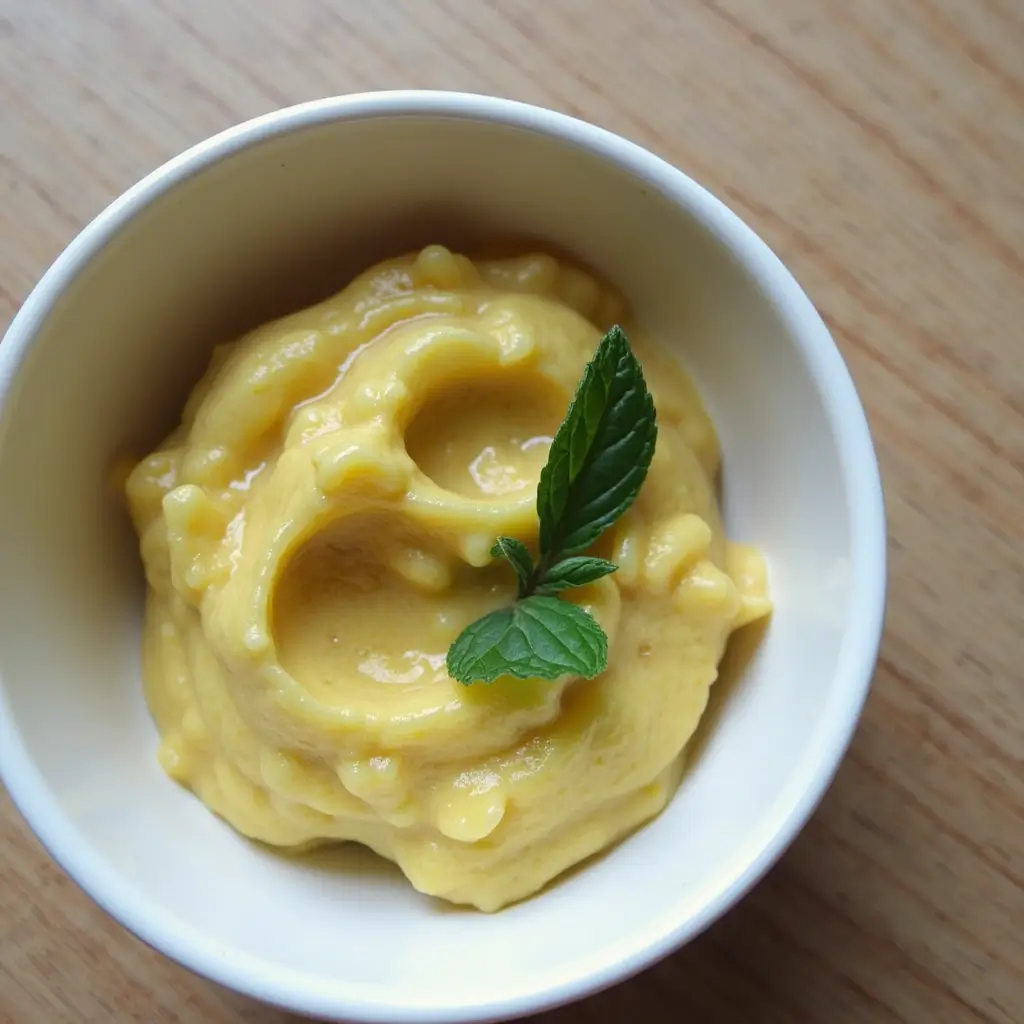
A creamy yellow baby puree garnished with a fresh mint leaf in a small white bowl.

Adapt your prep methods by season:

1. Summer Vegetables: Quick-steam or prepare raw to preserve nutrients in delicate summer produce.

2. Winter Vegetables: Roast or steam heartier winter vegetables until tender to maintain nutritional value.

3. Year-Round Options: Some vegetables maintain consistent nutrient levels year-round and can be prepped similarly regardless of season.

Troubleshooting Common Issues

Solve these common challenges while maintaining nutrition:

  1. Too Thick Purees: Add cooking liquid rather than plain water to thin purees, preserving nutrients from cooking.
  2. Discoloration: Use lemon juice to prevent browning in fruits and some vegetables while adding vitamin C.
  3. Grainy Texture: Adjust cooking time or blending duration without overcooking to maintain smooth texture and nutrients.

Moving Beyond Basic Purees

As your baby grows:

  1. Textured Combinations: Gradually introduce more texture while maintaining the same nutrient-preservation techniques.
  2. Finger Foods: Apply the same nutritious preparation methods to soft-cooked vegetable pieces.
  3. Family Meals: Scale up these preparation methods to create nutritious meals for the whole family.

Future Planning

Think ahead for continued success:

1. Meal Planning: Create a weekly prep schedule to ensure fresh, nutritious purees are always available.

2. Rotating Varieties: Plan to introduce new foods while maintaining proper preparation methods.

3. Scaling Up: Adjust these methods as your baby grows and needs more food.

Remember, creating nutritious purees doesn’t have to be complicated! By following these guidelines, you’ll create delicious baby recipes that maintain maximum nutritional value. Keep experimenting with different combinations and preparations, always focusing on preserving those precious nutrients.

Your efforts in proper preparation now will help establish healthy eating habits that last a lifetime. Happy pureeing, parents!

FAQs

When should I start introducing purees to my baby?

Most babies are ready for purees around six months old, but it's essential to look for signs of readiness, such as sitting up with minimal support and showing interest in food.

Can I add spices to my baby's purees?

Mild spices can be introduced gradually. Avoid adding salt or sugar, but herbs like basil or spices like cinnamon can enhance flavor.

How do I know if my baby is allergic to a new food?

Introduce new foods one at a time and wait 3–5 days before trying another. Watch for signs like rashes, swelling, vomiting, or diarrhea.

Is it safe to use frozen fruits and vegetables for purees?

Yes, frozen produce can be just as nutritious as fresh and is a convenient option, especially when certain items are out of season.